
DIY Cricut Birthday Banner with Chipboard – Cricut Maker versus Cricut Explore Air
Make every birthday a little more special with this long-lasting chipboard birthday banner made using the Cricut Maker!
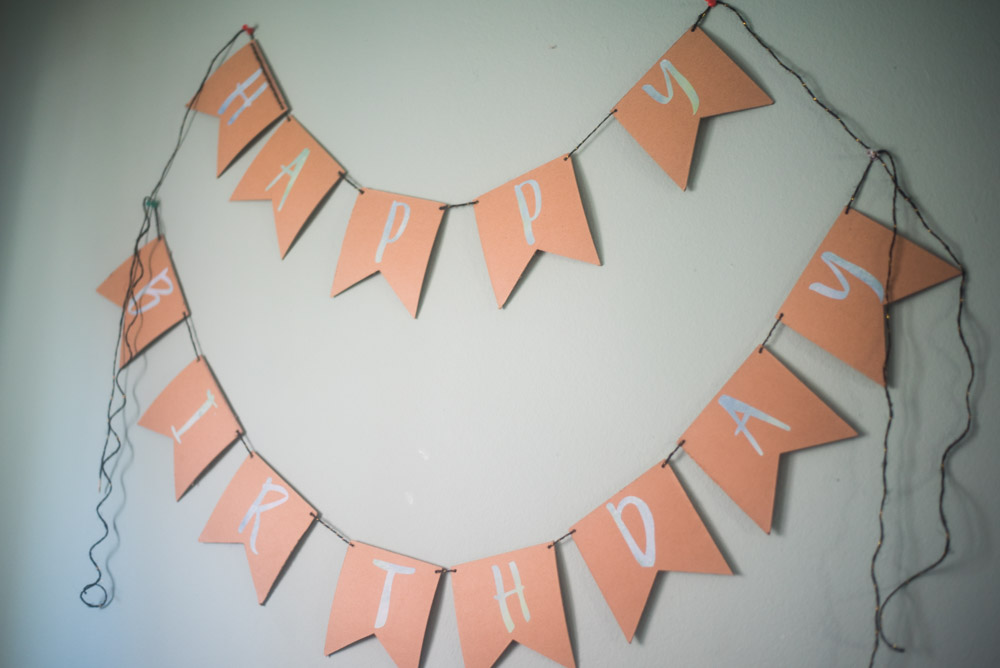
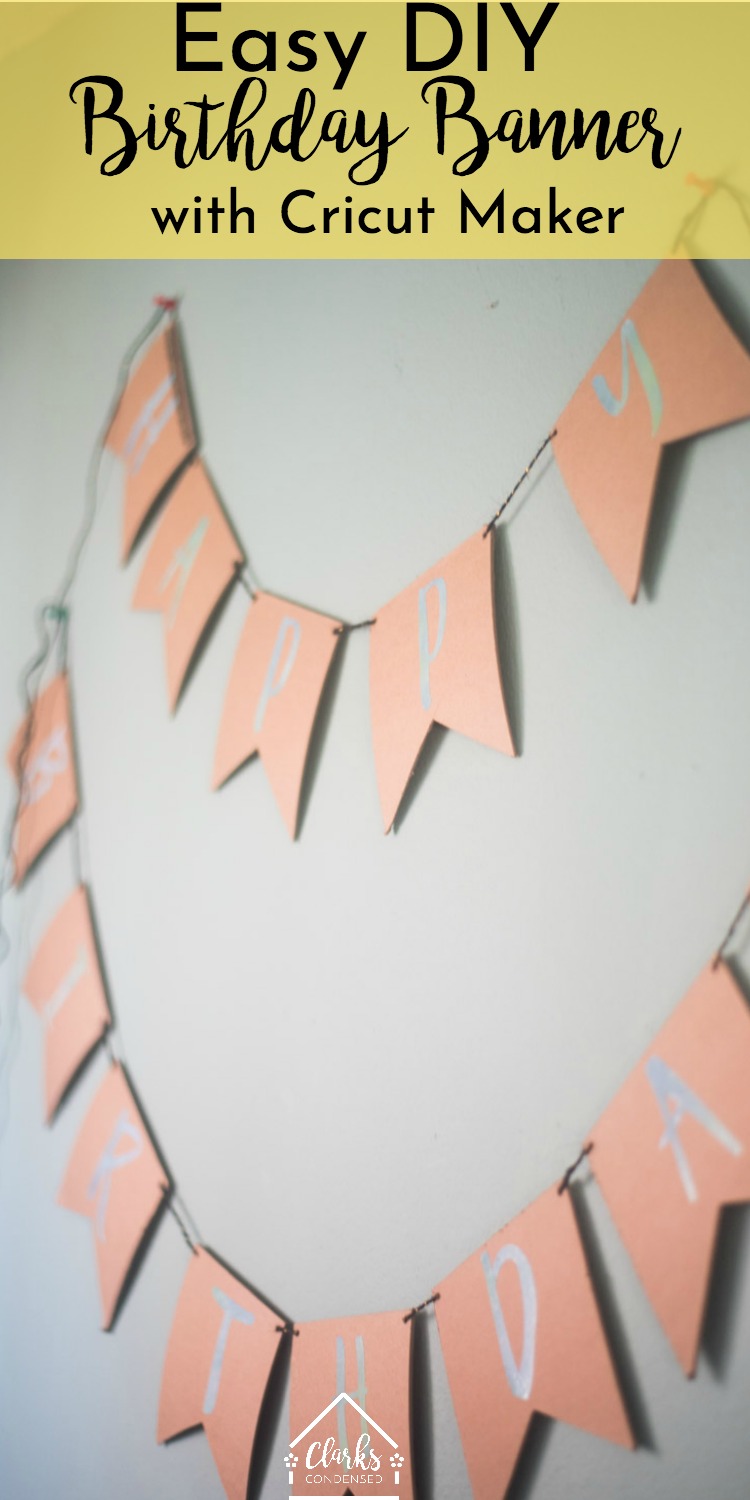
DIY Birthday Banner
Thank you to Cricut for our continued partnership and making this post possible.
I love birthdays, and I have accumulated reusable decorations over the years that make it easier to take up and put down decorations throughout the year.
Recently, I was tasked with making a craft using my Cricut Maker, and Forrest suggested, “Why not a reusable birthday banner?”
I’ve gotten birthday banners in the past – I think we have several options in our basement. But none of them will likely stand the test of time.
So I thought making the banner with heavy duty chipboard would be a great idea! I went back and forth about how I wanted it to look – I contemplated gluing scrapbook paper onto the chipboard, using foil, painting the chipboard…but in the end, I really like the classic brown of the chipboard, and I ended up pairing that with my latest obsession – patterned iron on!
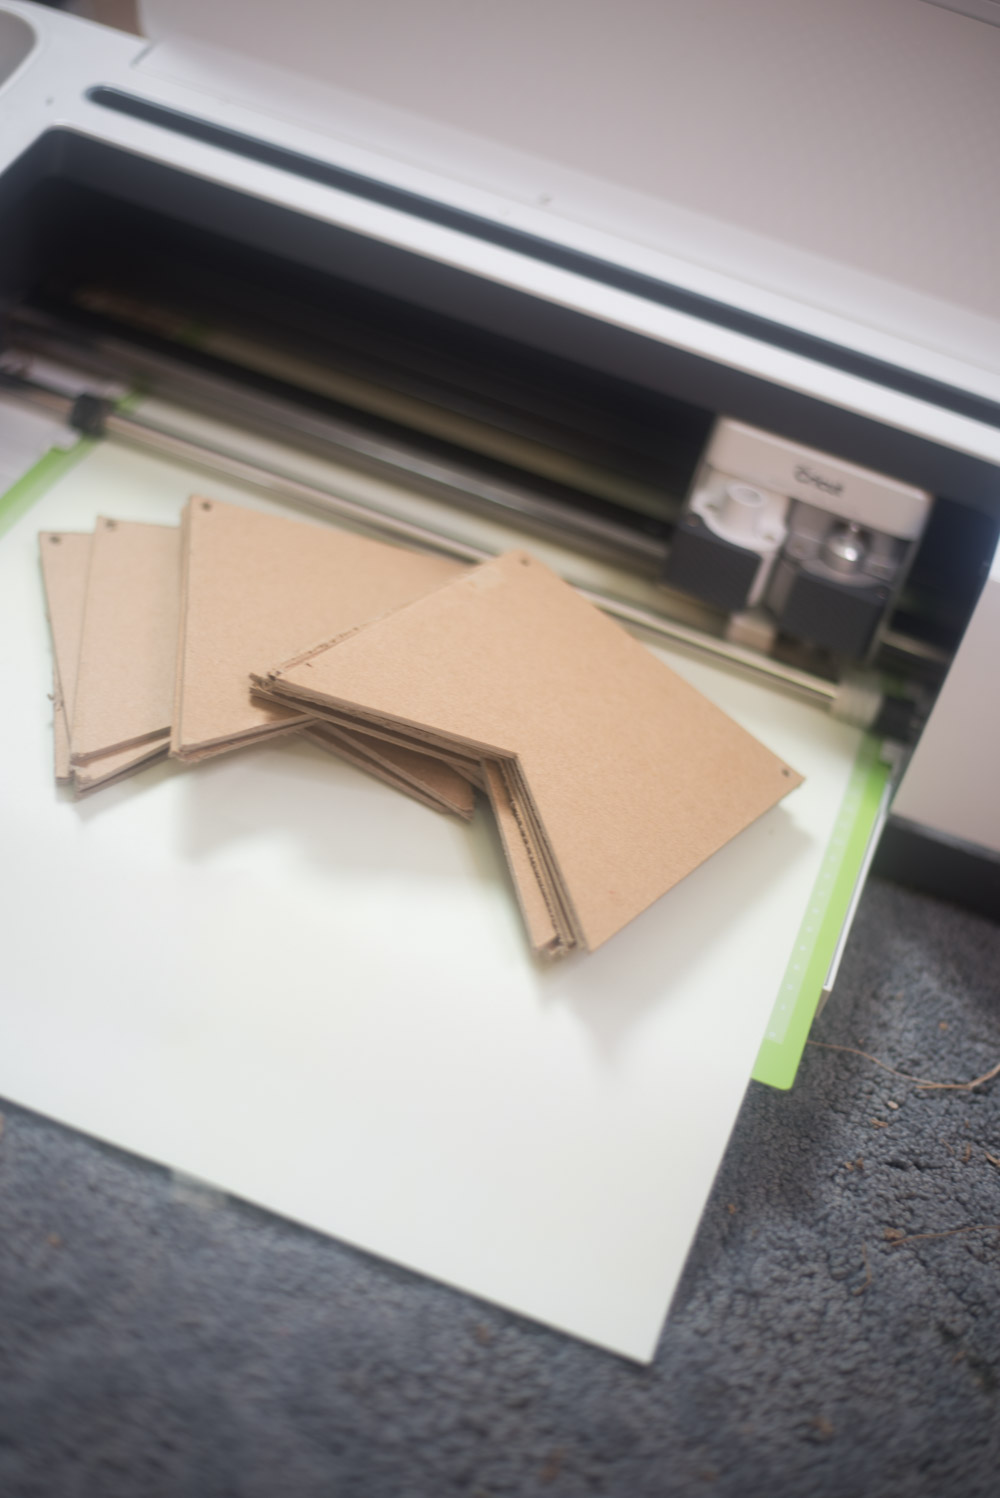
I’ve used that with several projects lately, and it just seemed like the right choice. I had gotten some thinner chipboard earlier this year (which I can cut with either the Cricut Maker or my Cricut Explore Air), but I decided to go with Cricut’s heavy chipboard.
It cuts beautifully with the Knife Blade, and I thought it would just look nicer and last longer with the greater thickness.
Here is a little video I did about using Chipboard with the Maker:

However, if you don’t have the Maker, you could use thinner chipboard, as well.
This project was not a hard one AT all – it just takes a long time for all the chipboard to be cut.
It took almost all 20 cuts to go through each piece, so I just made myself busy with other tasks.
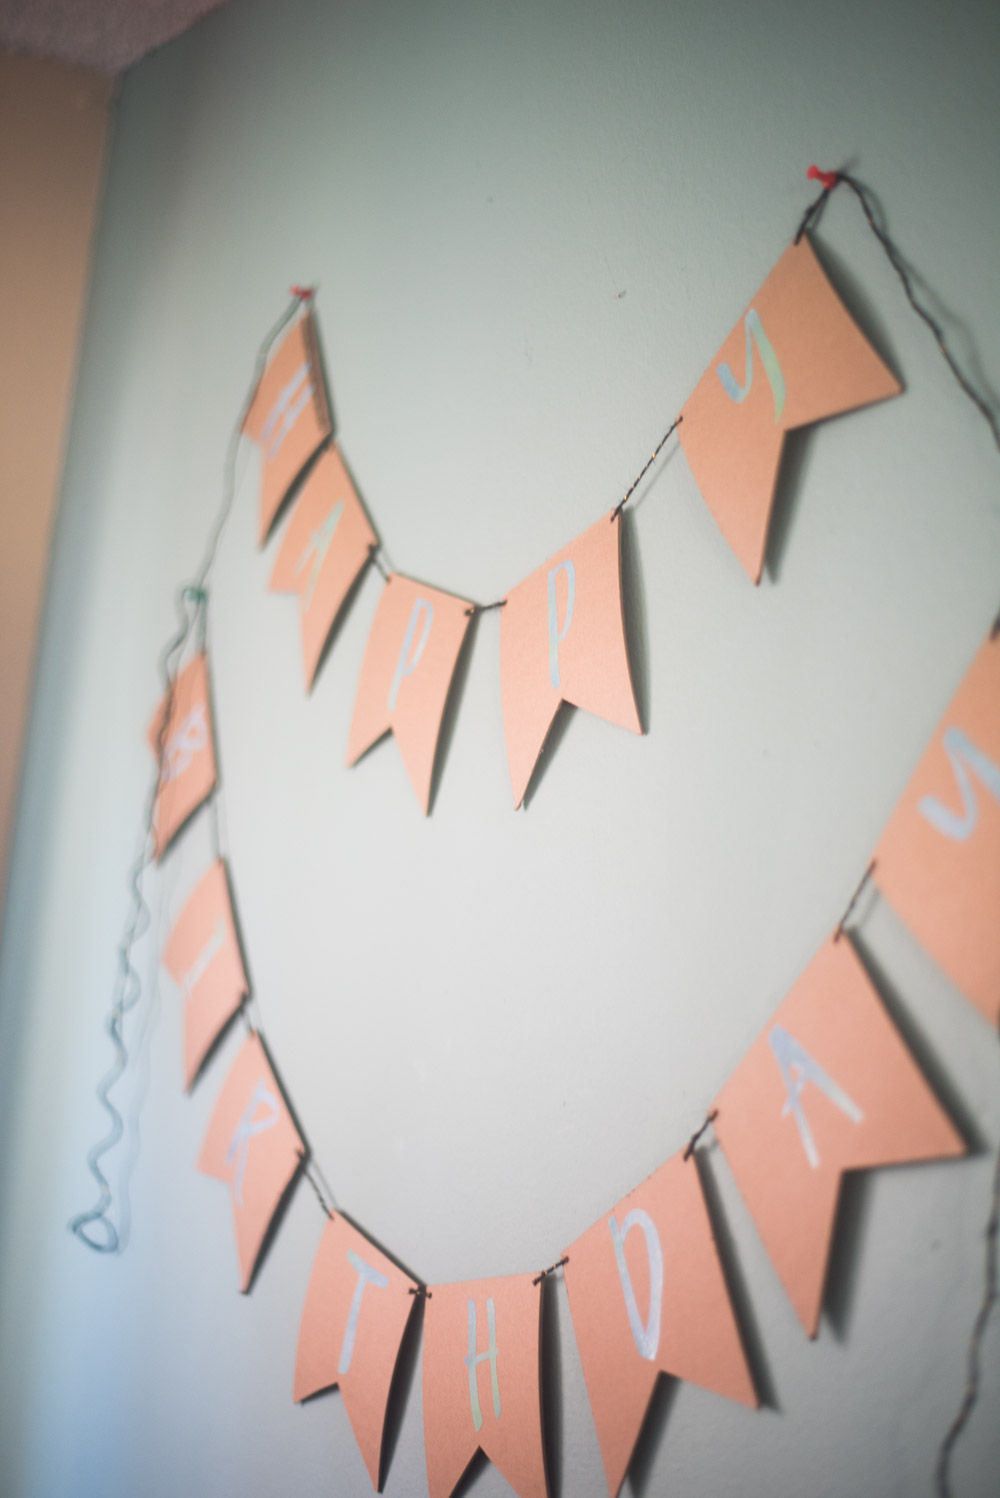
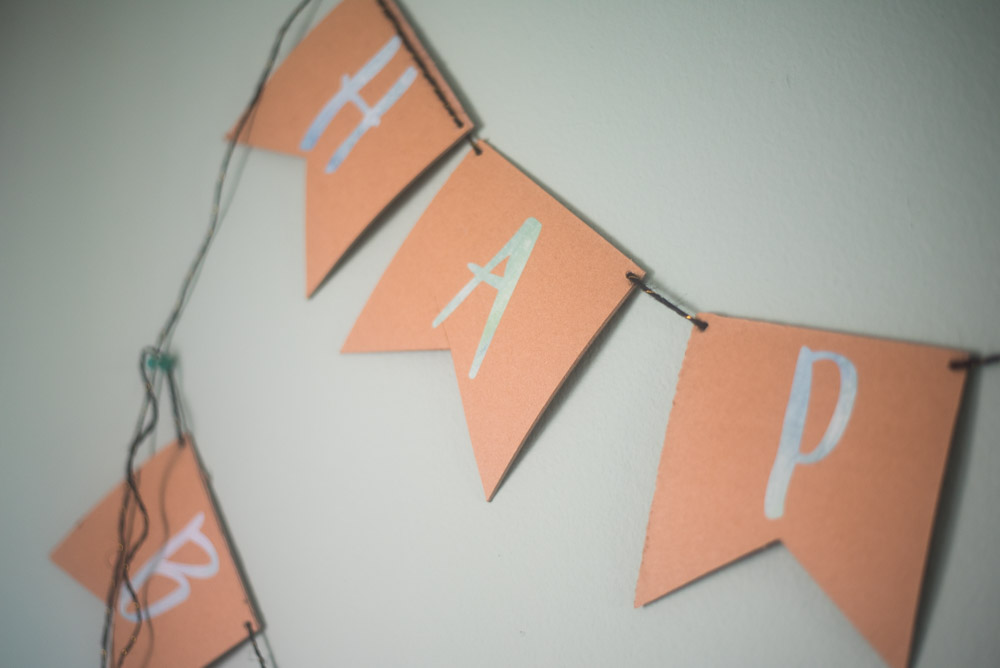
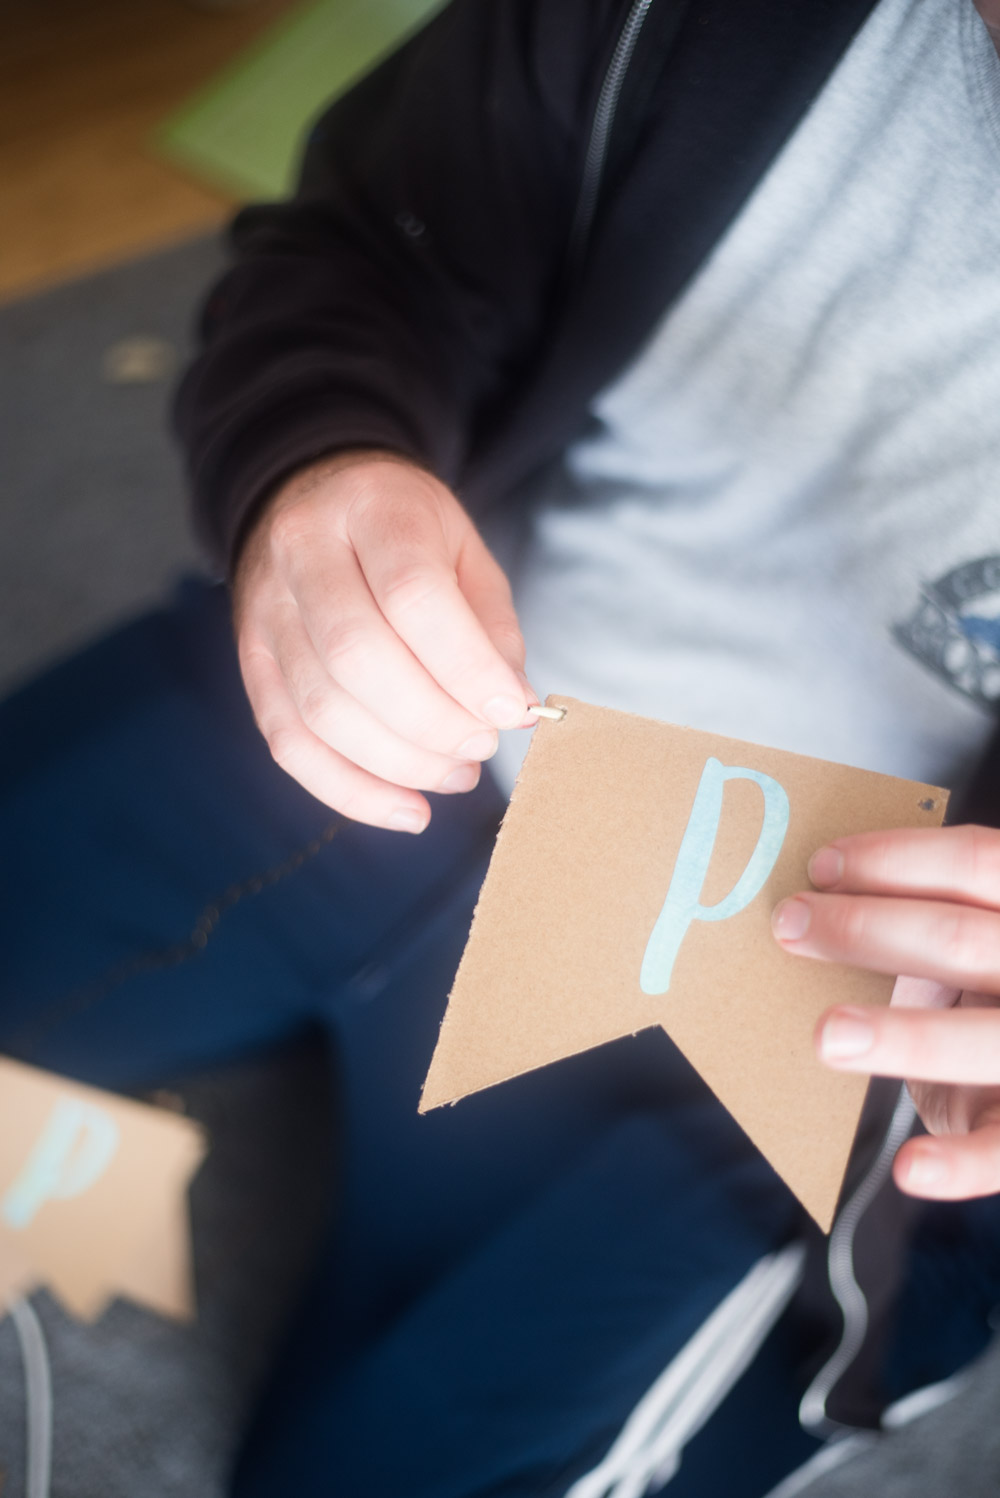
We used some twine to put it all together, and I really like how it turned out! I just LOVE how thick the banner pieces are. I was a little bit worried that it might be too heavy to hang, but it wasn’t at all. I just used some push pins, and it went up with no trouble.
Also, time for a real life moment. This whole project totally stressed me out putting together for a variety of reasons. My superhero Forrest came to the rescue though, and not only did he put all the chipboard in for me while I edited the video above, he put together the banner itself.
This was his first time using my Cricut Maker, and I’m certain it won’t be his last! #BestHusbandEver Anyways, before I share the tutorial, I wanted to share a few notes and tips for success:
Notes for this Project
- I used the patterned iron-on, and I used my EasyPress 2 – 6×7. You DON’T have to use iron-on – and in fact, if you don’t have an EasyPress, I would strongly suggest you stick with regular adhesive vinyl or foil. I just really wanted to use this color, which is why I used the EasyPress 2 and patterned iron-on. If you do use iron-on, make sure you double check the settings on the EasyPress Interactive Setting Guide (this is seriously my favorite thing ever).
- This project takes time – please be patient with the chipboard as it cuts!
- We taped some masking tape around the edge of the twine for easier threading. This may not be necessary; just depends on what you are using!
- The teeny tiny circles didn’t always cut out all the way, so we had to use an Xacto knife to get some of those out.
- Here is the Design Space file that you can use. All the images and fonts are available through Design Space (if you have a Cricut Access subscription, they are included with that!)
Below you will find the printable instructions and material list, however, here is an overview of what you will need:
- Heavy Chipboard
- Vinyl or foil of some sort
- EasyPress (if you are using Iron-on)
- Twine
- StrongGrip Mat
- Knife Blade
- Cricut Maker
- Masking Tape
[the_ad id=”93378″]
Materials
- Cricut Chipboard
- Twine
- Vinyl, Iron-on, Foil (whatever you want!)
Tools
- Knife Blade
- Fine Point Blade
- StrongGrip Mat
- EasyPress (if you are using iron-on)
Instructions
- Open up this design in Design Space
- Press “Make It”
- For the mat with the letters that will be cut with vinyl, if you are using iron-on, make sure you mirror the image. If you are just using regular vinyl or foil, you don’t need to do this.
- Go to the next screen, and select Heavy chipboard as your material
- Place your first piece of chipboard on a StrongGrip cutting mat and secure the edges with masking tape
- Put the Knife blade into your machine
- Press Go
- Repeat with all the chipboard pieces. Remove from mats, and if you need to, us an Xacto knife to make sure the tiny circles were completely cut out.
- Cut your vinyl or foil
- Weed out the excess and transfer to your chipboard. If you are using iron-on vinyl or foil, follow the instructions for chipboard here.
- String the chipboard and enjoy!
I also wanted to talk a little bit about the Cricut Maker versus the Cricut Explore Air. I’ve had my Cricut Maker for about a year – my Cricut Explore Air for two. Although I use my Cricut Maker more, I still have a soft spot for my Cricut Explore Air. It’s really what got me into the Cricut world – and I am forever grateful for that.
I have actually written a pretty in-depth post on this in the past – Cricut Maker vs Cricut Explore Air: Which Cricut Machine Should You Buy? – that I highly suggest reading if you are trying to decide.
Top Reasons to Buy a Maker
- The Rotary Blade – this is AMAZING for cutting our fabric and patterns. If you sew at all, this is absolutely the biggest reason to get the Maker.
- The Knife Blade – I was SO excited when they finally released the Knife Blade. They had been teasing it to us for months, and it was definitely worth the wait as they perfected it. It makes cutting thicker materials – like chipboard and balsa wood – SO MUCH easier and so much cleaner
- Scoring Blade
- 2x faster cutting
- Print then cut on colored paper – with previous models, you can only do print and cut with white paper. The Maker opened up so many more possibilities with this upgrade.
- Adaptive System – If you think the blades that have been released so far are amazing – who KNOWS what the future holds. Because the adaptive system, the Maker was created to grow with the company as they release more and more amazing products.
Make sure you read this post about everything you need to know about the Cricut Maker.
Differences Between the Maker and Explore Air
When it comes down to it, they are both great machines. The Cricut Maker definitely has more capabilities – especially for fabric and thicker materials. There is also a lot of potential down the road for expansion as well.
If you have the Explore Air 2, it has the same 2x cutting speed capabilities as the Cricut Maker, so if that’s your main concern, I would just go with the Explore Air 2 over the original Air (I have the original, and I will say, it makes a BIG difference).
However, if you are wanting to be able to cut those thicker materials, as well as cut fabric without having an adhesive backing (which can be annoying), the Maker is definitely the best option for you. Beyond that, I’ve found that they both do an equally good job of cutting materials like paper, vinyl, foil, etc.
So if those are primarily what you plan to do – and you won’t suddenly feel sad that you aren’t able to take advantage of the Rotary and Knife blades, the Explore Air 2 might be a good choice.
With that said, Cricut recently released their scoring blade, which is an amazing new addition to their tool line for anyone who does a lot of paper crafting. So before I would say that if you primarily did paper crafting, either machine
Other Cricut Projects You May Enjoy:
- DIY Month by Month Baby Onesies: Cricut Baby Onesies
- DIY Paint Chip Banner: Patriotic Themed (Made with Cricut)
- Easy DIY Paper Lanterns (Perfect for Weddings!)
Helpful Cricut Tutorials:
- Cricut FAQs: Answers To Your Most Common Frustrations
- How to Use Iron On Vinyl with Cricut
- How to Layer Heat Transfer Vinyl


Easy banners are the best! Especially custom ones that look like they took a lot of time! And yay for hero husbands!!