Cricut Contour: Everything You Need to Know
The contour tool is Cricut Design Space is a unique and easy to use tool that allows you to make even more customized designs! This tutorial shares all you need to know about Cricut Contour.

I have been a Cricut user for many, many years. So, I am often asked how to do something or what is this feature in Cricut Design Space. One of the questions I am asked all the time though, is what is contour in Cricut Design Space?
What is Contour in Cricut Design Space?
Cricut Design Space has tons of awesome features and tools. But, one of my favorites is Contour. The Contour Tool allows you to remove layers and unwanted cut lines in a design. You can use it on a Cricut Access Design or an uploaded image.

How to Contour in Cricut
Cricut Contour is one of the easiest tools to use in Design Space. I think it is easiest to think of it as a hide button. When you select a part of the image you are hiding it, and removing it from the cut file.
Step 1
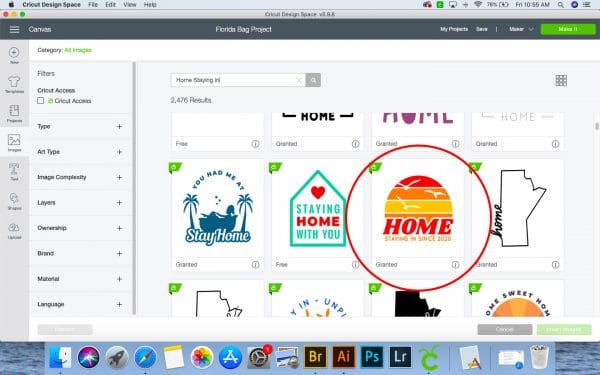
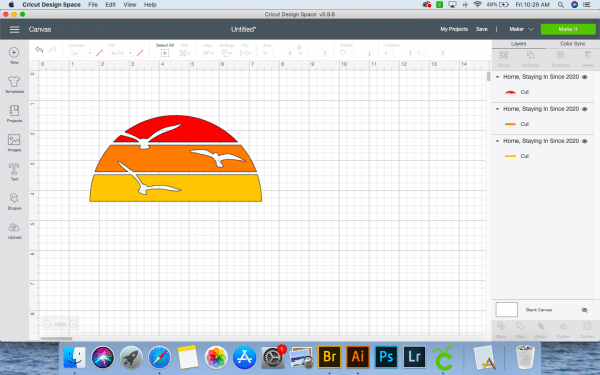
First, choose an image with layers. For this project, I chose one of Cricut’s Time for a Staycation files. I liked the main image a lot. It reminds me of vintage beach shirts from when I was a kid. But, I wanted something that I would use beyond this summer.
Step 2
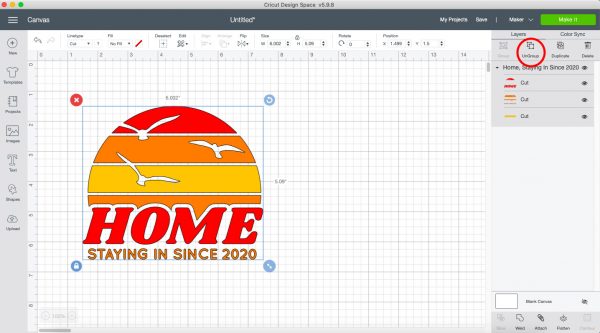
After I chose my image, I ungrouped the file. Once the file was separated into groups of cuts and colors, I was able to hide the parts of the file that I didn’t want to cut.
Step 3
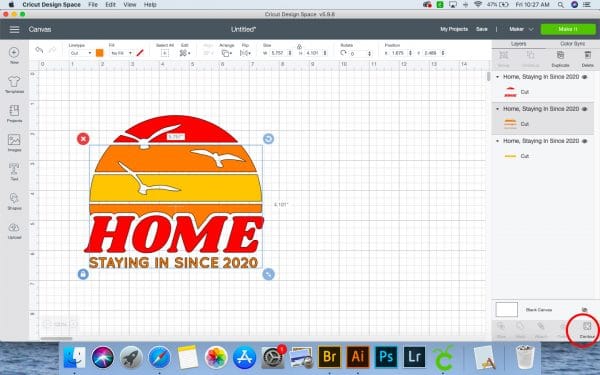
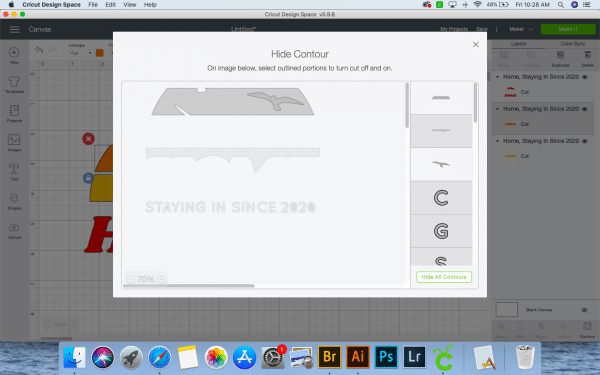
I selected a group, and then clicked on the contour tool. That opened up a pop up screen with the selected group. There are two ways to select what you want to hide.
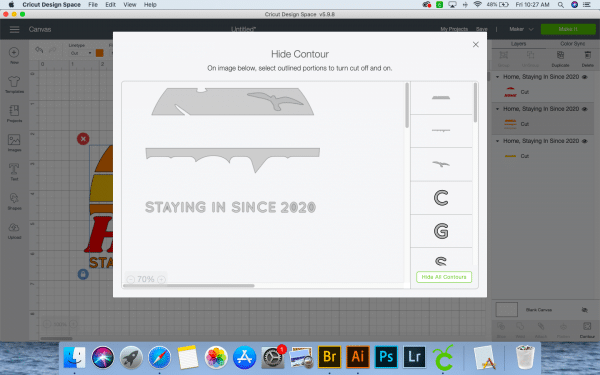
You can select each letter or image on the menu on the side of the pop up, or you can select each letter or image on the larger image in the pop up. Simply click the pieces of the image that you do not want to cut.
Once you have removed all of the unwanted cut lines and pieces, you can close the pop up. The darker colored images in the drop down menu area are the ones that will be hidden.
Step 4
If you have a second layer of images that you want to change, select that group, and repeat the steps above.
Step 5
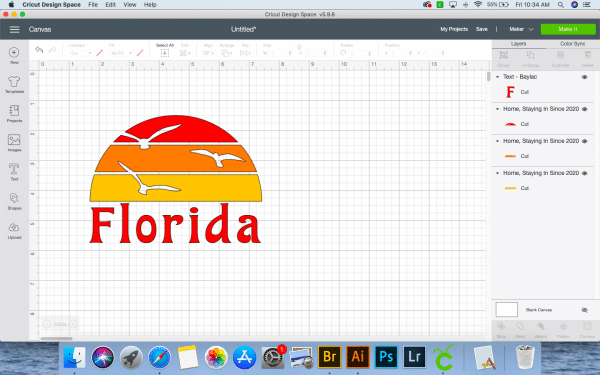
Since the image looked a little boring after I removed the text and semi-circle section, I added my own text underneath it. Now this image is perfect for years to come. I decided to make a fun shirt and beach bag with it, but it would also be a great design to use for vacations and trips.
If you like this file as it is, here is the link to the Cricut Design Space Cut File too.

More Cricut Tutorials You May Enjoy:
- How to Curve Text in Cricut Design Space
- How to Easily Edit Text In Cricut Design Space
- Design Space Desktop: What You Should Know
- Cricut Tips for Beginners: Everything You Need to Know
- How to Use the Cricut Explore 2: The Beginner’s Guide
- Cricut Joy versus Explore Air 2 Versus Maker: Which Should You Get?