DIY Halloween Luminaries
We are almost to October! Although I’ve been sneaking in Halloween decorations all of this month – once October hits, no one can protest, right?!
My boys seem to love Halloween just as much as I do, so I’m excited to decorate our house and hopefully participate in some fun Halloween events going on around town.
It only makes sense that we started making decorations before October hit – we want to be able to enjoy them all season long!
This month, we’ve partnered with Stampin’ Up once again to share some of their fun Halloween products – and a couple of projects we made with them.
As most of you know, our sweet baby Andrew arrived a few weeks early. I had intended to create these projects before his arrival, but that didn’t happen.
So I have to give a major shoutout to Forrest who did the majority of the luminaries and helped with the Halloween banner. He’s pretty crafty!
Anyways – Stampin’ Up sent me a great box with all sorts of fun goodies inside. It was hard for me to decide what to use because there were so many awesome products.
Here is what they sent me:
- Spooktacular Bash Stamp Set
- Monster Bash Designer Series Paper
- Basic Black Scalloped Edge Ribbon
- Monster Bash Enamel Shapes
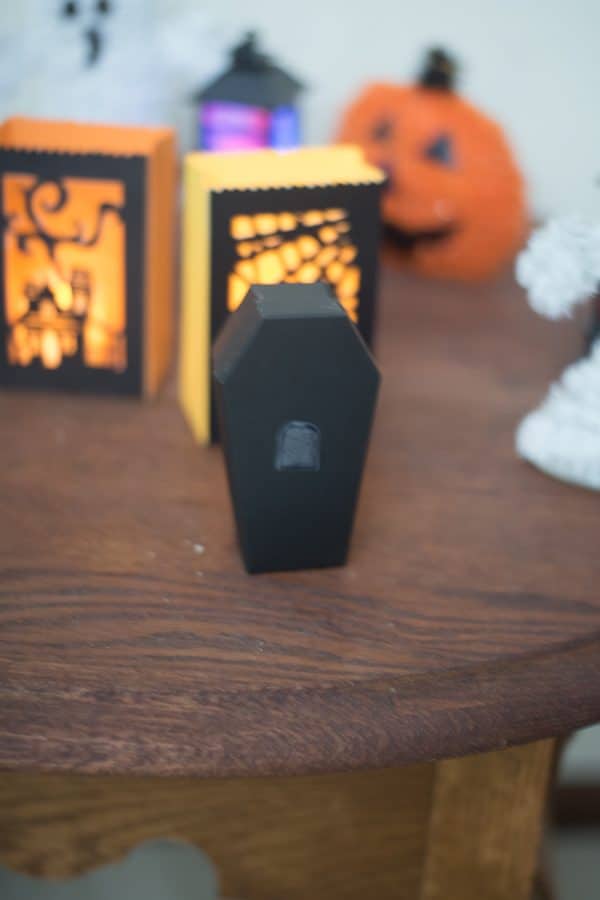
- Coffin Boxes
- Boo to you Stamp Set
- Googly Eyes
- Cardstock in various Halloween colors
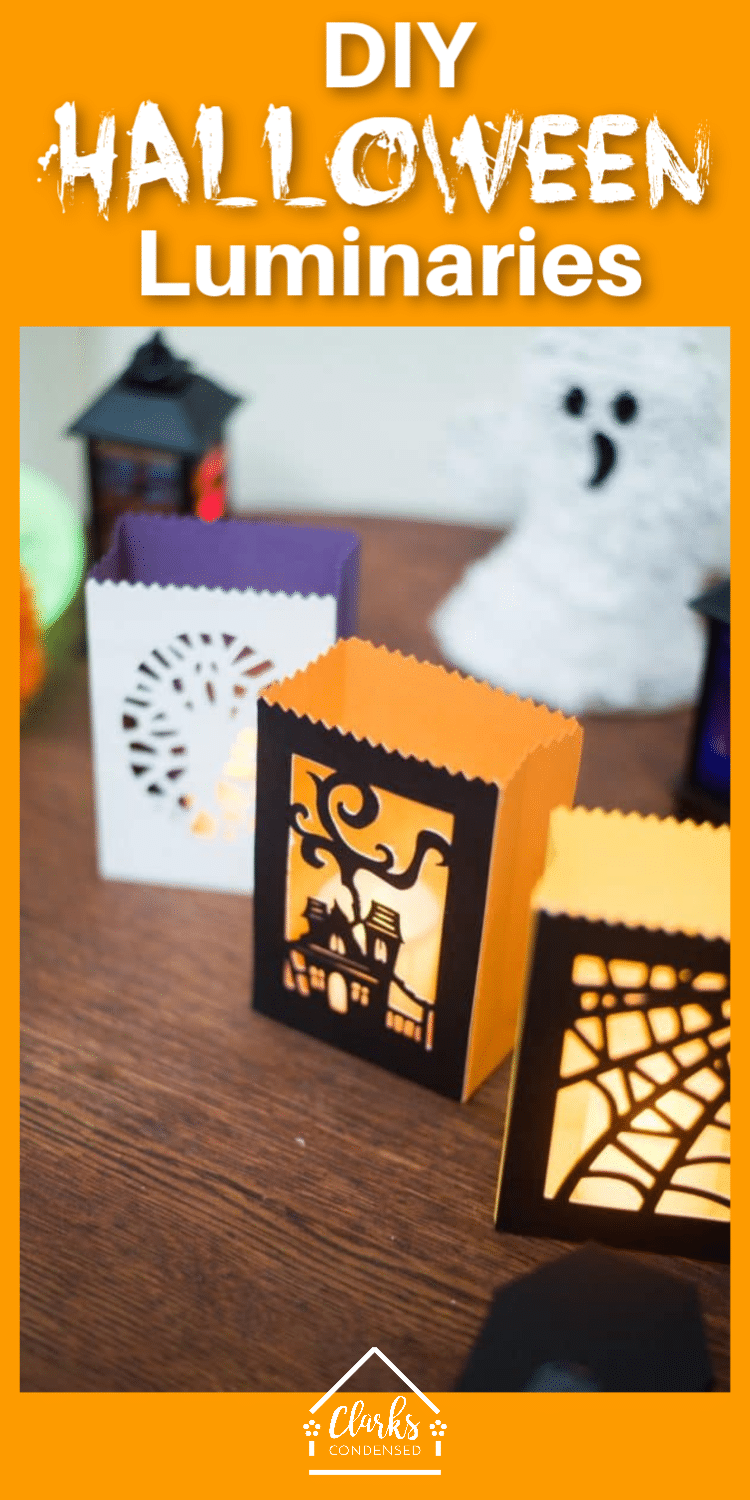
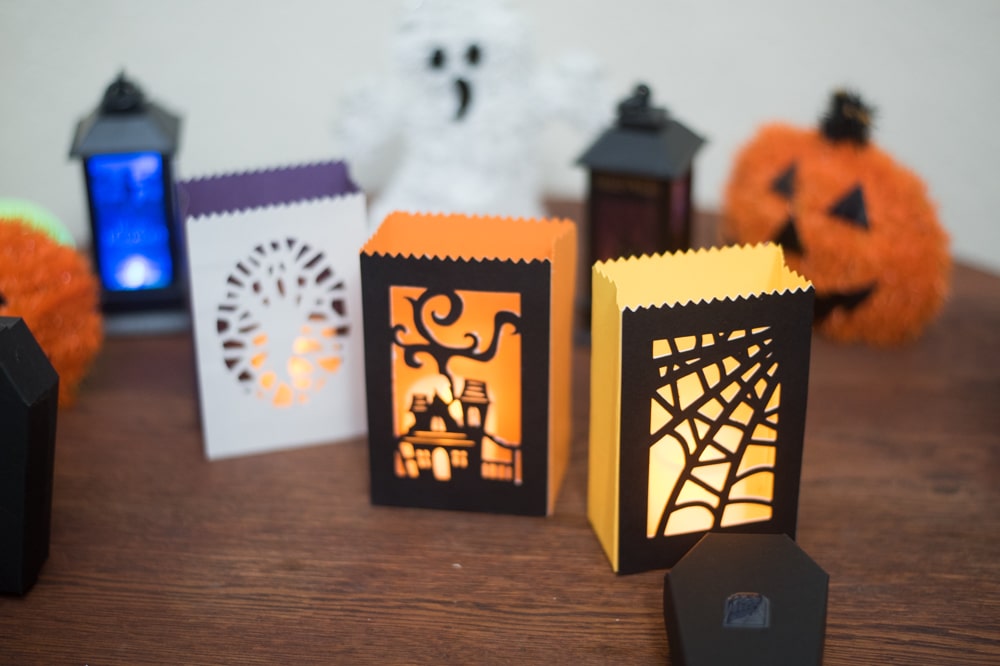
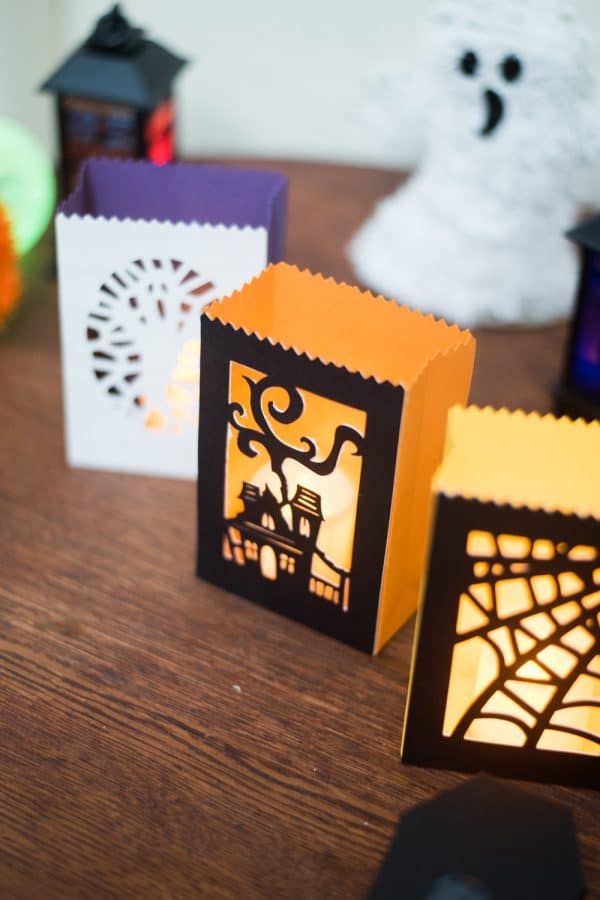
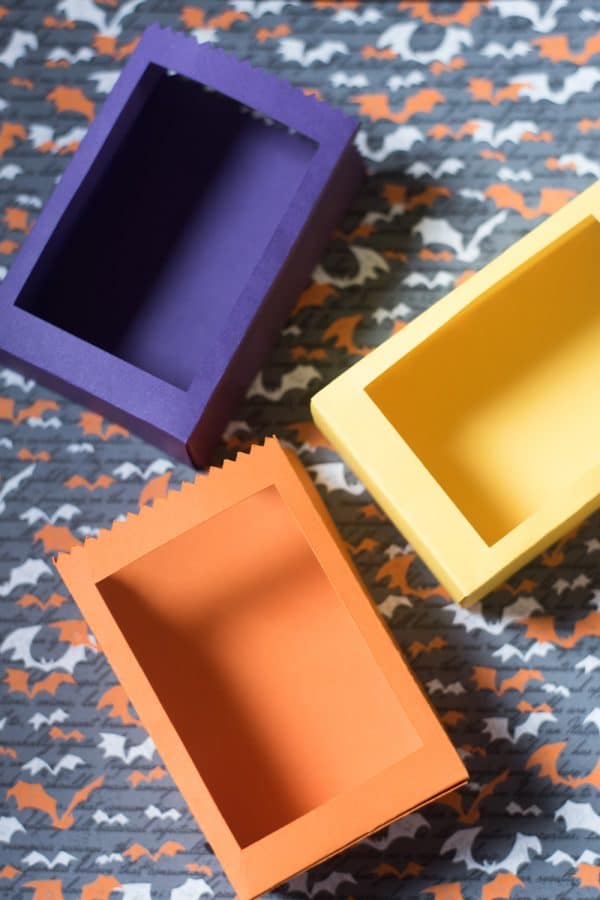
For these luminaries, I used the cardstock they sent, and I also used the cute Coffin Boxes(with the Monster Bash Enamel Shapes on top) to help set up the scene a little bit more.
I use some of the other materials to make my “Happy Halloween” Banner (click for that tutorial!).
Although I didn’t use the Spooktacular Bash Stamp Set or the Boo to you Stamp Set , they are SO cute. Forrest and I thought they would be perfect for a Halloween party invitation, or to make a custom “You’ve Been Booed” card.
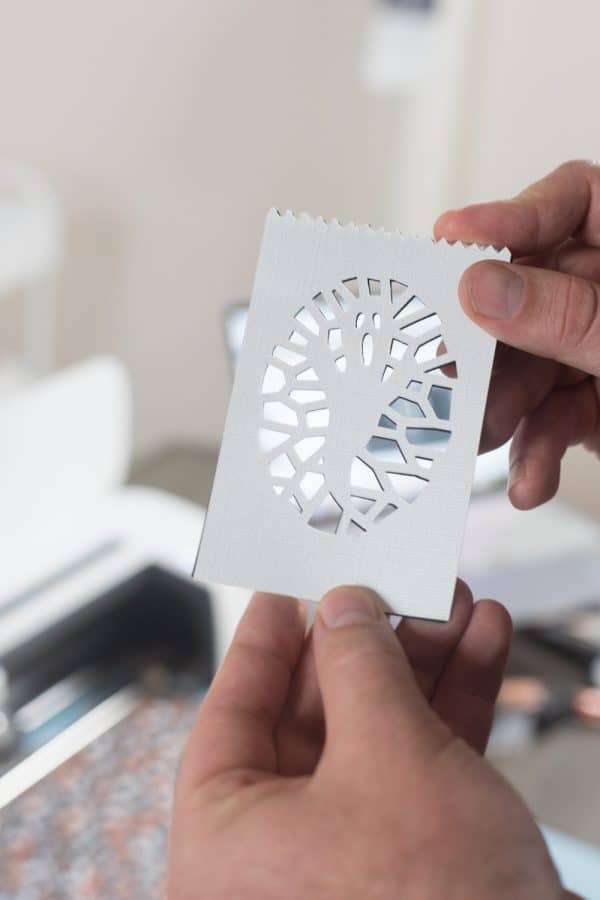
I made these using my Cricut Maker – thought you can easily do it with the Cricut Explore Air 2.
I found the project in Design Space here. Make sure you print off the PDF instructions before you get started!
The instructions call for black glitter cardstock, but I just used plain. I also changed the grey luminary to be purple. You can really use whatever colors you want!
Be aware that these luminaries are pretty small. You can adjust the size in Design Space if you’d like them to be larger!
Materials and Supplies:
- 1 piece orange cardstock (we used cardstock from Stampin’ Up)
- 1 piece purple cardstock (we used cardstock from Stampin’ Up)
- 1 piece yellow cardstock (we used cardstock from Stampin’ Up)
- 1 piece (12×12) black cardstock
- 1 piece (12×12) white cardstock
- Adhesive (we used this snail adhesive)
- Battery-powered lights (we used these tea lights from the Dollar Tree)
- Cricut Maker or Cricut Explore Air 2 (Amazon / Cricut.com)
- Cricut Scoring Wheel (Amazon / Cricut.com) or Scoring Stylus (Amazon / Cricut.com)
- Weeding tool (Amazon / Cricut.com)
- LightGrip Cutting Mat (Amazon / Cricut.com)
Instructions:
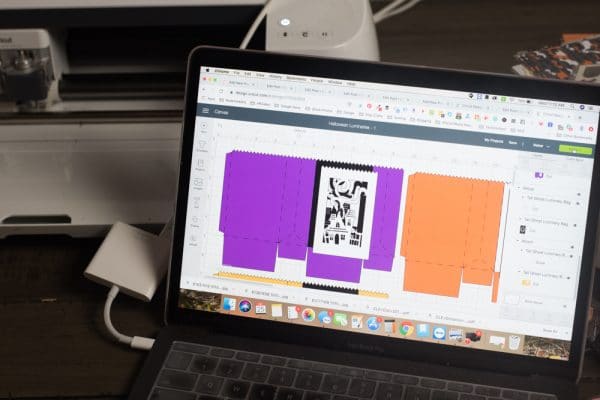
Pull up this design in Design Space. If you want the luminaries to be larger, resize them in the canvas.
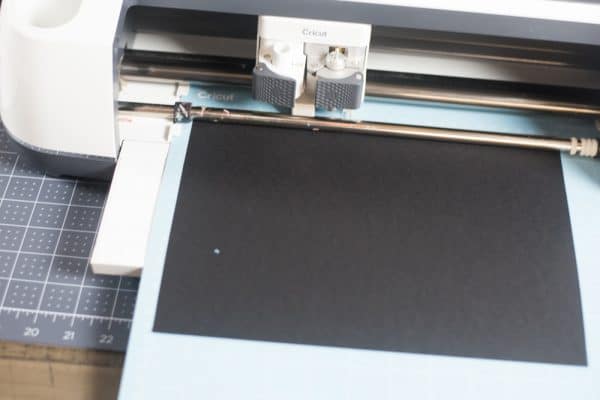
Cut out all the designs using your Cricut Maker or Explore Air 2. If you are using a scoring stylus, you will need to change the tools before it cuts those pieces.
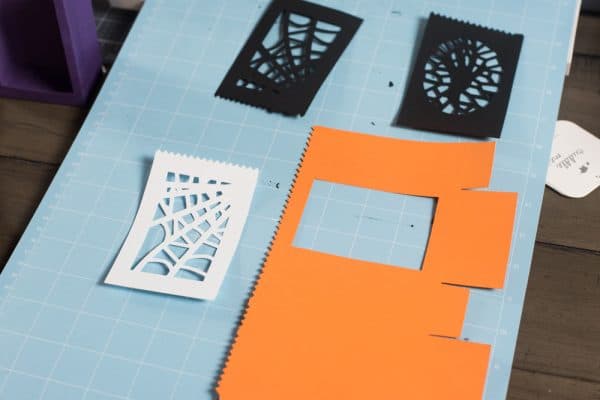
Carefully remove each piece of cut cardstock – there designs are pretty intricate, so you may need to use a weeding tool to get all the paper out without tearing it.
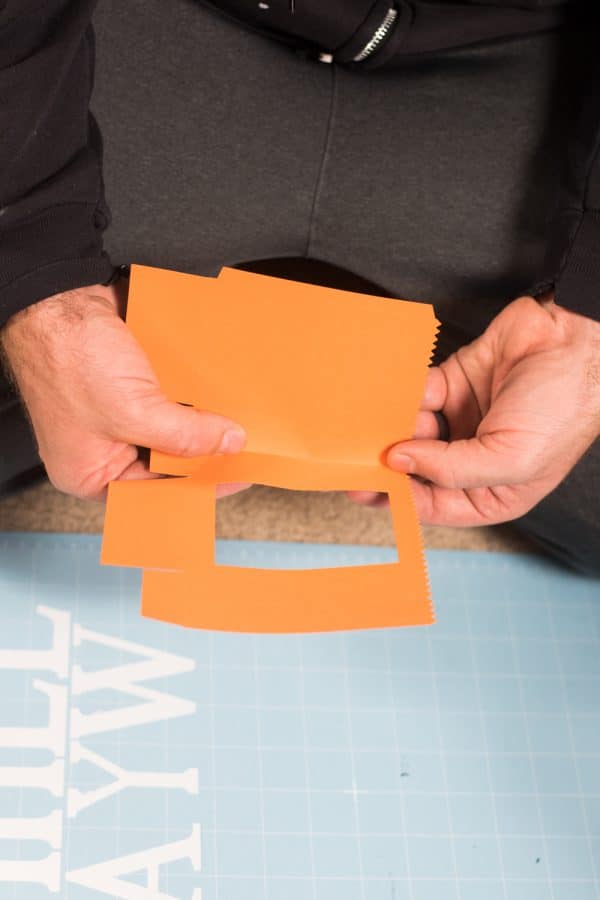
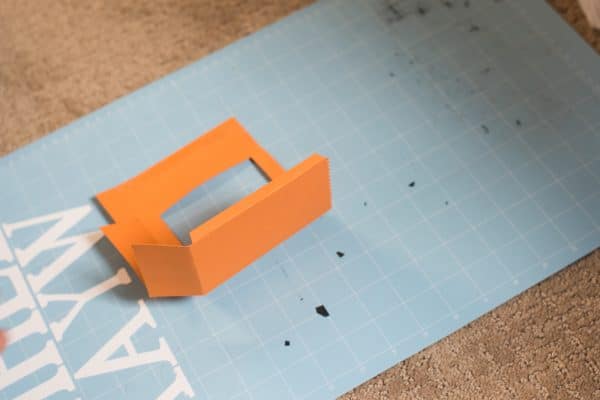
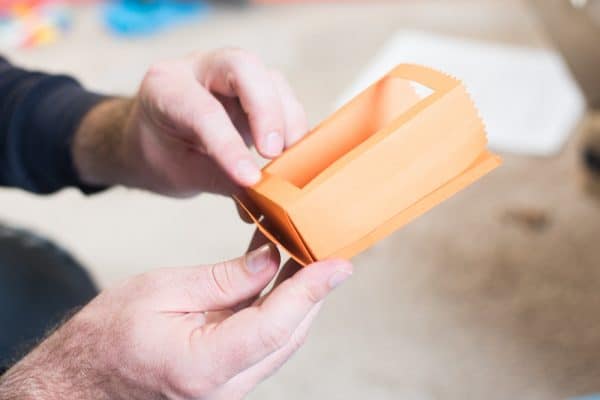
Assemble each luminary box and use glue or double-sided tape.
After the boxes are assembled, you will adhere the images to each box. You will place a black piece on top of a white piece, and then place one on each box. For the ghost, you will put the white piece on top of the black.
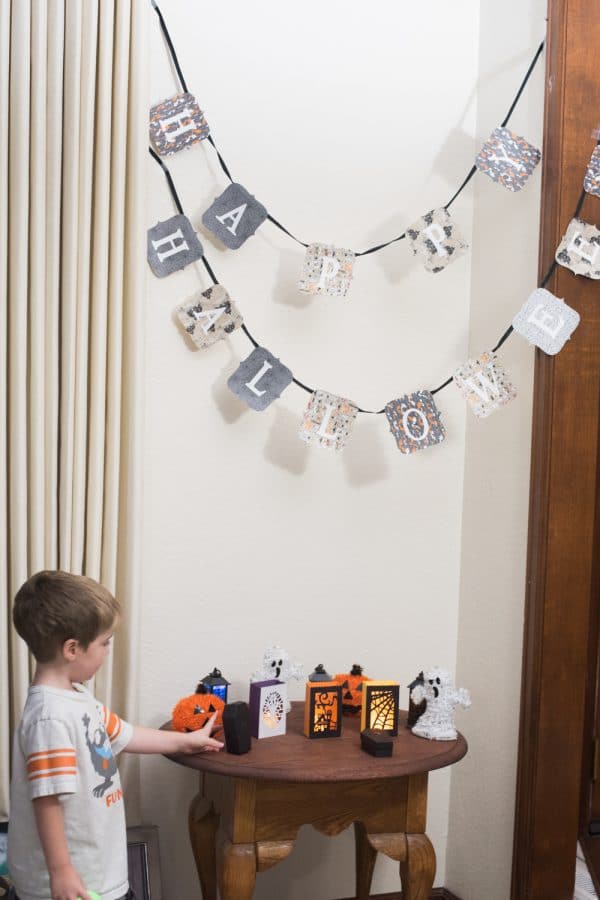
Place a light inside each box and enjoy!
Other Halloween Posts You May Enjoy: