DIY Ornament Christmas Tree + More Dollar Tree Christmas Projects
This beautiful Christmas tree centerpiece is made entirely from Dollar Tree Christmas supplies – all you need is a glue gun, a couple of hours, and you will have a beautiful decoration to enjoy for years to come.

Christmas Tree Centerpiece
Today as I checked out at the Dollar Tree, the cashier said, “Well, I’m sure we’ll see you again soon. The Christmas season is just starting.”
Oh, how right she is. We are certainly frequent shoppers at the Dollar Tree – but especially this time of year.
I actually went back a few hours later because I forgot something 🙂
We’ve written about the Dollar Tree and Christmas a few times:
- Our Favorite Dollar Tree Stocking Stuffers for All Ages (and Pets!)
- The Best Christmas Products to Buy at The Dollar Tree
But I haven’t ever touched on how many amazing Christmas crafts you can make using Dollar Tree products.
So when my friend, Amber, suggested we host a Dollar Tree Christmas Craft challenge with our fellow blogging friends, I thought it was a brilliant idea.
And that’s what we are doing today!
After I share my tutorial, you will find tons of really fun ideas from other bloggers from across the web. These projects are around $20 or less, and they should primarily use products from the Dollar Tree.
So many creative ideas!
Now on to my project. We went to the Dollar Tree having no idea what kind of craft we could come up with. I honestly had no idea! However, we were only there for a few minutes when Forrest said, “We could make some kind of Christmas tree out of these ornaments…”
And that’s all he had to say. My mind immediately started churning out ideas on how to make this simple suggestion come to life.
I walked around the store grabbing different materials – Christmas ball ornaments of different sizes, colors, and textures.
Battery powered lights.
A star.
I was so excited to get started!
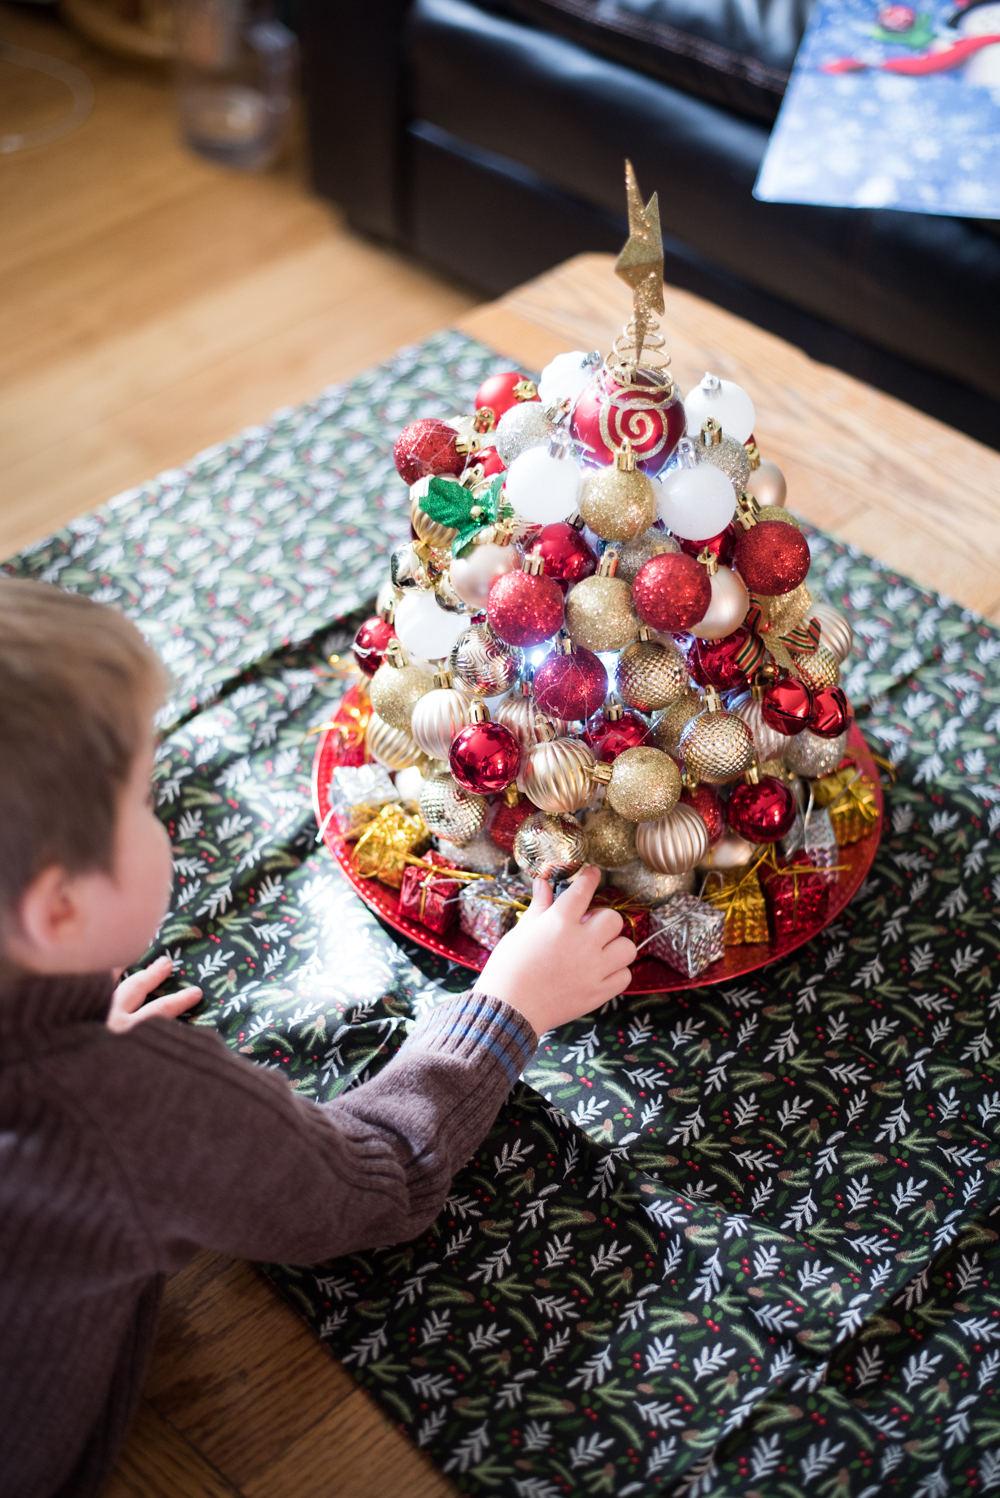
It definitely turned into more of a project than I initially anticipated – and I had to run back to the Dollar Tree for more ornaments a couple of times.
It’s not entirely even on all the sides, and I ended up building out with ornaments more than I thought I would (just to make it look more even), but in the end, I really loved the effect.
I wasn’t going to put the lights on the inside, but Jack convinced me that I should…and I’m so glad I did. It will be so fun to turn on in the dark!

This is definitely a project that takes a lot of attention to detail (something I’m not good at). It’s not really hard – it just requires a lot of gluing and paying attention to where you are putting the ornaments.
Forrest thought it would be helpful to make a cone out of paper to put in the center to help make sure you are going up the right direction. I would have made another one to try this out, but I was just too exhausted. ha ha.

It all turned out though, and we really love it!
WHAT YOU NEED
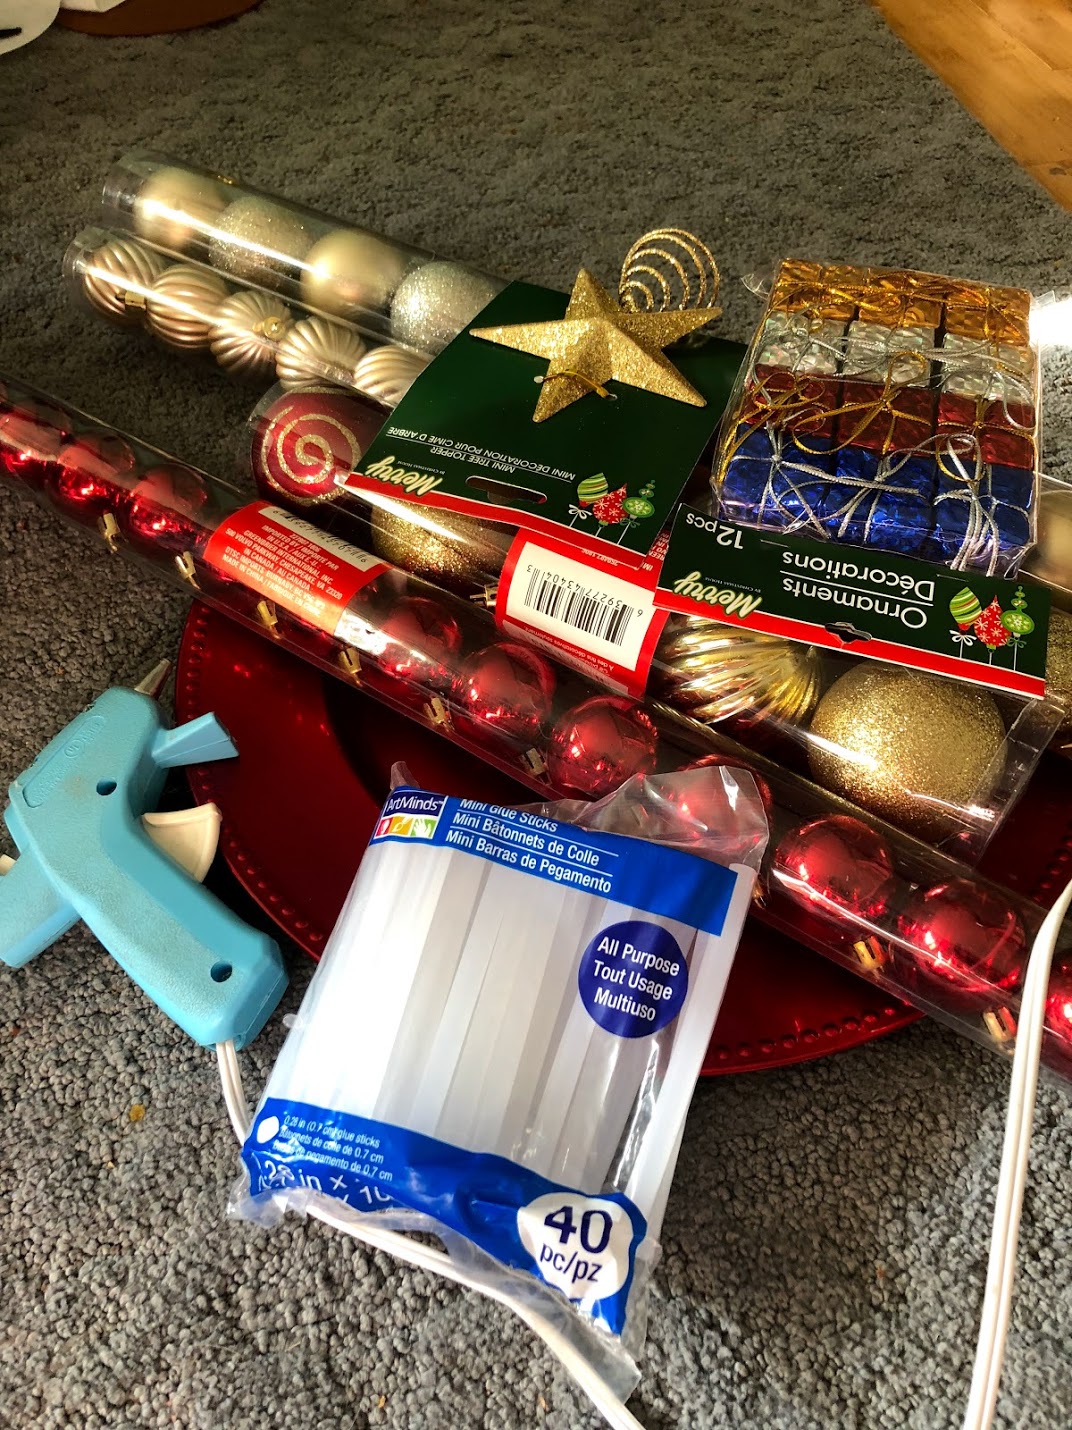
Here are the materials you will need. All of these can be found at the Dollar Tree, though the availability will depend on what your store has in stock. I’ve linked to them on the Dollar Tree website (great option for buying in bulk)
-10-12 tubes of Christmas ornament balls (I had one tube of five large ones, and one tube of the medium size. The rest were the smaller size).
-Mini Presents (I used three packs – I can’t find these on their website – this is what they look like, but I found them at two different Dollar Tree stores)
–Mini Glittery Star Tree Topper
-Bells with Leaves (can’t find these on their website, but these can be optional. I just added them at the last minute)
–Hot Glue Gun + Hot Glue Sticks (I wish I would have used glitter hot glue sticks)
Instructions:
Place charger on a solid surface. Heat up hot glue gun.
Take the five large ornaments and glue them on top of each other. Make sure the ornament hanger is facing off to the side (except for the top one).
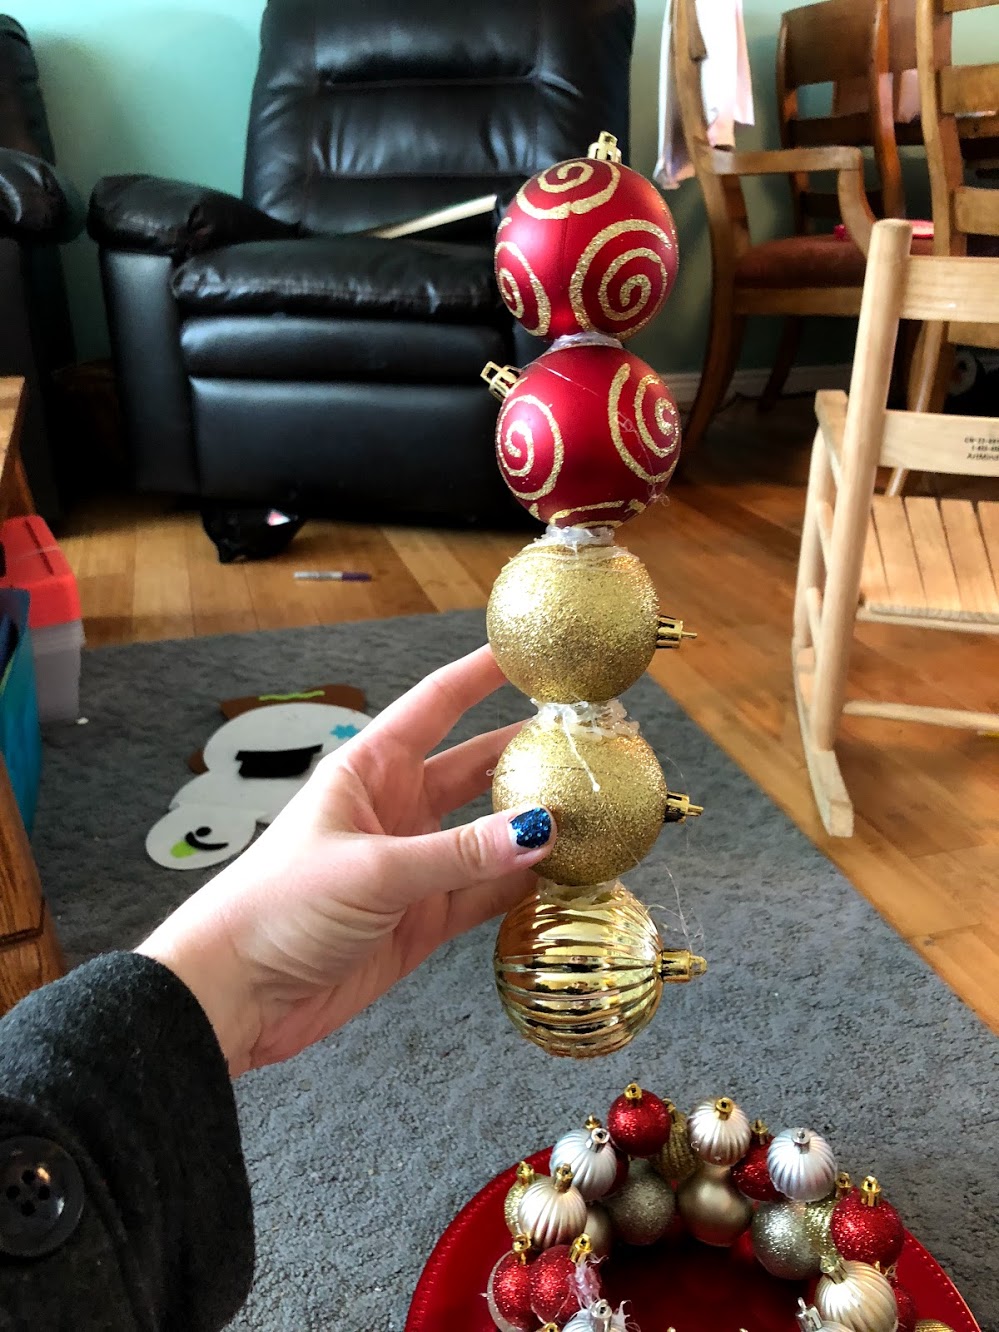
Glue start to top of the pillar.

Glue the lights to the tall pillar of ornaments. Set aside.
Starting with the medium-sized ornaments, glue them around the inner rim of your charger plate.


Create another layer with the smallest sized ornaments, doing your best to keep things even.

You will continue to create your layers as you go up. They need to start to slant in to make the tree shape (this can be tricky, so just take your time). When you have done about 3-4 rows, hot glue your large pillar into the center. If it falls over, that’s okay – by the time you get to the top, it will be held up by the ornaments at the top.

You will want to find an opening to put the battery back out from so it’s on the outside of the tree.

Continue creating rows until you get to the top ornament.
If you want to make it thicker (or if it becomes uneven) you can glue more ornaments to make a second layer. We made three additional rows to make it have more of a tiered look.
Glue gifts around the base of the tree

Put batteries in the battery pack and turn on. Enjoy!
Notes
You may find it helpful to create some kind of cone with paper to help keep the rows more even. I wish I had done this, as it became a little lopsided. I ended up having to make it double layered throughout the tree so it didn’t look so lopsided.
Other Christmas Projects You May Enjoy:






This turned out so cute! Hot glue is seriously the best way to craft haha!
I LOVE this tree!! Such a cute idea – thanks for the fun challenge babe. Dollar store win!