
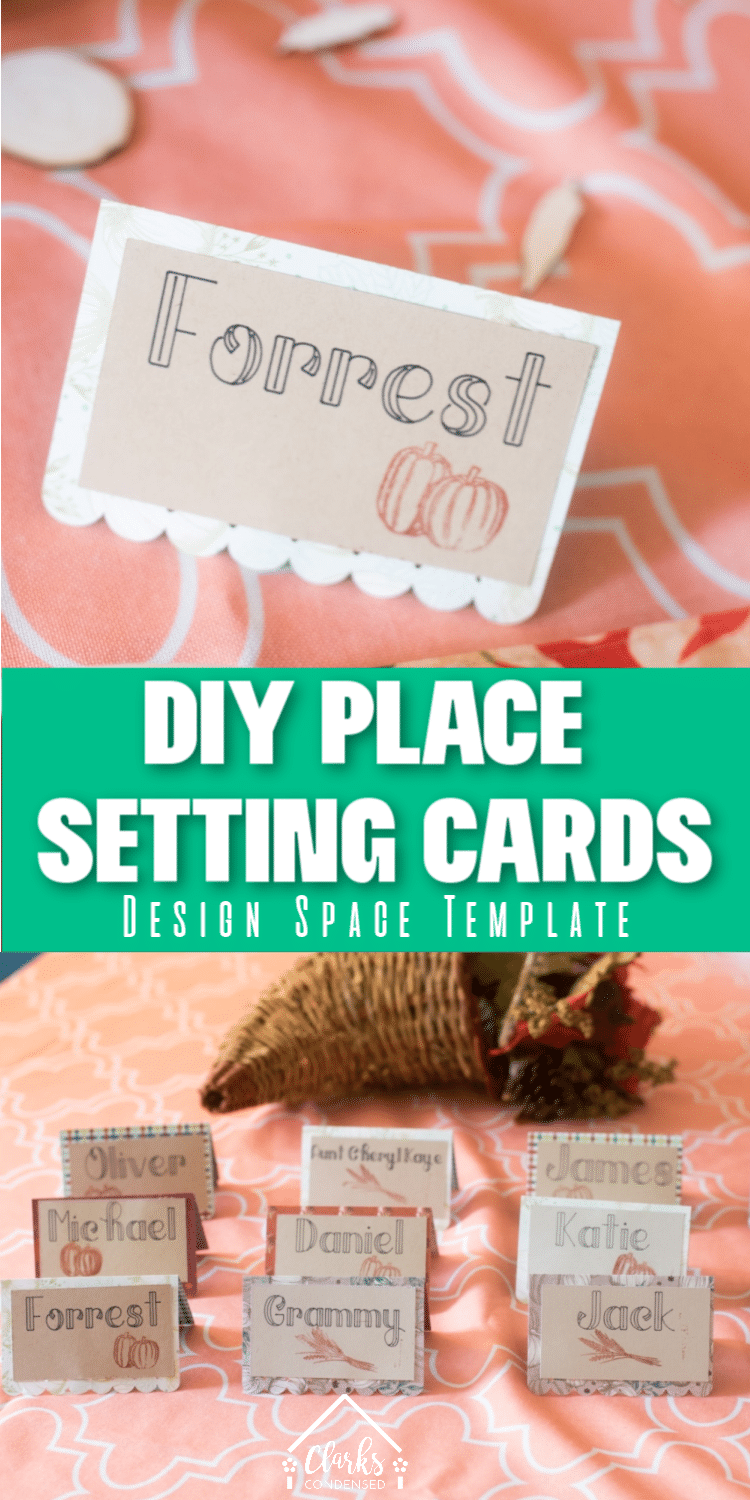
DIY Place Setting Card Tutorial + Template
Place Setting Cards Ideas
This time of year is so busy – we just have one holiday after another, and there’s always get-togethers, cooking, and other events to attend.
But I really love it. It truly is my favorite time of year.
I think sometimes Thanksgiving can often be overshadowed by Christmas, Halloween, and even consumer-created events like Black Friday and Cyber Monday…but as I’ve gotten older, it’s become one of my favorite holidays.
I mean, I don’t think it ever hurts to have another excuse to remember all the things we have to be thankful for.
Plus the food is always the best!
This year, we are celebrating Thanksgiving with my parents, my little brother, and my big brother and his family. It won’t be as large as some gatherings we’ve had, but I’m looking forward to it.
As you may remember, I have been partnering with Stampin’ Up the past few months. They sent me some really fun items that are perfect for Thanksgiving to create a project with this month:
- Gather together Stamp Set
- Come to Gather Designer Series Paper
- Come to Gather Ribbon Combo Pack
- Tags and Feathers Elements
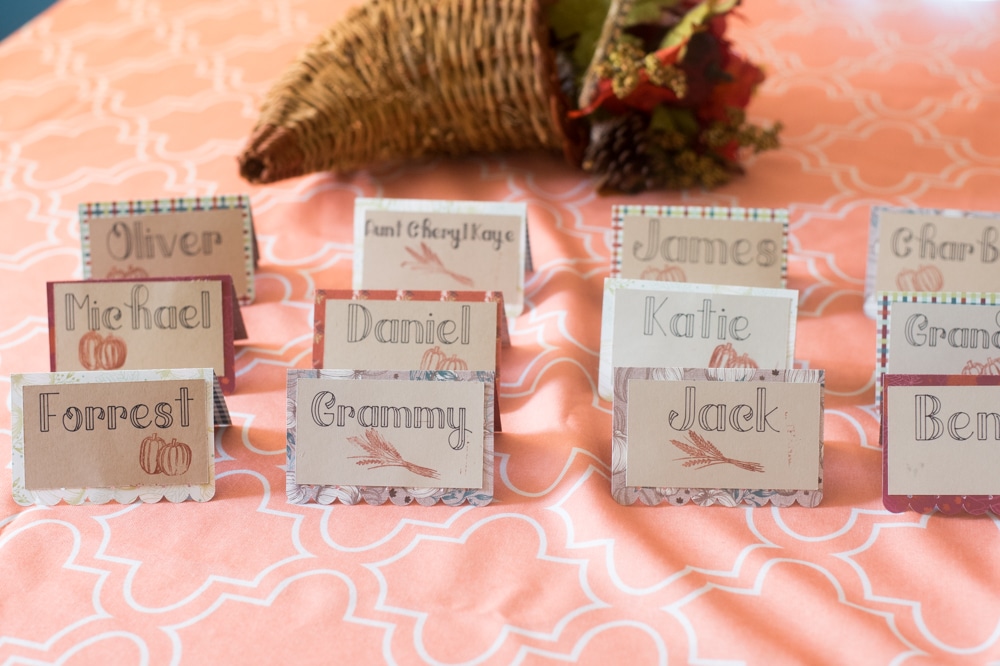
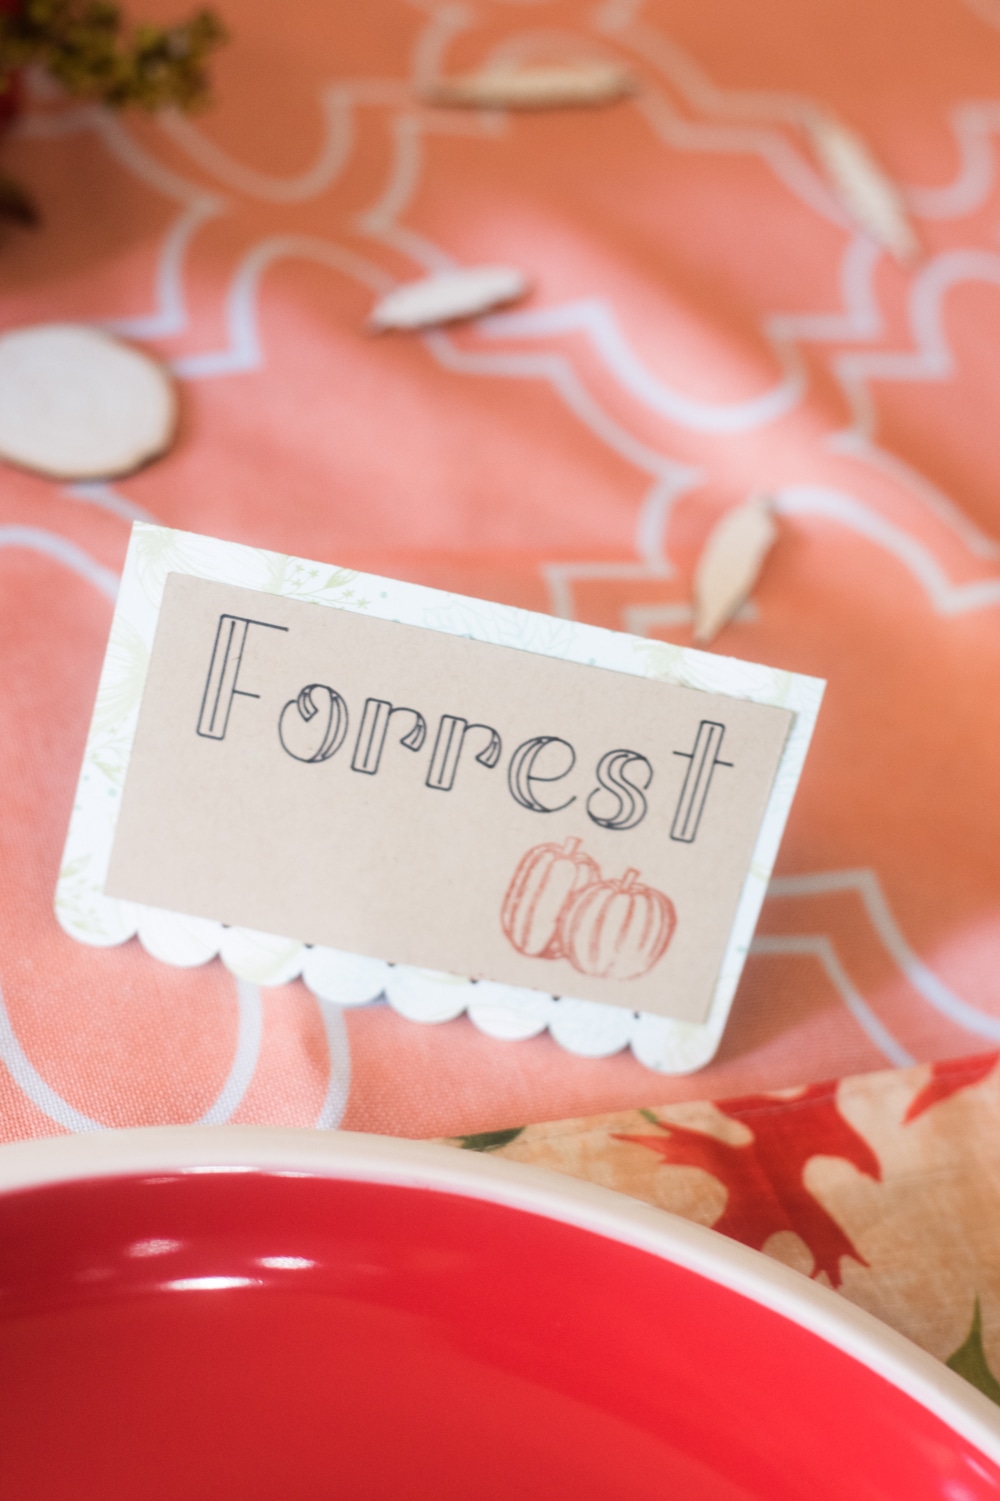
I loved the tags and feathers, so I put those on our tablescape. I thought it would be fun to encourage everyone at dinner to write a few things they are thankful for on them.
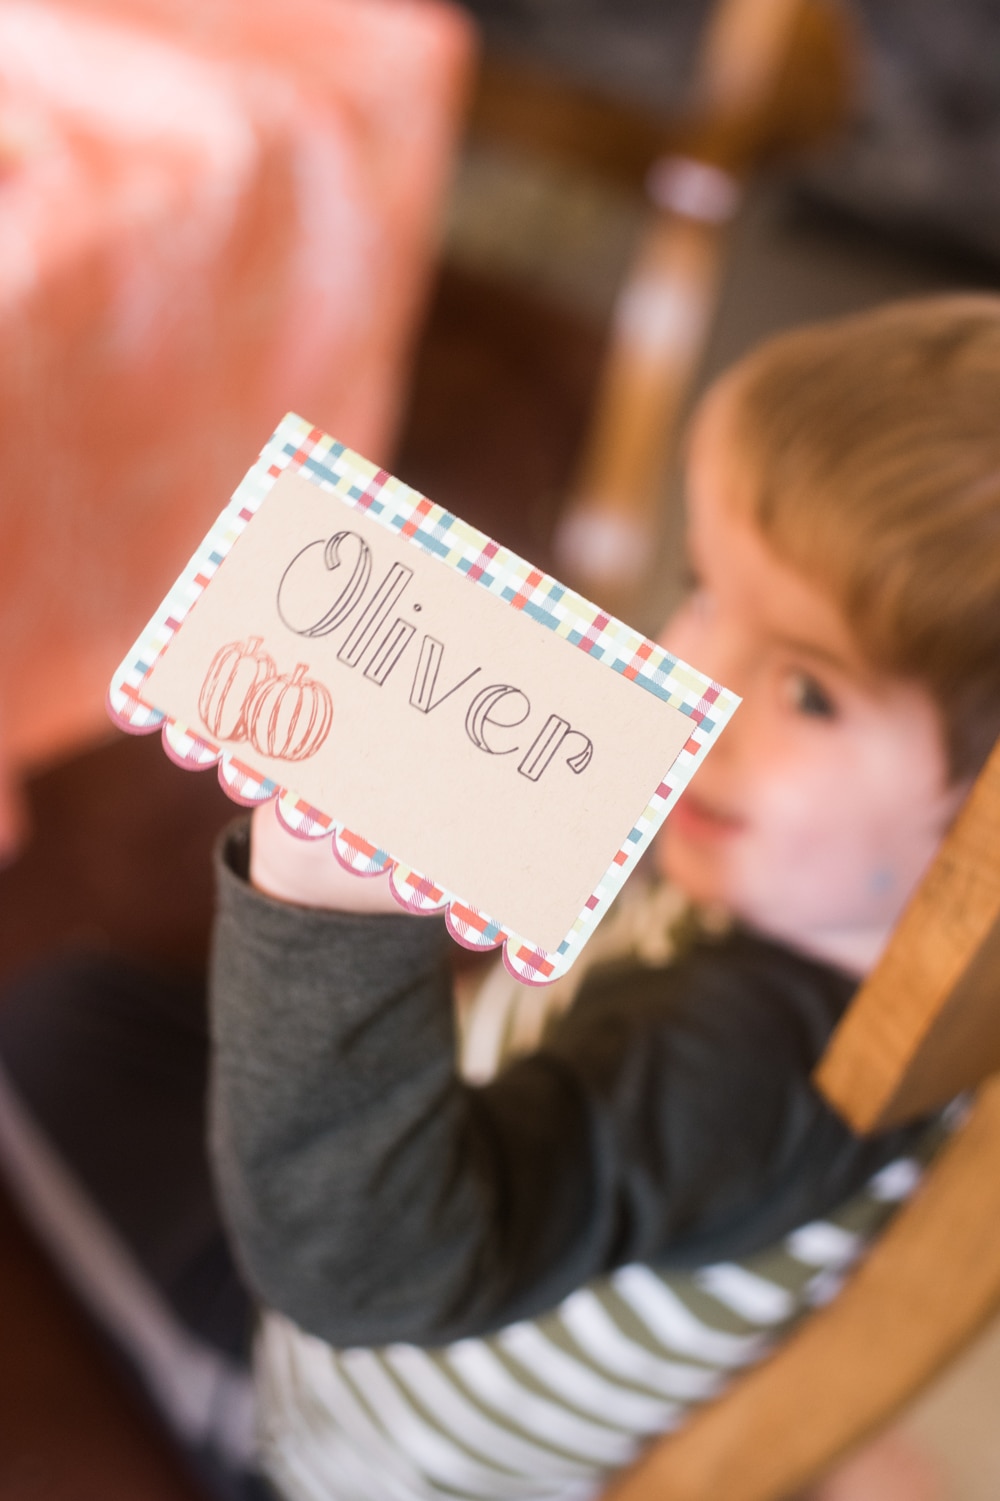
But the main project I made were place card settings! I always think it’s fun to have these for holidays, and they are so simple to make.
I made these using my Cricut Explore Air 2, but if you are handy with some scissors, you could easily make them by hand as well!
You can make these for Thanksgiving, Christmas, or other gatherings, or even for a larger event such as a wedding!
I used my Cricut’s writing feature, which makes it a lot easier to put names on. I have terrible handwriting, so I love that I can use that feature to make writing look a little bit fancier (Be sure to check out this post on how to write with Cricut).
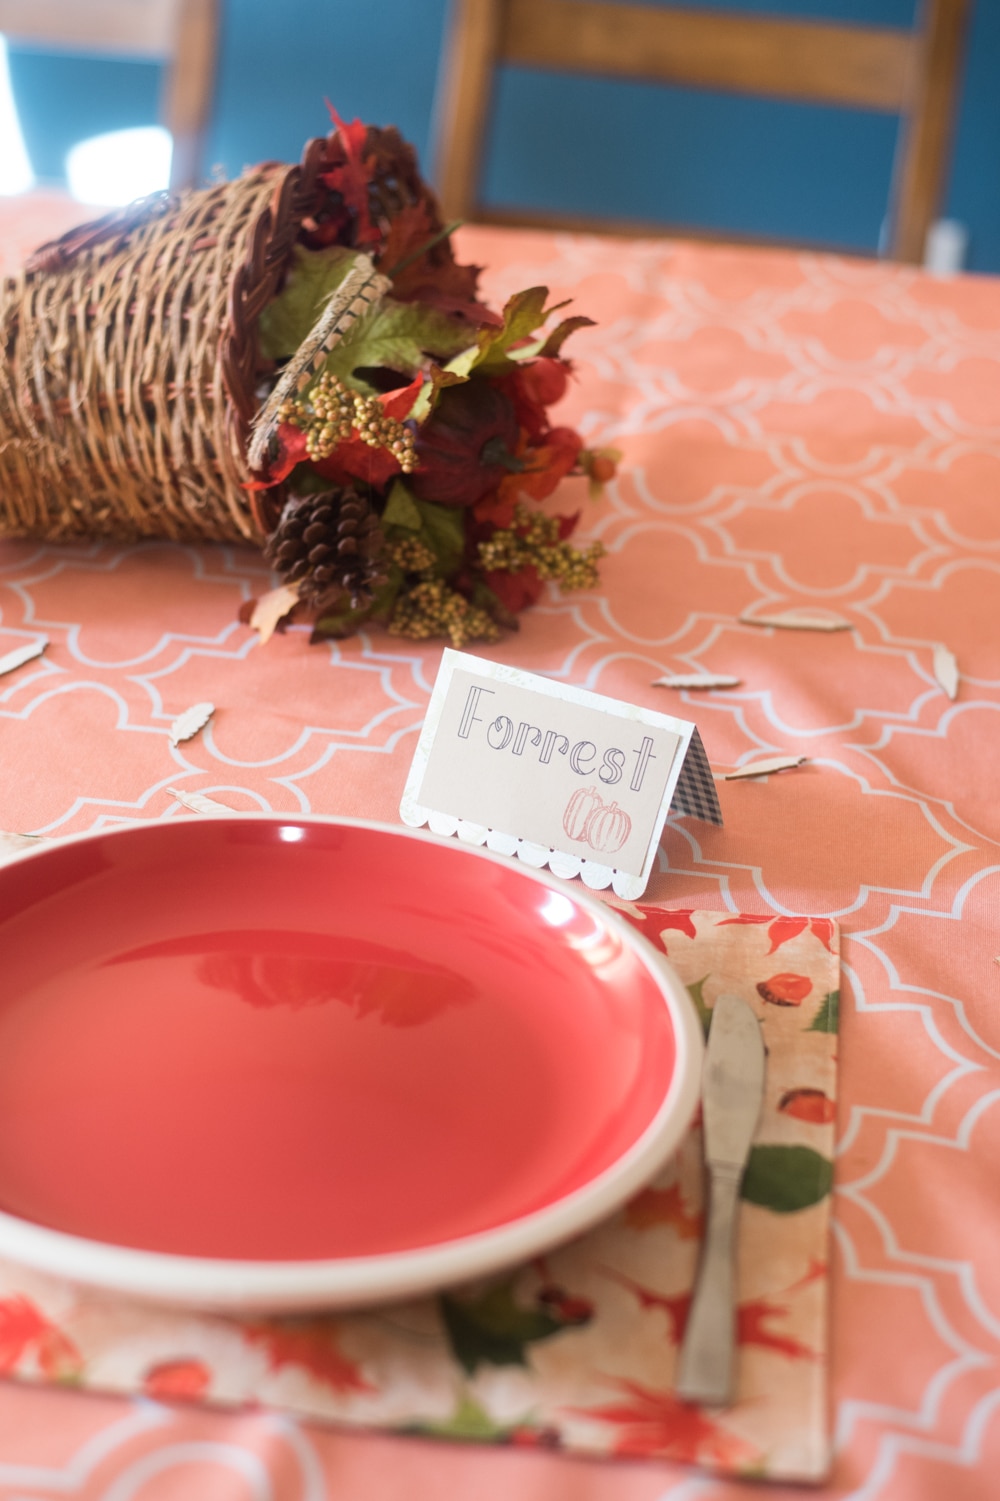
Place Card Setting for Thanksgiving, Christmas, and Weddings
MATERIALS:
- Come to Gather Designer Series Paper (or other medium-weight patterned paper)
- Cardstock in coordinating colors
- Cricut Explore Air 2 or Maker
- Fine Point Blade
- Black Cricut Pen – .4
- Scoring Stylus
- LightGrip Map
- Stamps (if doing the Thanksgiving theme above)
- Glue, tape, or another adhesive (I used the snail adhesive from Stampin’ Up).
INSTRUCTIONS:
Open this design in Design Space for our template. You can also find other folded card shapes if you would prefer something else.
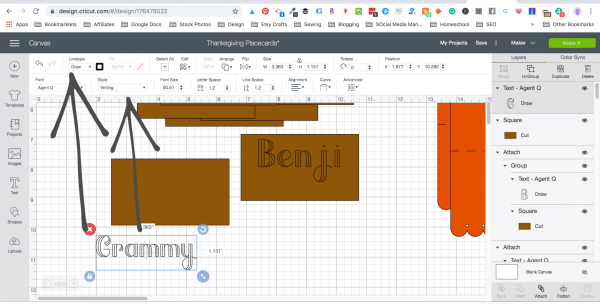
Select the font you want for the names and set the line type to draw and style to writing. Write out all the names.
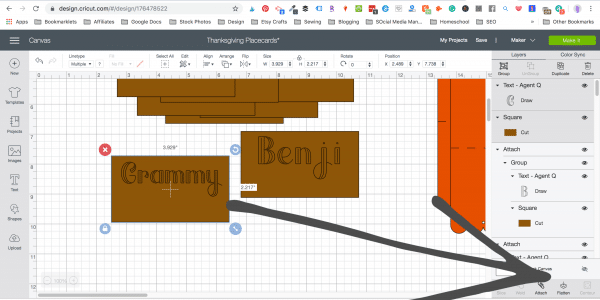
With the plain rectangle shapes, place the name on top where you want it to be written. Attach them together.
Press make it.
Follow the prompts and select the correct paper. I used the light patterned paper setting.

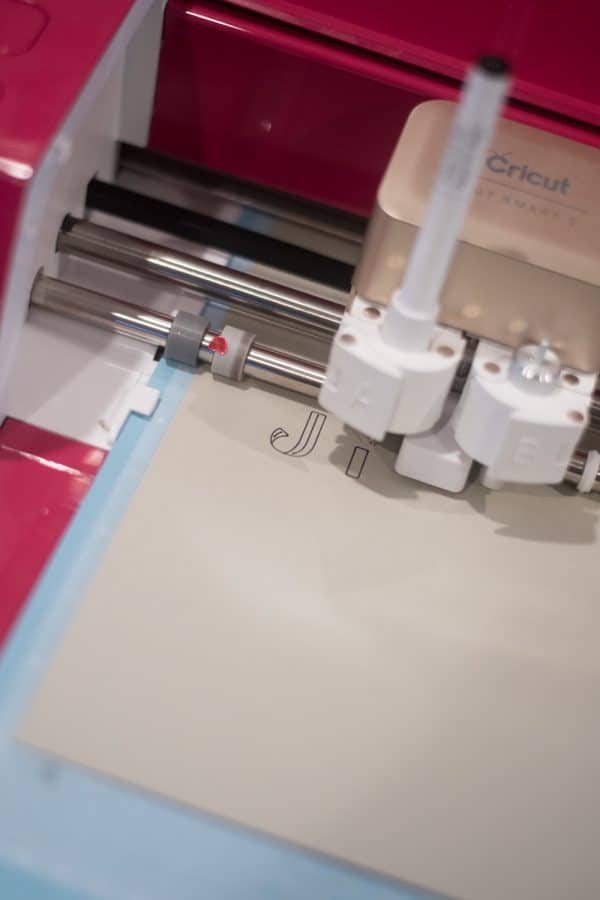
Cut out the designs and follow the prompts for when to put in the scoring stylus and the pens.

Carefully remove the excess paper from all the cut pieces.

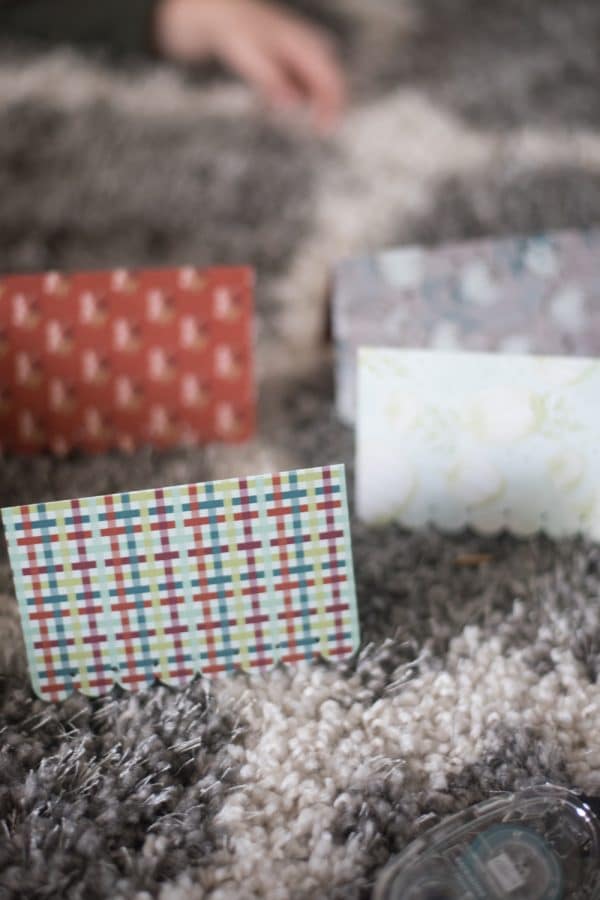
For the folded cards, fold at the scored line.

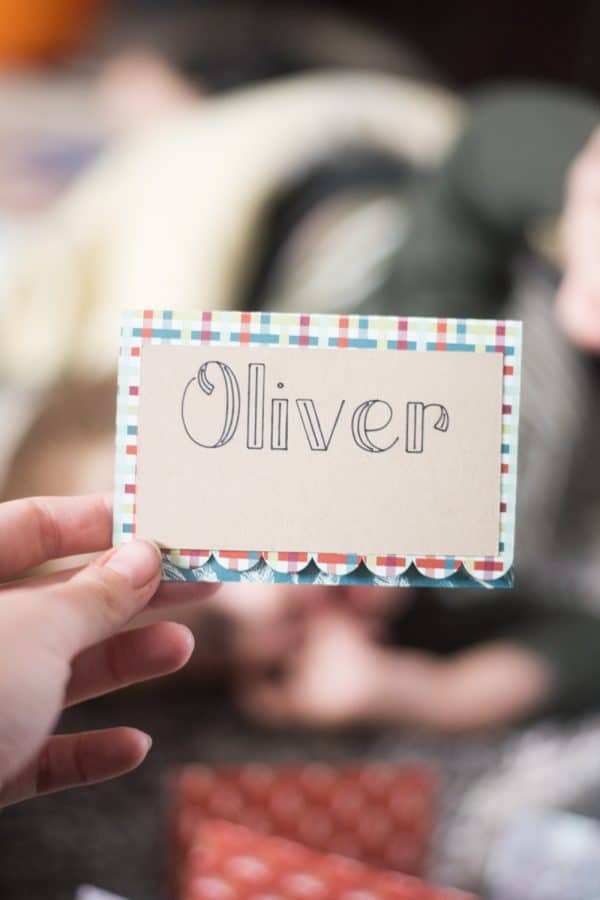
Glue or tape the name cards onto each folded card.

Stamp each card.

Your Design Space link says its unavailable, private 🙁
So sorry! It should be fixed now
I love those placecards! They are so cute!
Thank you, Mom!