DIY St. Patrick’s Day Window Clings
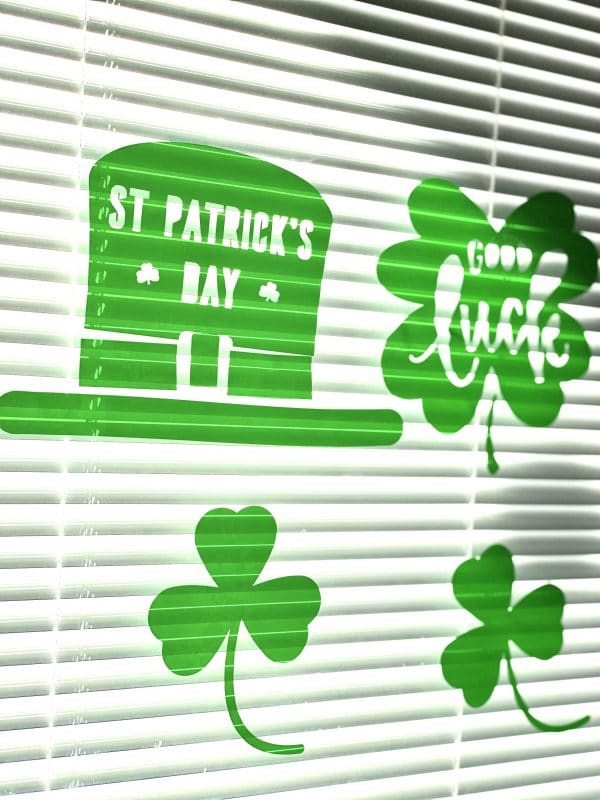
Make your own St. Patrick’s Day window decals with this Design Space file and tutorial!
Growing up, I always thought it was so fun to set up traps for leprechauns and catch anyone who wasn’t wearing green (and proceed to pinch them).
My mom would usually have a shamrock-printed tablecloth she’d put on the front entry way – along with these cute little leprechaun figurines.
It’s those simple memories from my childhood that I Love.
These days, St. Patrick’s Day is one of those holidays I often forget about until the day or so before.
But remembering how much I loved those simple things my mom would do remind me to do try and do simple traditions like that as well with my children.
The other day, I was trying to think of a project to do with Window Cling, and I thought, “Why not make some cute St. Patrick’s Day window decals?”
I went into Design Space, searched for St. Patrick’s Day, and within minutes, I came up with this super simple project.
They only took about 10 minutes to cut out with my Cricut, about five minutes to weed, and BAM. I had some cute decorations.
I was surprised at how thrilled my boys were when they saw that I had put them up.
I sometimes forget how easy it is to use make custom window decals using window cling and my Cricut, but I think this might be a new tradition.
I share this on Instagram and TikTok, and people seemed to love them, so I thought I’d share the DS file and tutorial here.
Here is a quick video showing the basics of this project.
@crafting.with.the.clarks ##cricutexploreair2 ##cricutmaker ##cricutmade ##icancricutthat ##cricutprojects ##luckoftheirish ##bestofluck ##diycraft ##fyp
♬ Irish Whistle Dance – Spency

Materials
- Green Window Cling
- Cricut Explore Air 2
- Fine Point Blade
- Weeding Tools
- Green StandardGrip Mat
The images used are free with a Cricut Access subscription.
Techniques Used
If you aren’t totally sure how to use window cling – click here to learn more.
Instructions
I decided at the last minute to share this project, so I don’t have step-by-step instructions. It’s a pretty simple project, though, so I hope you enjoy it!
Place window cling material on your Cricut Mat.
Open up this file in Design Space. Resize if necessary.
Go through the prompts and select “Window Cling” as your material. If you are using the Cricut Explore Air 2, make sure the dial is set to custom.
Cut out the material. Weed out the excess that you don’t need.
Place on the window!


