Easy DIY Drawstring Bag for Toys – Perfect for LEGO, Toys, and Play and Go!
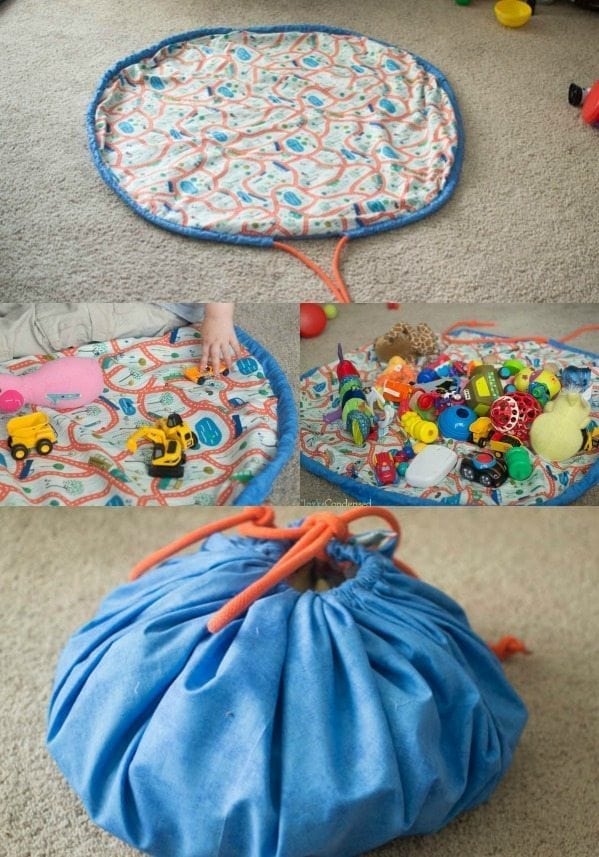
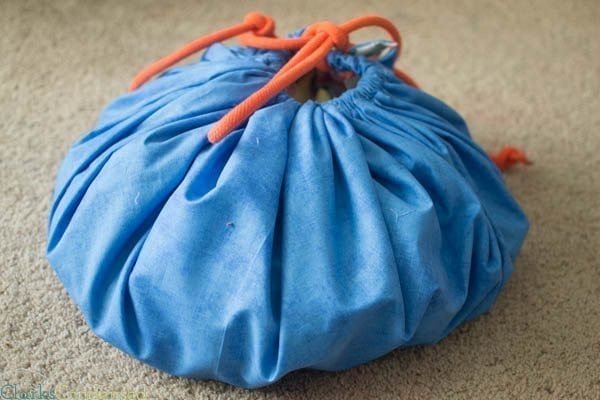
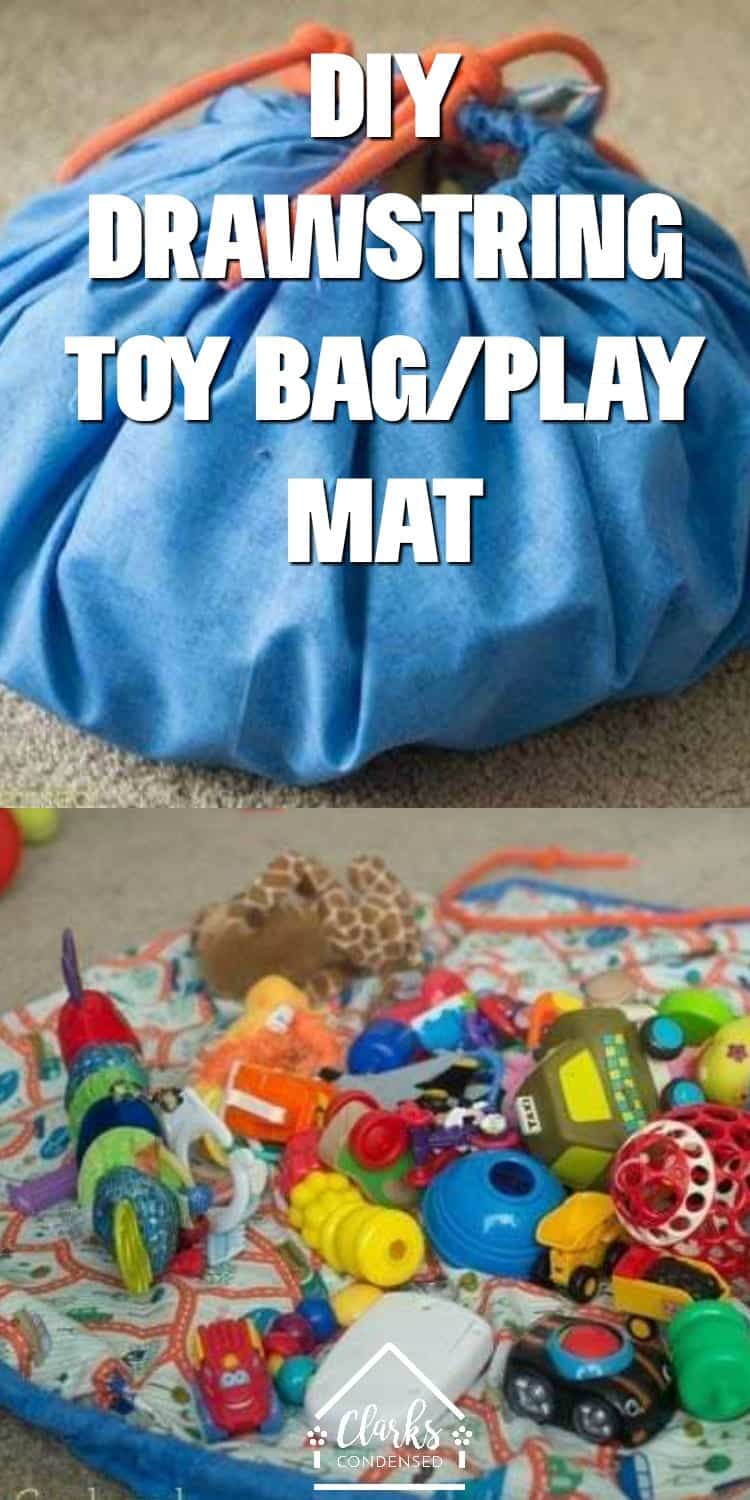
Do you have lots of toys or legos laying around? They sure can be a pain to pick up and put away. However, with this DIY Toy or Lego Bag and play mat, clean up is a lot easier. The bag cinches up into a great toy storage container, and it holds a lot of toys. This project is easy and is perfect for gifts!
LEGO Drawstring Mat
I always used to say we wouldn’t have a lot of toys for Jack. And until recently, I didn’t think we did! But then I started looking around, and I realized that we have slowly accumulated a lot over the past two years…and I kind of feel like we live in a small toy shop.
I keep telling Forrest that we can just wrap up old toys that Jack outgrows for other kids we may have, just so we don’t become overrun with toys. He thought that was a great idea…Check back with me in a few years to see how that turns out!
Most of the toys we own aren’t big — just lots of smaller toys. These small toys are perfect for Jack’s latest favorite game – throw all the toys out from behind the couch and then do nothing with them. Jack is excellent at throwing small objects.
Needless to say, we’ve been trying to teach Jack how to clean up after himself lately (and thankfully, have had success. I was checking on him in nursery in church on Sunday, and my heart just beamed as I saw him put away a toy without being asked…ah, the simple joys in life.)
I wanted to come up with a way for us to quickly put away all of our smaller toys, as well as store them. I remember seeing toy (or lego) bags with drawstrings growing up at friend’s homes and thinking they were so cool.
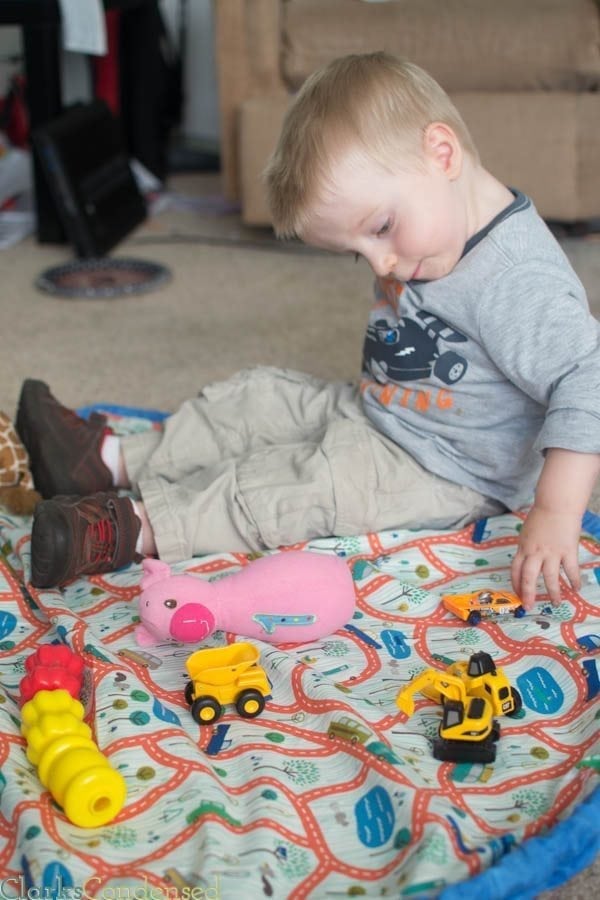
So I went to Pinterest found this post from Make It Perfect for a lego sack tutorial. It seemed simple enough and like it would be the perfect solution to our tiny toy problem.
After looking at the tutorial, I also discovered the name of this bag – a Swoop Bag. These are pretty pricey, so I was excited to see if I could make one for a fraction of the price.
I liked how they did the drawstrings on their bags, as opposed to how the tutorial at Make it Perfect made the cinch sack (the button hole thing confused me), so I decided to combine the tutorial from Make it Perfect with my own twists to resembled the Swoop Bag, and it turned out awesome.
So, by all means, this is not a super unique and original idea, but I think I put my own unique twist on it.
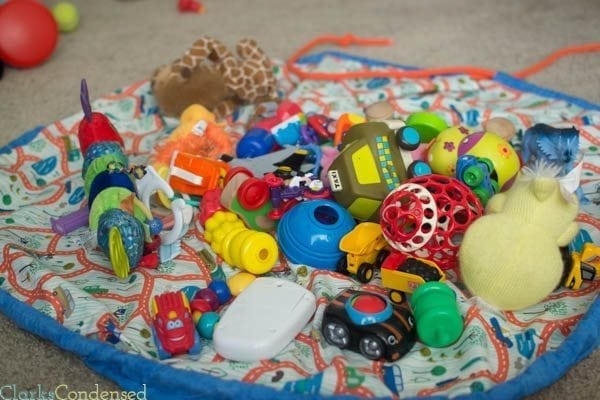
Jack LOVES it. He’s been dragging it around our house and is actually quite good about putting all the little toys in it and playing in it. It turns into a great play mat. I used this adorable Scenic Route fabric from Riley Blake Designs for the top layer, and this simple Colbalt fabric, also from Riley Blake Designs. Jack totally loves the cars and the roads on it and enjoys “zooming” his cars along them. It’s perfect for his age and interests.
Here’s the tutorial — it really is pretty simple and should just take 1-3 hours (depending on how fast you are!) I think this would be a great birthday gift or even a baby shower gift.
The size is plenty large for us, so the instructions below do have exact measurements. It’s about 40 inches in diameter, but if you want it a different size, you should be able to easily adjust the instructions below.
Printable version available at end
Play and Go Storage Mat
Materials
- 2 pieces of fabric that are about 43″ wide and 56″ tall in coordinating colors (Fabric used in this tutorial – Scenic Route and Colbalt. These are no longer available online, but they are from Riley Blake Designs, which has the CUTEST fabric. The Oh Boy! or Harvest Friends Owl with some polka dot cotton would be PERFECT for this project.)
- 3 40″ long, 3″ wide strips of fabric (I would use a solid color.) You should have enough left over in scraps from cutting the fabric, but you might want to get a little extra just in case.
- Coordinating Thread
- Paracord in coordinating color
- Measuring tape
- Sewing Scissors (I love the Gingher brand)
Instructions:
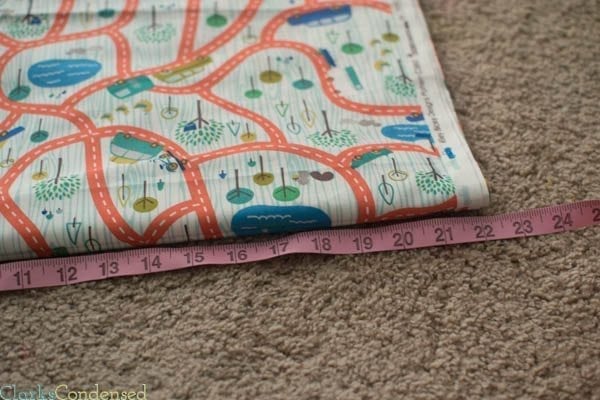
1. Fold one piece of fabric into quarters. Each edge needs to be at least 21″ (or one inch more than what you want the radius of the finished product should be. Iron the edges, and then starting at one corner, make multiple 20″ marks in an arch across the fabric. The more marks you have, the easier it will be to connect the lines and cut! After you’ve connected the line, cut along the line.
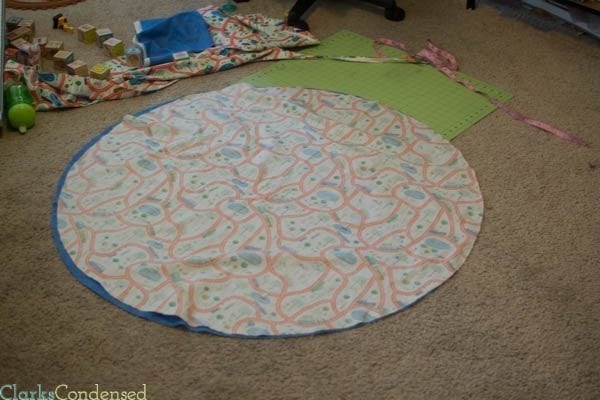
2. Repeat with the other piece of fabric until you have two large circles. I totally forgot to take pictures of this whole process, so if you are confused, this a great tutorial for cutting a circle out of a piece of fabric. If you are very careful, you could even just do one circle, and then trace the other one from the first.
3. Cut three strips of fabric that are 40″ long and 3″ thick.
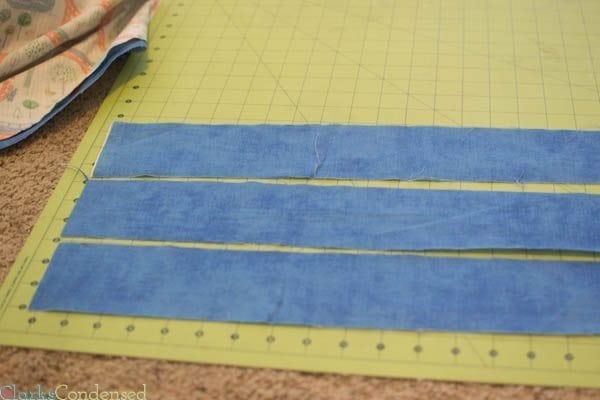
4. Sew them together into one large strip. Make sure to put the edges right side together, so the seam doesn’t show.
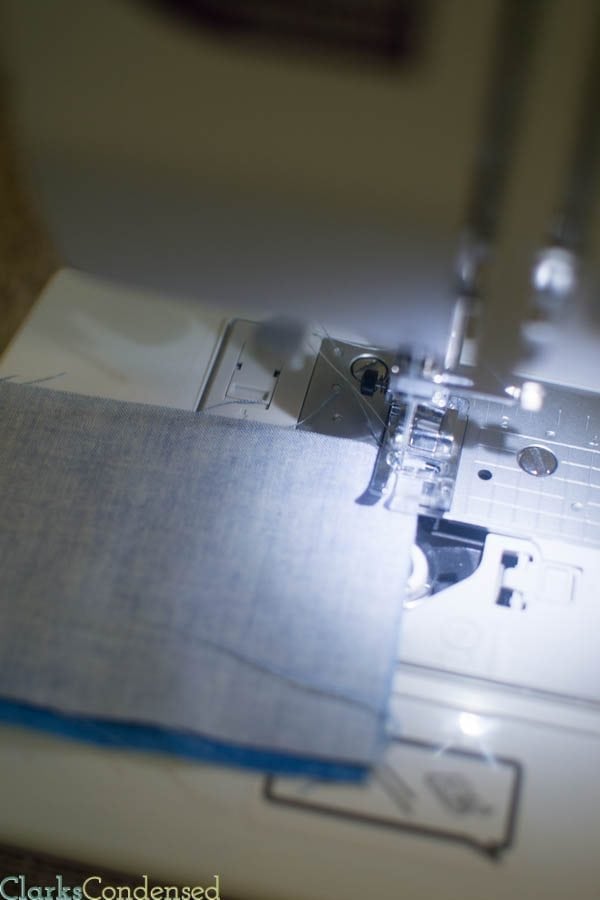
5. Once you have the long strip of fabric, fold the ends in about 1/2″ and sew in place.
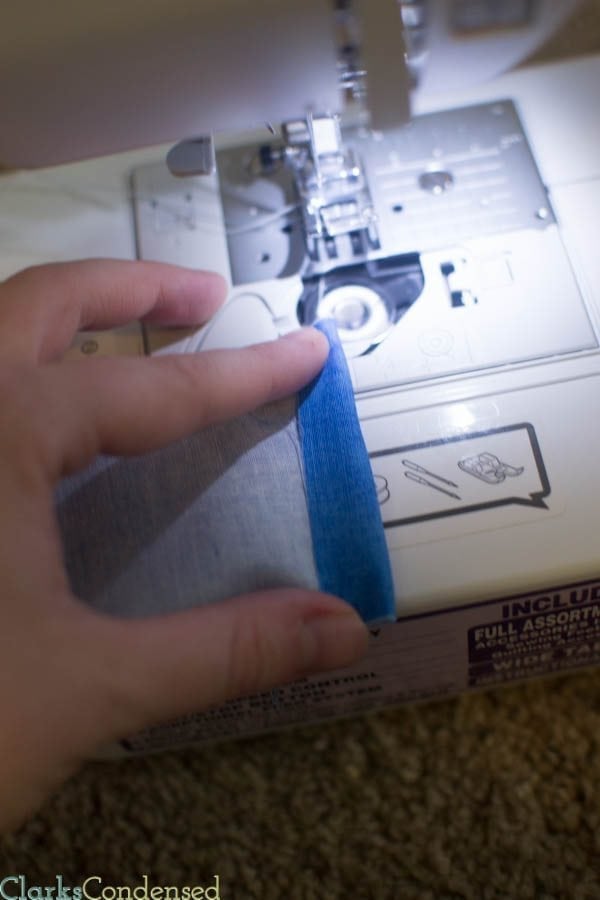
6. Fold the fabric in half and sew down the long edge until you have a long tube. You don’t need to worry about the raw edge, as it will be covered in the end.
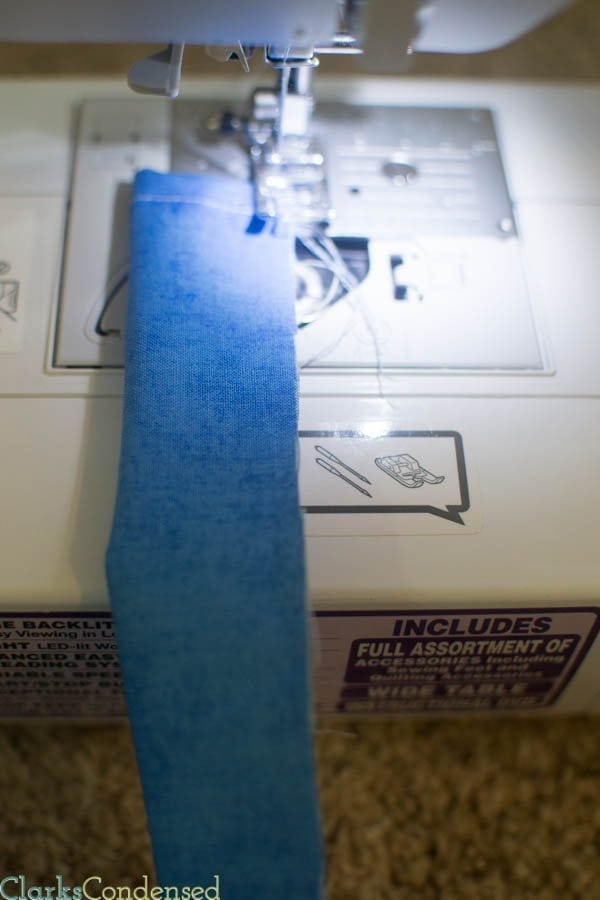
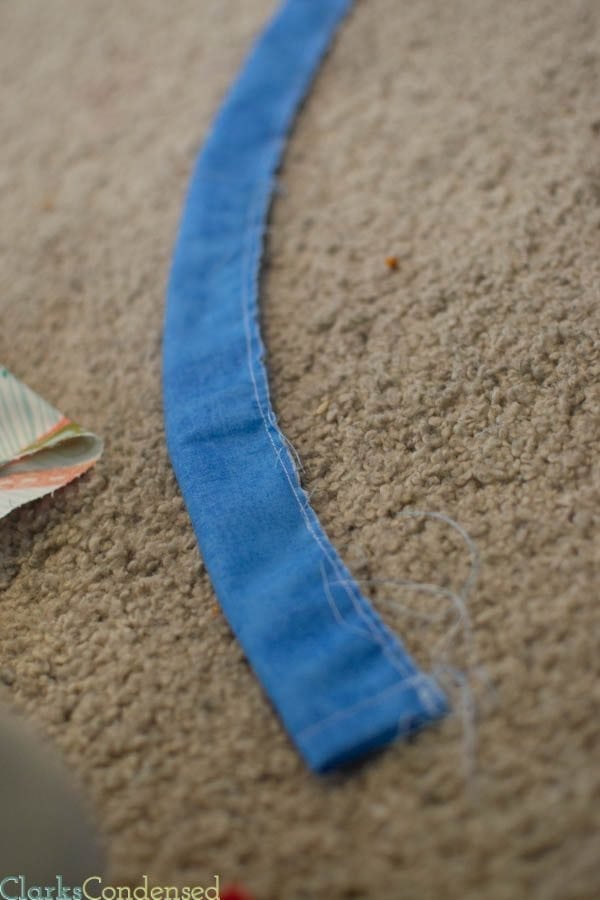
7. On the circle of fabric that you want on the bottom of the bag (but will ultimately be on the outside when it’s cinched up), pin the tube of fabric around the entire fabric. There should be about a 5″ gap between the ends of tube (if there isn’t, just cut off a few inches from one of the ends and re-sew.) Make sure to pin the raw edge of the tube on the outside of the circle.
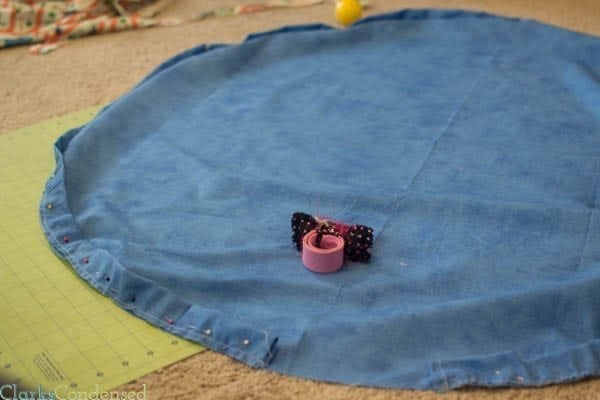
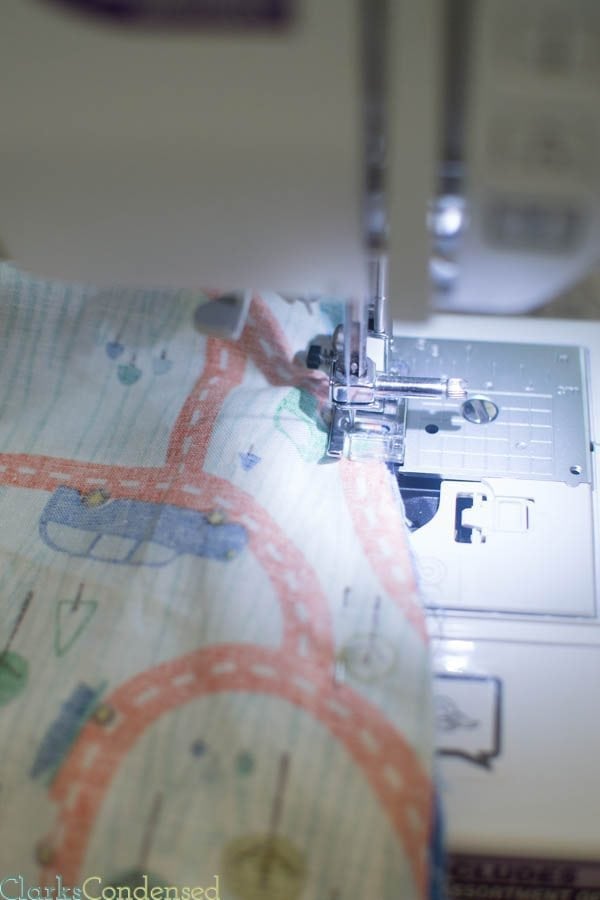
8. Sew the tube to circle using a 1/4″ stitch
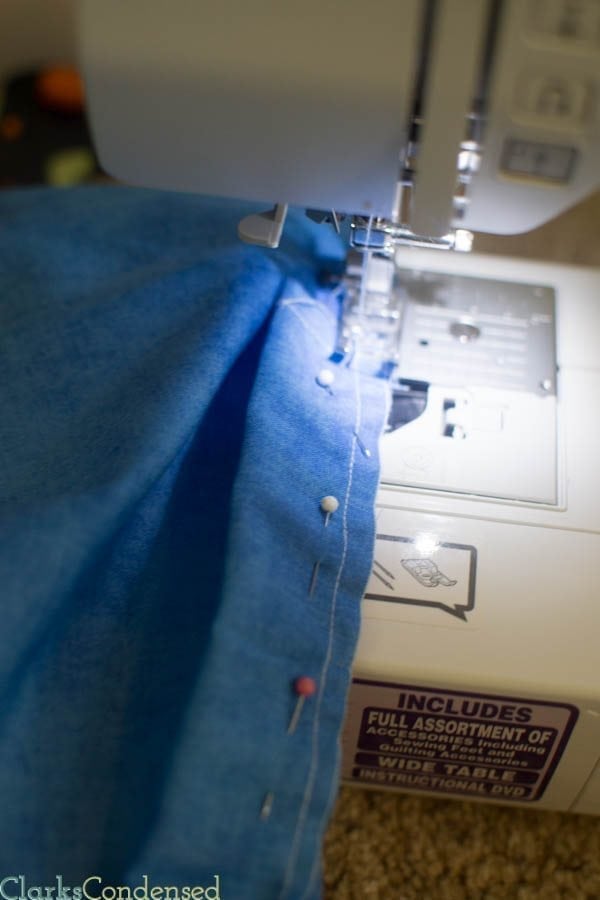
9. Pin the two circles to each other (right sides together), leaving a 5 or 6 inch gap on the side opposite of gap between the edges of the fabric tube that you previously sewed to the bottom circle.
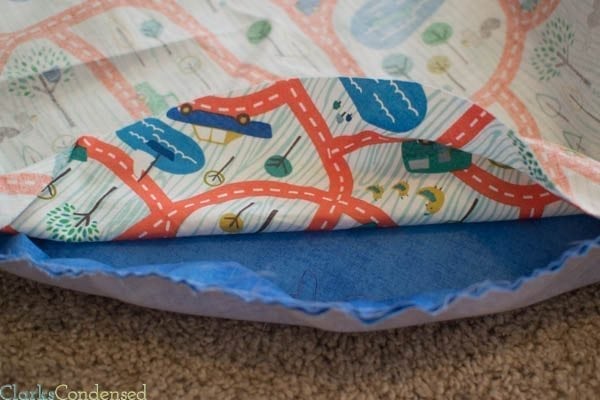
10. Sew 1/4″ stitch around the circle, starting at the beginning of the part you left unpinned and stopping at the other end right before the gap.
11. Turn the material so the right sides are showing, through the gap.
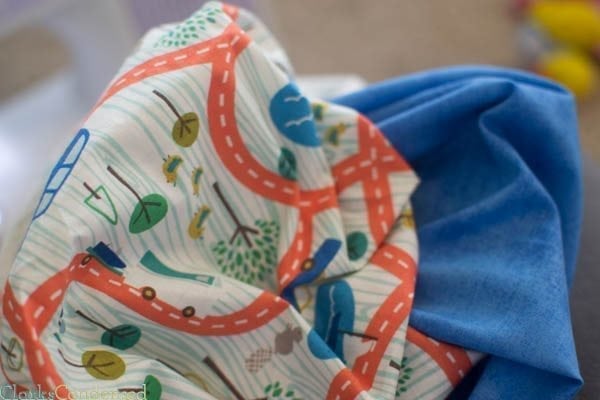
12. Top stitch the gap closed.
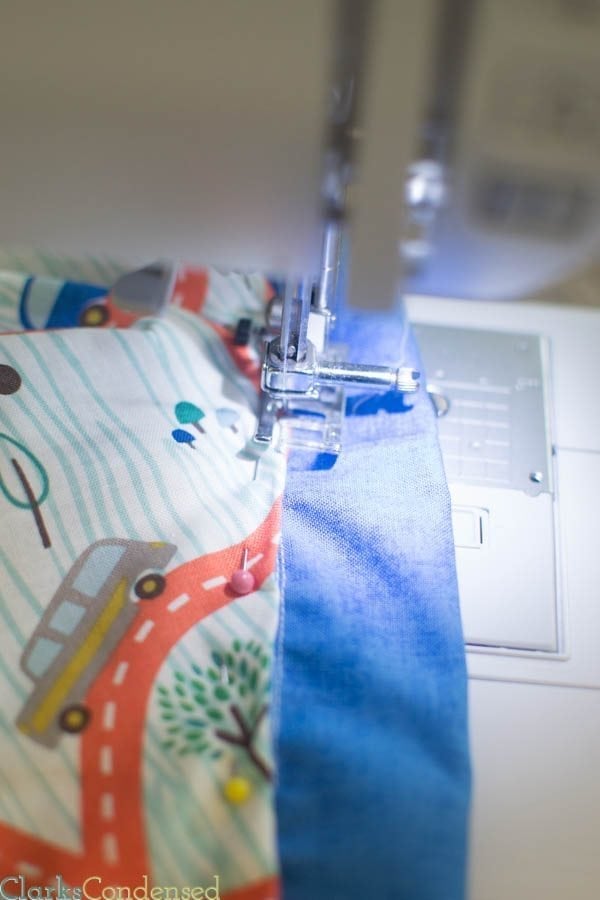
13. Starting at one end of the fabric tube, “thread” the rope through until you reach the other end. You’ll have to do a bit of tugging and adjustment until the mat lays flat and the tubing isn’t bunched up.
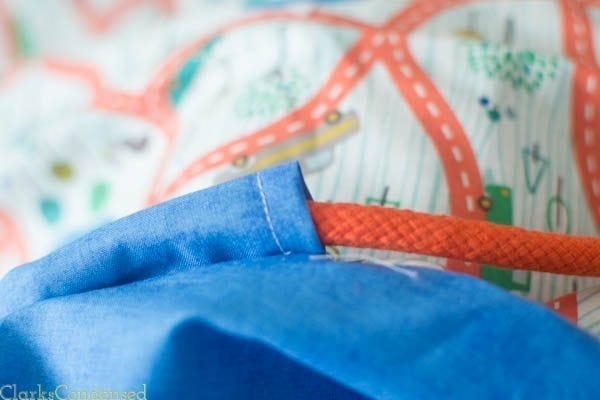
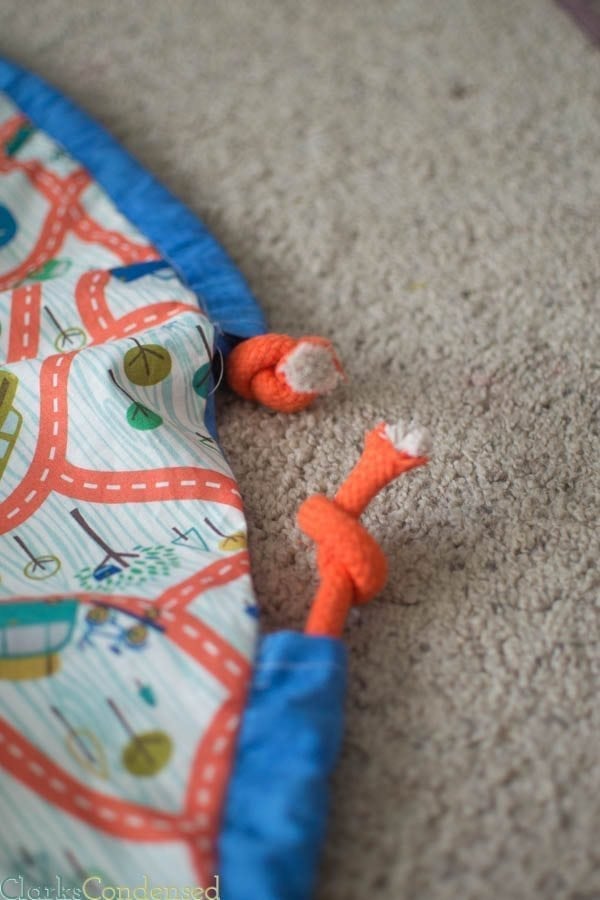
14. You’ll likely have a good amount of extra rope left over, like below. Cut the rope so there is about 5″ sticking out of each edge.
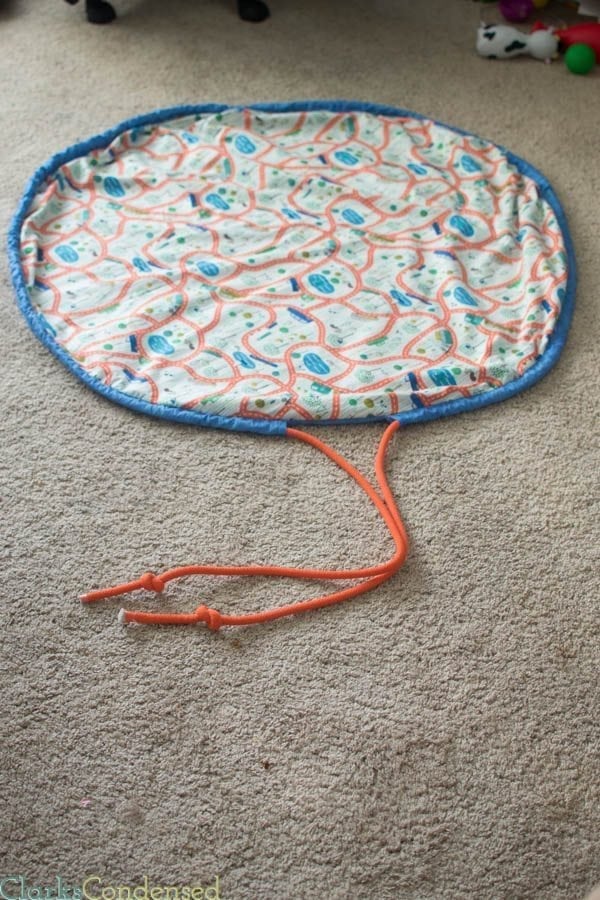
15. Tie the ends of each side of the rope into a tight knot so it doesn’t go into the tube.
Put toys in and enjoy!
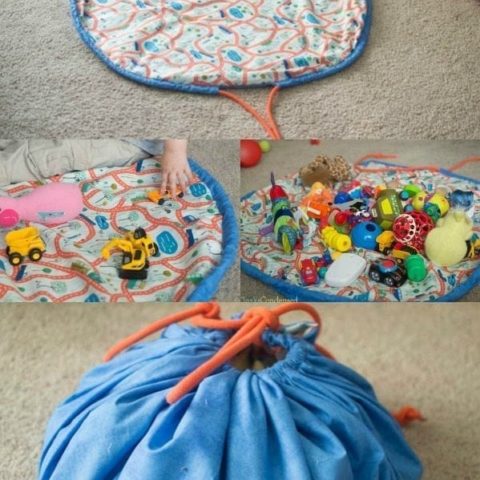
Easy DIY Drawstring Bag for Toys
Do you have lots of toys or legos laying around? They sure can be a pain to pick up and put away. However, with this DIY Toy or Lego Bag and play mat, clean up is a lot easier. The bag cinches up into a great toy storage container, and it holds a lot of toys. This project is easy and is perfect for gifts!
Materials
- 2 pieces of fabric that are about 43″ wide and 56″ tall in coordinating colors
- 3 40″ long, 3″ wide strips of fabric
- Coordinating Thread
- Paracord in coordinating colors
Tools
- Sewing Scissors
- Measuring Tape
- Sewing Machine
Instructions
- Fold one piece of fabric into quarters. Each edge needs to be at least 21″ (or one inch more than what you want the radius of the finished product should be. Iron the edges, and then starting at one corner, make multiple 20″ marks in an arch across the fabric. The more marks you have, the easier it will be to connect the lines and cut! After you’ve connected the line, cut along the line.
- Repeat with the other piece of fabric until you have two large circles.
- Cut three strips of fabric that are 40″ long and 3″ thick.
- Sew them together into one large strip. Make sure to put the edges right side together, so the seam doesn’t show.
- Once you have the long strip of fabric, fold the ends in about 1/2″ and sew in place.
- Fold the fabric in half and sew down the long edge until you have a long tube. You don’t need to worry about the raw edge, as it will be covered in the end.
- On the circle of fabric that you want on the bottom of the bag (but will ultimately be on the outside when it’s cinched up), pin the tube of fabric around the entire fabric. There should be about a 5″ gap between the ends of tube (if there isn’t, just cut off a few inches from one of the ends and re-sew.) Make sure to pin the raw edge of the tube on the outside of the circle.
- Sew the tube to circle using a 1/4″ stitch
- Pin the two circles to each other (right sides together), leaving a 5 or 6 inch gap on the side opposite of gap between the edges of the fabric tube that you previously sewed to the bottom circle.
- Sew 1/4″ stitch around the circle, starting at the beginning of the part you left unpinned and stopping at the other end right before the gap.
- Turn the material so the right sides are showing, through the gap.
- Top stitch the gap closed.
- Starting at one end of the fabric tube, “thread” the rope through until you reach the other end. You’ll have to do a bit of tugging and adjustment until the mat lays flat and the tubing isn’t bunched up.
- You’ll likely have a good amount of extra rope left over, like below. Cut the rope so there is about 5″ sticking out of each edge.
- Tie the ends of each side of the rope into a tight knot so it doesn’t go into the tube.
Let me know if you make this project — I’d love to see your take on it!
More Posts You Might Enjoy:
- How to Clean Stuffed Animals in Washing Machine
- How to Clean a Wubbanub: The EASIEST Way
- 40+ LEGO Boredom Buster Activities
- Fun Baby Shower Jeopardy – With Free Digital Version!
- What DIY Projects Can I Make with My Cricut? 50+ Creative Ideas
- FREE Editable and Printable Chalkboard Birthday Poster



Just an idea. What about making a tic tac toe game for the middle of the circle. A small bag could be included to hold the pieces for this game. Also a race track, using iron on fusible web to play with cars on it. There are endless possibilities for this bag.
Such a fun suggestion!
Love this idea! Made one for my grandson who loves all vehicles. Since I made it extra large (1.5 m.), I left an opening for the rope on two sides of the mat.
https://drive.google.com/file/d/1IujSWJIXRuXQWcagg9mL7Uyp2aDDgNJJ/view?usp=drivesdk
I love this bag and will try to make one for my grandson. I haven’t sewed in a very long time and not sure how sewing a straight long tube for the rope will make a circle around the bag without bunching up. Do I sew it together a certain way? Is the fabric cut a certain way?
Hi! I love this toy bag! Do you have any suggestions to make one for cosmetics, or even for jewelry when traveling? I’m unsure how large to make the circle and the rest.
I don’t! That’s a great idea though. I would make it significantly smaller – probably a diameter for 12″ or so.
Hello, I made some for cosmetics and made the circles 18”.
Thank you for such an easy to follow tutorial! Made this for a friend for her baby shower. I used minky fabric on the back and snuggle flannel for the top so it’s extra cozy.
Hey Katie,
I have no idea if you will see this comment, so by the time you’ve read this I may have continued on and quite possibly have ripped a bunch of stitches out… But, I have a question that I hope isn’t too “noob-ish”… :’)
I’m in the process of following your tutorial, and I’m about to sew together the two circles. I am a little confused, though, about whether the tube should be on the inside or the outside when I sew them together. I am struggling to visualize how the tube ends up on the outside once the circles are sewn together and once turned from inside out.
My sewing skills are pretty minimal; this is one of my first few projects!
Hi, Britt! Hopefully I saw this in time 🙂 The tube should be on the inside when you sew them together 🙂
I’ve just finished this – thank you so much! I added some wadding/batting between the layers to make it a bit comfier, and sewed felt underwater creatures all over the inside of the playmat, so it took me quite a bit longer, but I love the result! The pattern is brilliant! Thank you 🙂
So glad you loved it!
Just made this. Cute as can be! Great tutorial – thanks for the clear instructions. I was looking for a bag for baby shower gifts. This is perfect!
So glad it turned out!! 🙂 Thanks for letting me know!
Thanks for the tutorial!! Thinking of making it for when we go on vacation.. Make a little car track and take cars into grandparents’ and hotels so they have a few toys, but easy to carry.
That’s a great idea!
LINDO DEMAIS! VOU FAZER.
#BestIdeaEver Clever idea, well executed. too bad I didn’t have it 25 years ago! There may have been a dozen made for our child, as she had so many toys. Thanks for this info.
You are very welcome! I’m glad you thought it was helpful 🙂
Love this so much! Thank you for the tutorial. Ive made 3 so far and plan to make more. My boys love them! They carry them everywhere, use them for lego and camping games. I do find it hard to cinch up, so I’m trying to figure out a way to make it easier.
I am so glad that you have found this tutorial helpful! Definitely share any tips you discover along the way! =)
I made this following your tutorial, instructions were really easy to follow. Only question I have is how do you get the rope to gather without much effort? I love the fabric you used but I could not find it locally and did not want to wait to mail order it.
Thanks for the tutorial. I made one for a new baby to come. I hope it is not too big (1.32 m ).
I’m sure it will be perfect!
Thanks for your tutorial, very clear and helpful. I’ve made it tonight, didn’t take too long. I sewed the rope into the tube so that I didn’t have to pull it through afterwards (lazy I know). I’ve made mine to fit our coffee table that will now for ever be our son’s territory 😉
I am so glad you were able to make it!
I like the tutorial and have made several of these by your directions. However, I am concerned about the amount of rope when it is drawn closed. When giving as a gift, should I put some sort of warning for small children? Any ideas would be helpful
Definitely add a note if you are concerned about it!
I adore this idea and have been searching for DIY gift ideas for my 18mo old niece, Amelia. I am definitely going to keep this on top of my list. If I sew it I’ll be sure to link to you and post on my blog!
Happy Holidays!
http://www.onecraftymiss.com
I hope you’ll have time to make it sometime – we love ours!
I absolutely love this, it looks so convenient! Thank you for making this wonderful tutorial!
I featured it on my blog today: https://www.sewingshop.net/blog/convenient-play-mat-bag/
Thank you so much! I appreciate you sharing it 🙂
No problem!
Hi,
I discovered this bag this morning and I am thinking to make one for my nephew. I hope that my sister is going to apréciate this present 😉
I hope she loved it 🙂
This is a great tutorial! I made two of these about 30 years ago. One was a farm & the other a Strawberry Shortcake scene. They were so much fun to make & my boys & niece still have theirs for the next generation to play with!
It’s so fun to hear from people who have made these bags for their children years ago – it shows what a timeless thing it was. I’m sure your grandchildren will love the ones you made some day. Such a fun thing to pass down!
Love this idea! Will try and make one when I get a chance. So, glad I stopped by:)) Thanks!
I made one of these toy, playmat bags and was very pleased. One draw back was when I tried to pull the string, it took all the strength I had. I knew this was not for new mothers. So I decided to put grommets where the pull cord was like every 11.5 inches. Worked good. Then the problem I had was all the extra cord to close the bag. Another thing I found it was not safe for the baby. There was too much loose cord for the baby to get caught in. So now I am going to try to make the piece that holds the cord (3″ X 40″ piece) out of a lighter slippery material and have it open at two ends to pull close. It might make it easier to pull the cord. Hope it solves my problem. Anybody got any views on this?
Jan
Thanks for your comments, Jan! Regarding the cord length, we just tie it up when we close it, and there isn’t an issue. I hope your solution works as well! Thanks for the suggestion on the grommets – I haven’t had issues closing mine, but it’s good to have another option for our readers. I hope you enjoy your bag, and I appreciate your suggestions for others!
I saw a different style on another site. It had a small pocket on the front of the bag to tuck the drawstring in when closed. I suppose you could close it with a button or Velcro.
Thanks for taking the time to share this! I’ve been eyeing those bags myself for a while and couldn’t stomach the price. I think they will be a huge help with the lego chaos and the horrible crash, crash, crash, as the kids stir their boxes looking for parts. I can sew, but I’m not always good at envisioning the patterns, this will be wonderful for us!
You’re welcome! I couldn’t believe the cost of these bags either when I was looking at them. I hope it turns out well for you. Let me know if you need any help!
Hi. I just finished the bag for my 4.5 year old son – I used a Ninja inspired fabric that he loves. Thanks for the tutorial – was so easy to follow and it turned out great. Cant wait to see his happy face after pre-school today.
Oh I bet that turned out so cute! Thanks for coming back and commenting 🙂
This is by far the best tutorial I have seen on these play mats/sacks. Your cinching tube method makes the most sense and the ends are safe. These can also be made smaller for jewelry or makeup bags. The possibilities are endless! Thank you for posting and please keep creating and putting your own unique twists on what you might see out there. I have no hesitations on making one of these now.
Thank you so much for your comments. It means so much to me! I’m hoping to start doing more projects with my own twists on them, because I feel like I’m always finding things that just need a few tweaks. If you make one, be sure to let me know how it turns out!
Made a square one of these 40 years ago for my boys. I put roads ,stores ,houses etc on play side so they could use it as a play mat. Named the stores and streets after my boys. Still have it.
I love that! Thanks for sharing! I definitely think it’s a timeless project that will last for decades!
Thanks for the tutorial!!! I just finished mine.
🙂 Love your blog!!!
THank you!! You’re so sweet. I’m glad you made it! Hope you enjoy it 🙂
most cotton fabrics are 45″——how many yards do I need for each piece? 2 yards???
thanks
That would probably work
I made this, in one afternoon, with all materials from the attic – old bedsheats and some unused rope.
As it’s one of my early projects in learning how to sew, it’s not perfect, but usable :).
I made it a bit larger (60cm halfdiameter) and it’s a bit hard to tie. I think I will make it smaller with wider rope strip for easier tying.
My kids love it so far.
Thanks for great idea and tutorial.
P.S. How do I post a pic?
Thanks for stopping by! I’m so glad it worked out for you. I’d love to see a picture – if you go to facebook.com/clarkscondensed you can post a picture on my wall 🙂 I will add the ones that people share to the bottom of the post!
I was wondering about the paracord. the link you gave is the 5/32 inch paracord on Amazon. Joann’s doesn’t seem to carry that small width. Did you have trouble cinching the bag with a thicker paracord? thanks a bunch! Great project!
I’m french and i find your pattern of swoop bag on Pinterest. I did it for my cousin who will have a baby girl in some weeks. Thank you.
Let me know how it turns out! It’s perfect for a baby gift 🙂
Thanks for posting to Pintrest! I have the fabric, now just need to find the time to make one for my nephews for Christmas!
You’re welcome!! Let me know how it turns out!
I love this idea
Love love love this! I can’t wait to make one! This is such a great idea for traveling or the beach or really anywhere 🙂
Thank you Anita! We have loved having it. I love the idea of taking it to the beach!
what a great tutorial thank you so much!
Thank you! I hope you have success making it!
I definitely want to make one of these! Time to go shopping for some cute fabric!
That’s the best part! I want to see a picture of yours when you are done! 🙂
Where did you find the rope?
Hi Becky!
I found the rope at Joann’s in the aisle that has a bunch of ribbon, lace, etc. that you can cut by the yard. They had tons of different colors!
i’ve made this, but the cord doesn’t slide smoothly. It also does not open back up smoothly. Help! Any suggestions? It’s the greatest idea, but if it’s a struggle to use, that’s no fun.