DIY Pumpkin Soap Dispenser
DIY Pumpkin Soap Dispenser – A wonderful pumpkin craft idea!
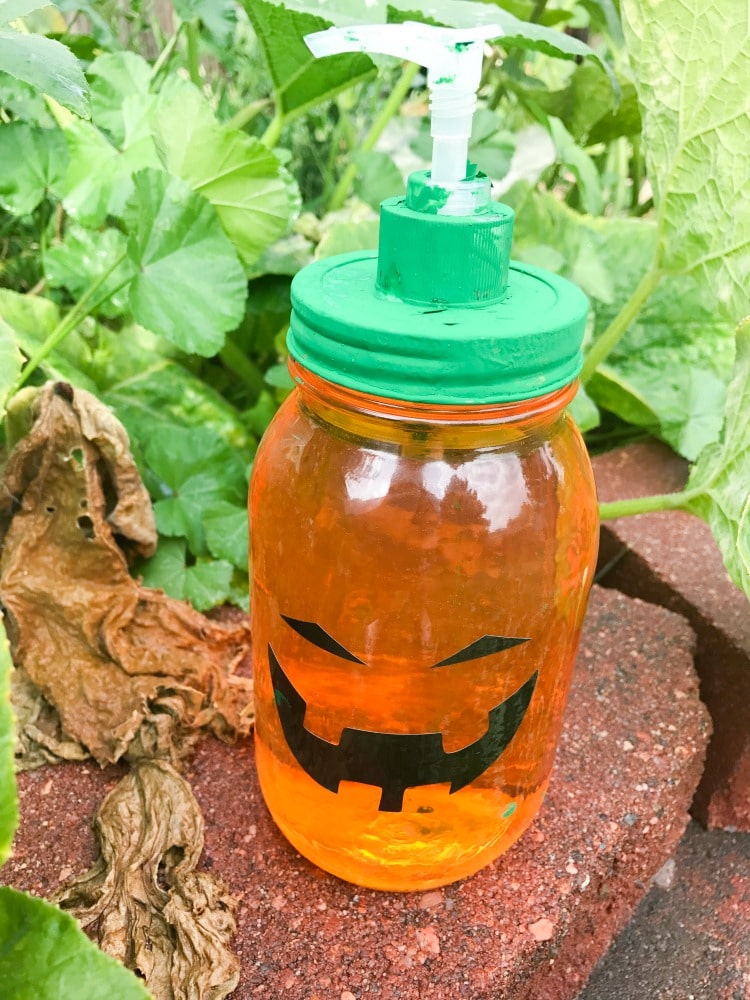
If you’ve been reading Clarks Condensed for long, you know that I love sharing simple ideas – recipes, tips, and crafts.
You may also know that I love using my Cricut machine (most recently, my new Cricut Maker), and I really believe these machines make crafting so much easier – especially for people like me who aren’t necessarily the most creative people around.
I was excited when I signed up for Craft Lightning – Cricut Halloween edition. Every craft that is submitted has to be made in 15 minutes or less (excluding drying time).
Perfect!
As soon as I heard about this round up, I knew exactly what I wanted to make a – a Pumpkin Soap Dispenser. I had seen something similar at Jo-Ann’s, and since I had most of the materials at home, I figured it was the perfect craft.
This is seriously the easiest craft – it’s perfect for the beginning crafter or just someone who wants an easy decoration or gift idea.
I used Cricut Adhesive Foil in Stainless Black for the face – I just love the look of adhesive foil. I thought about using vinyl, but when I stumbled across the black foil I had in my stash…I knew it was perfect for this.
Beyond the foil, the materials are fairly simple. I purchased a mason jar that was on clearance at Jo-Ann’s Fabric, the orange liquid dish soap at the Dollar Tree (can’t beat a dollar!) , and a mason jar soap dispenser. I painted the parts for the dispenser green, which I thought was a fun touch.
This project would be really fun for a girls night or church activity. It’s simple enough anyone can enjoy making it!
I do have to apologize that I don’t have tons of pictures – I did this project live, so I couldn’t take too many pictures…and I only had ordered one soap dispenser!
DIY Pumpkin Gift
Materials
Orange Liquid Dish Soap (I got mine at the Dollar Tree) I had a large mason jar, and 32 ounces was perfect.
Cricut Adhesive Foil (Vinyl works as well)
Instructions
1) Paint your mason jar soap dispenser green. Let dry completely.
2) While drying, you can make the pumpkin face in Cricut Design Space. I used the pumpkin image #M2E37B, which is included with Cricut Access.
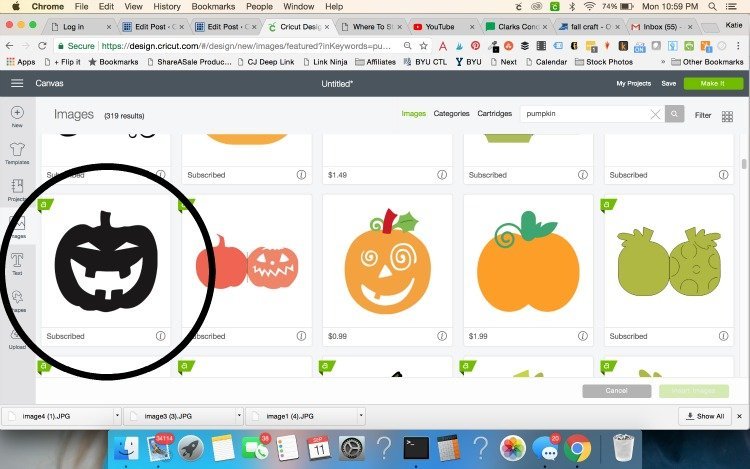
3) Use the contour tool to invert the image so you cut the eyes and mouth instead of the outside of the pumpkin. The contour tool is in the bottom right hand corner of Design Space. Here is a video showing how to use it (I’m even using this exact image!) Resize the image to be about 2.5-3 inches wide (base this off of the size of mason jar you are using)

4) Get out your adhesive foil or vinyl and place it on your cutting mat. Send your image to cut.
5) Weed out the excess material.
6) Apply to your mason jar.
7) Pour orange soap into the container
8) Screw the mason jar soap dispenser on top
Other Fall Craft Ideas




I love any craft with a mason jar! So cute!