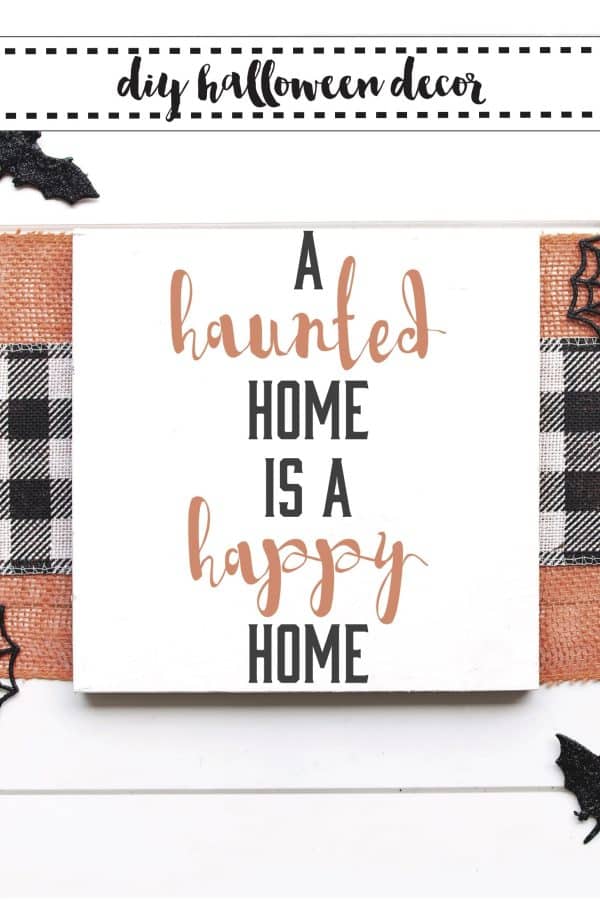
DIY Halloween Sign – FREE SVG File
It’s nearly the end of September, so I can start decorating for Halloween now without getting the side-eye from my friends and family.
I truly love to make a lot of my holiday decorations, and this DIY Halloween sign is no exception. Halloween decorations are super easy to make with just a few tools and a few minutes of time.
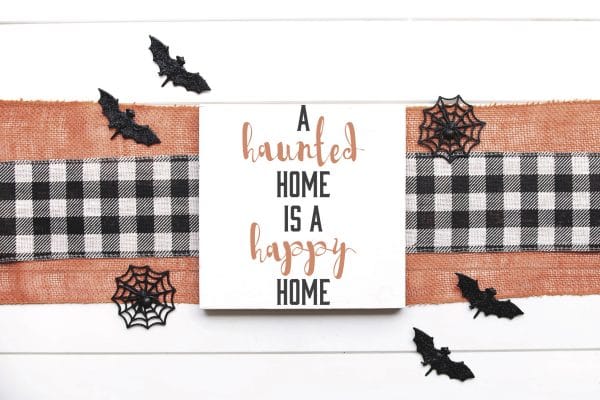
Make your own Halloween Decorations
This SVG is perfect for small or large Halloween signs! And, with my trick, anyone can make a professional sign.
You can download the SVG below
[purchase_link id=”94088″ text=”Purchase” style=”button” color=”blue”]
Halloween Sign Supplies
To make either of these Halloween projects, you will need a few minutes to work and a couple of supplies! (And if you are like me, you probably have all the supplies you need at home already)
DIY Sign Supply List
SVG File [purchase_link id=”94088″ text=”Purchase” style=”button” color=”blue”]
Cricut (Cricut.com / Amazon)
EasyPress 2 (Cricut.com / Amazon)
Iron-On (Cricut.com / Amazon)
Iron-On Protective Sheet (Cricut.com)
Paint and Paint Brush
Step 1
Lightly paint the wood blank and allow to dry.
Step 2
Download the SVG.
Step 3
Upload the SVG to Cricut Design Space and size it to fit your wood blank.
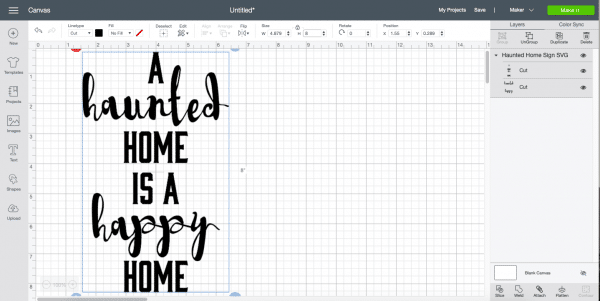
Step 4
Once your cut file is sized to fit your sign, send it to cut. Don’t forget to mirror your cut and place the Iron On on the mat shiny side down.
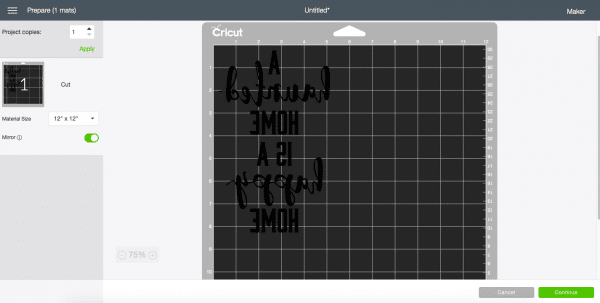
Step 5
After your Iron On is cut, weed the excess vinyl.
Step 6
Pre-heat your EasyPress 2. I set mine to 325 for wood. Place the Iron On onto the painted wood blank, and cover with the Iron On Protective Sheet.
Step 7
Press the Iron On onto the wood sign for 20-40 seconds, depending on the wood type and thickness. Then, remove the Iron On carrier sheet.

Step 8
Enjoy your awesome new Halloween decoration, or give it to a friend!
