Awhile back, I saw a picture of a little baby in a graduation cap and gown at her dad’s graduation ceremony. I thought this was the cutest thing ever, and was determined to make Jack one! Unfortunately, this picture didn’t really include instructions, so I set off on a search to find some instructions!
Well, I technically found some instructions, but they ended up being super confusing…so I just kind of winged it. In the end, I was able to put together this simple gown that we put Jack in on graduation. I ended up making it a tad bit too small (as you can tell,) so I adjusted the instructions so that hopefully won’t happen to you! I bought this fabric at Joanns, but if I were to do it again, I would have bought some that was slightly thicker, like an actual graduation gown. Overall, though, it turned out nice and served it’s purpose well. So if you are wanting to make a gown for your baby or toddler at graduation, hopefully these instructions will help. In all honesty, you could probably use this tutorial to make one for an adult too..but I recommend just buying or borrowing a gown if you are graduating 😉
I have listed two different ways to make the gown — once you just slip over the top of the child’s head, and the other you need to attach a zipper. In all honesty, if you can do the one with the zipper, that is probably the best. I just ran out of time! But either way will yield a cute little gown. I made this under $10.
And when I was finishing up the gown, I kind of forgot to take pictures. So at that point, you’ll see some awesome pictures I drew in Paint because I feel like the tutorial can be confusing without them. If you find yourself confused at any point, please feel free to reach out to me at clarkscondensed@gmail.com. I’d be happy to talk you through any of the steps!
Or if you don’t feel like making one and have money to spare, these baby graduation outfits are SO cute. They were a little out of my price range though.
Materials Needed:
2 yards fabric (in desired color)
matching thread
Zipper (optional)
matching, fabric covered button
Tassel
Cereal box
1/4-1/2 in thick elastic
Hot glue gun
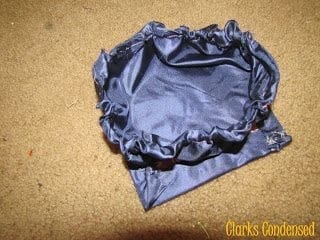
Graduation Cap Instruction
1. Take an empty cereal box and cut out the back panel.
2. Draw a square that is the desired size (slightly larger than the top of the head) and cut it out
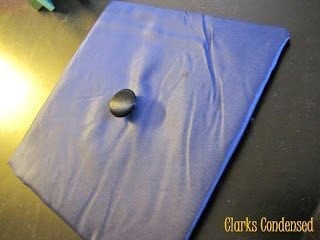
3. Cover the top and sides of square with fabric, securing with hot glue
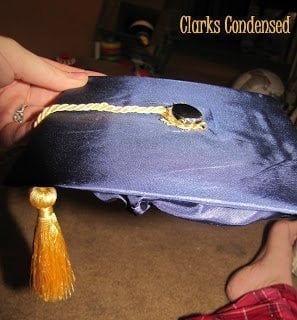
4. Sew button to the middle of the fabric covered square
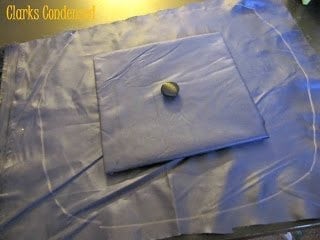
5. Place square on top of fabric and draw a circle, about two inches wider than the square. Cut out circle.
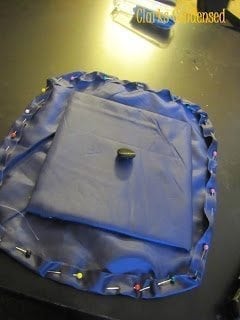
6. Fold edges of fabric in about 3/4 inch and pin. Sew in place, leaving a space open at the beginning and end that you can thread elastic through.
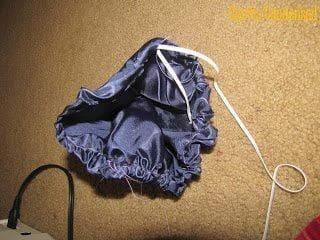
7. Thread elastic through the casing and then sew hole shut.
8. Sew another piece of elastic on to this piece of fabric, from one edge to another, to help keep hat on baby or toddlers head
8. Glue elastic cap to the bottom of the square.
9. Attach tassel to the top of the cap, around the button
Graduation Gown Instructions 1. Make the following measurements – the widest part of your shoulders, length from shoulder to ankles, and length from shoulder to wrist.
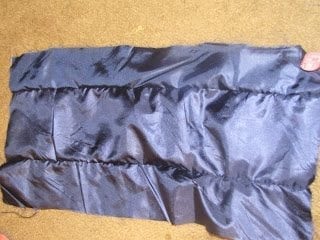
2. Cut out a rectangle that is the width of the shoulders, plus four inches, and the length from the shoulder to the ankle, plus one inch. Then, cut this rectangle into three smaller rectangles, of equal size.
3. Sew rectangles back together
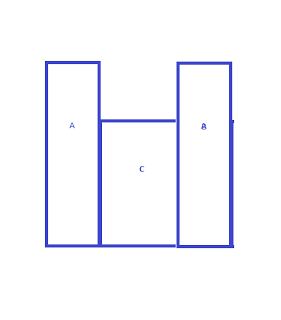
4. Cut two identical rectangles (we’ll call these rectangles A and B) that are 1/4 the width of the shoulders, plus 2 inches and the length of the shoulder to the ankle. Then, cut out one additional rectangle that is half width of the shoulders (this will be rectangle C), and 3/4 the length of shoulder to the ankle. see bottom of these instructions if you are using a zipper.
5. Lay rectangles A, B, and C on the ground and pin them together. Make sure the bottom of each rectangle line up together. Sew together
6. Right sides together, sew the front panel and the back panel together up the sides and at the top, leaving about 10″ open on each side (This will be for the sleeves.)
7. Cut out two identical rectangles that are the length from the shoulder to the wrist (plus 1-inch,) and the width about 21 inches.
8. Fold in half width wise, and, with right sides together, sew together.
9. Sew sleeves to the gown, and flip the gown right side out.
8. Hem the bottom of the gown, the sleeves, and the neckline. Iron fabric to remove wrinkles.
Zipper Instructions:
Instead of cutting the three rectangles from step 4, cut two rectangles that are the width of the shoulders (plus two inches) and the length from the shoulder to the ankle (plus one inch). Sew these to the back panel of rectangles, still leaving the 10″ space at the top on each side for the sleeves. At the top of the rectangle, cut the corner off of each rectangles inner edge. I know that probably makes no sense, so here is a picture:
Sew the zipper into the gown along the inner edge. Continue with step 6 from here.
Katie is a Colorado-native, BYU graduated, and most importantly, wife to one and mother to three beautiful boys. She is passionate about sharing her experiences with others - especially about pregnancy, breastfeeding, cooking, and crafts. She is an International Board Certified Lactation Consultant. She loves spending time with her family and helping others find joy in family life.


Thanks for linking this up at the Wonderland Hop! Too cute:)!
This is totally adorable. You did a great job making it despite the confusing directions!