
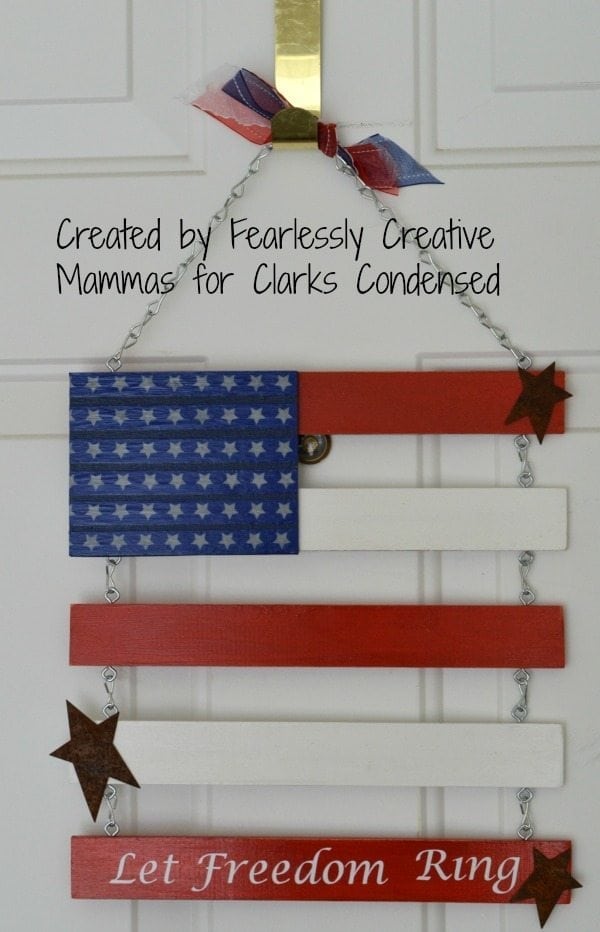
Independence Day Door Flag
Hello! I am Kathleen and I blog at Fearlessly Creative Mammas with my oldest daughter, Samantha. We blog about all things creative, at least to us, and we have a lot of fun doing it! I am so excited to be a contributor of my first post here at Clarks Condensed and would love to thank Katie for including me in this awesome blog! I hope you will come by and visit us sometime.
Today’s post is something I actually dreamed. I know, it sounds very weird. However, I’m older than your average bear and my mind can only take in so much at a time. Some of my favorite posts have been things I thought up in my sleep. True story, sometimes you can find me sketching away in the middle of the night because I have thought of something and don’t want to forget it. I’ve come up with some pretty good recipes that way too.
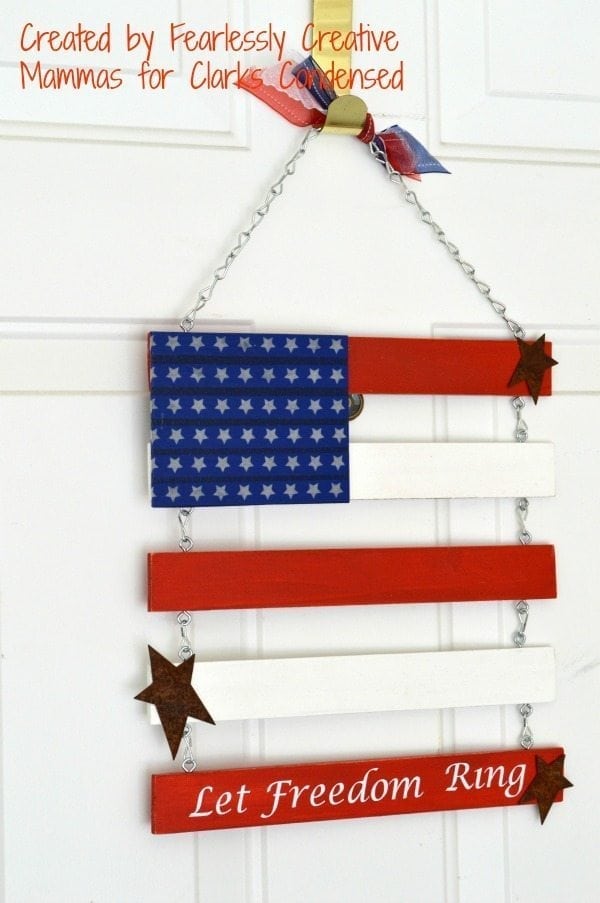
I always have something on my front door to greet our guests and ourselves. My kids give me a very hard time about it, but I think if they came over and there wasn’t anything there, they would miss it. So, when I dreamed this Independence Day Door Flag, I thought it would be a great thing to share here for my first contributor post. I hope you really love it! It will be pretty photo heavy because I want to make sure you can see what I am saying as I’m telling you what to do.
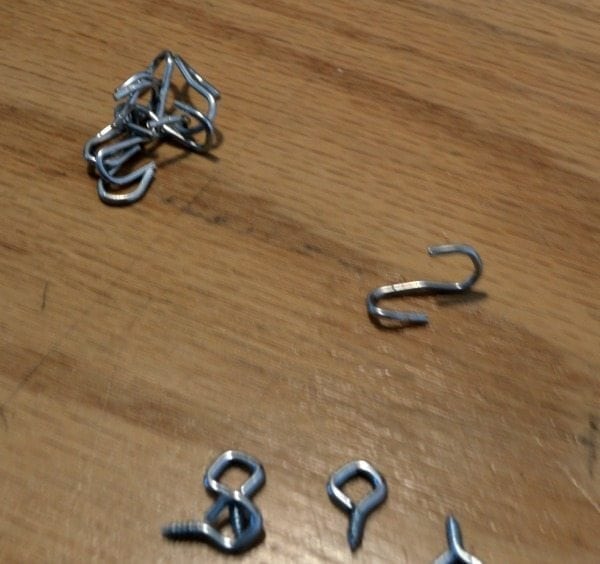
For this project you will need five 1 1/2″ x 12″ boards. I got mine at Home Depot and they are actually 24″ when you buy them, so you only have to buy 3 for this project. You also need a 4 1/2″ x 5 1/2″ piece of very thin and light weight wood. About 1 foot of chain that is small enough that you can bend the links, 18 small eye bolts, washi tape with stars, red, white and blue paint, a drill with a bit the same size as your eye bolt end, pliers, sandpaper or a sander.
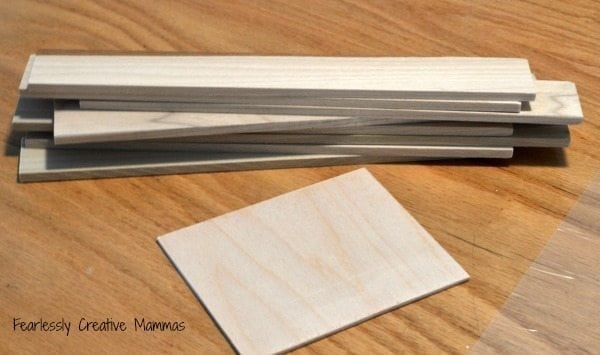
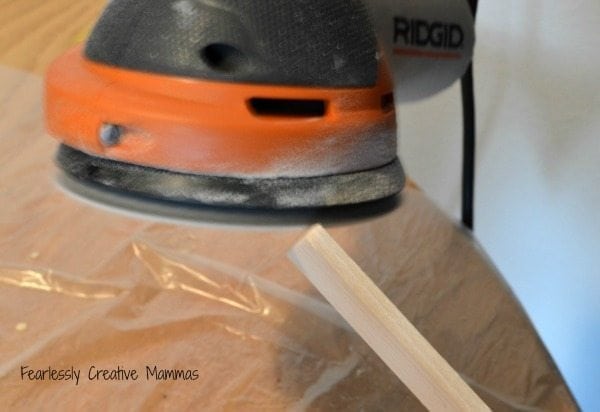
First, cut your boards to the correct length of 12 inches. Then sand the ends so they are smooth. If you use a sander and are sanding indoors, I HIGHLY recommend a sander with a bag to catch the dust. I learned that the hard way. What a mess.
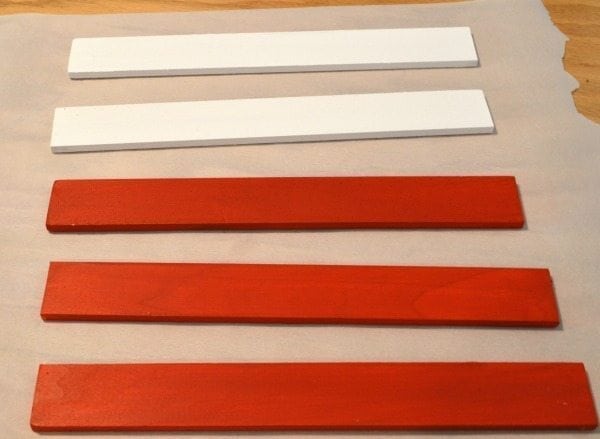
Next, paint 2 long boards white and 3 red. No, it isn’t the same as the actual American flag, but it’s going on the door, so we have to compromise. The main thing here is to show your American Spirit. Paint you small piece of wood blue. I painted each one with two coats of paint.
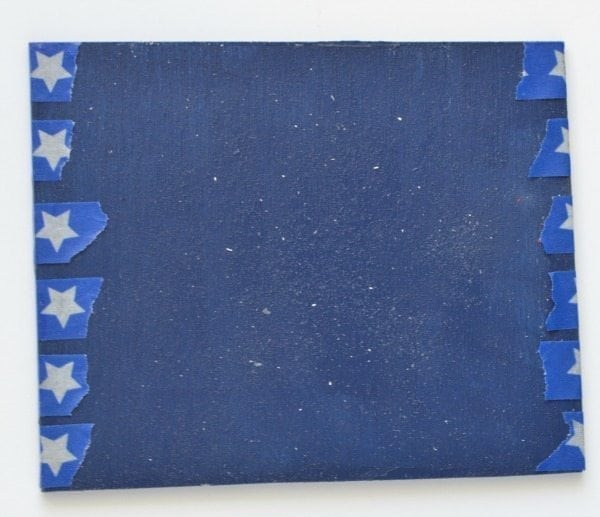
After the paint was dry, I put some blue star Washi tape on the blue piece of wood. I started having the tape touch and decide that would be too many stars, so I put some room between the pieces of tape and then wound it just over the sides.
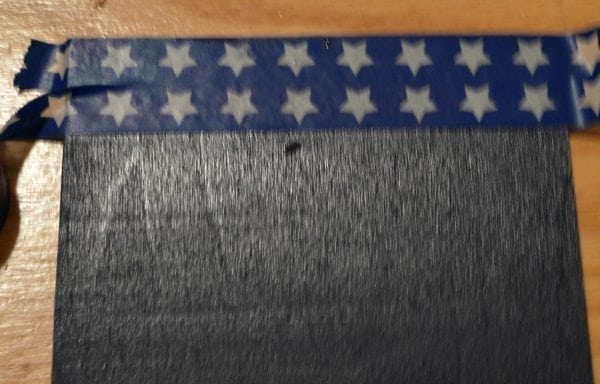
I wanted to make sure the tape would stay stuck, so I used some Mod Podge to paint over all of the tape, front and back. I had to brush all of the dust off of the back first though. Be sure you do that.
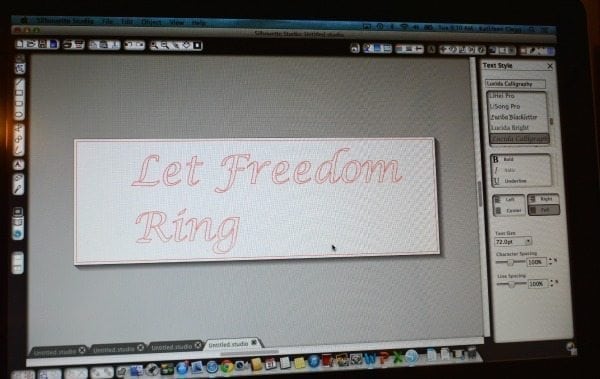
I wanted to add some words to the flag and chose ‘Let Freedom Ring’. I designed it on my Silhouette, but you can have a lot of different places make it for you if you don’t have a Silhouette. I chose Lucinda Calligraphy for my font, 72 pt and the size was 9 x 3 because I was using smaller vinyl and had to double the rows. I also used white vinyl.
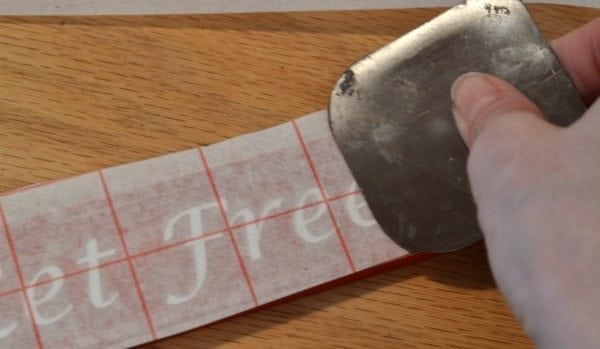
In case you’re buying your vinyl and haven’t used it before, I will tell you how to put it on your board. This is what it looks like when you get it. First you turn it so the side you are currently looking at is facing down. Then you take something like a pan scraper and rub the back of the vinyl paper. Next, you pull the back piece of paper off of the the front, so your vinyl is on the sticky side.

Then you position your vinyl on your board and rub it firmly so the vinyl sticks to the board. Carefully and slowly pull the paper off of the board. If it looks like the vinyl is sticking to the paper instead of the board, put the sticky paper back down and rub some more. I put my vinyl on the bottom board, which will be red.
Next, take 8 links off of the chain and open both ends, as the picture below shows. I used the pliers on a Leatherman, but you can use regular pliers.
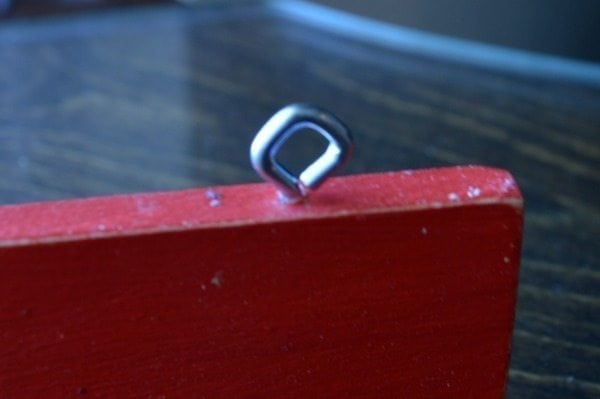
On each board, measure in one inch from each end. You will be drilling a hole on both sides and ends of each board, except the bottom board. That board, which is the one with the words, will only have holes on the top. You don’t have to go too deep. You are just helping to start the eye bolt.
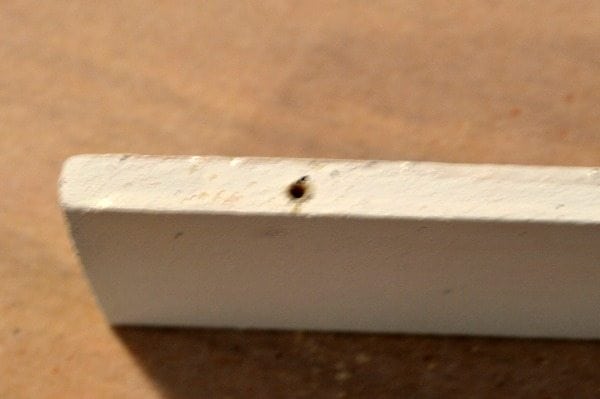
For each hole that you drilled, insert one eye blot and screw it all the way down. For the very end, you might have to use pliers.
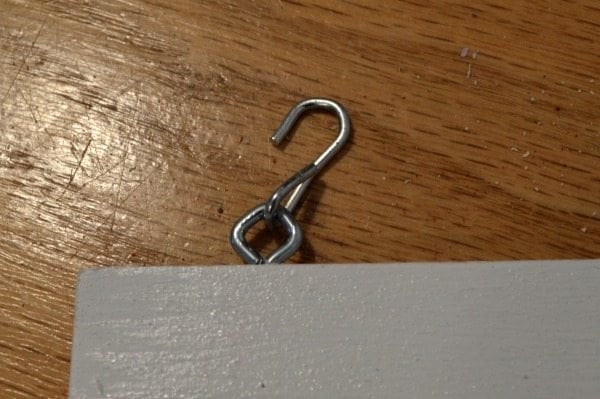
Now you take one link from the chain and link it between two bolts. Make sure you are lining up your boards red-white-red-white-red. Again, the words should be on the bottom board. Then take the remainder of the chain and connect it to the top two bolts for a hanger.
When you have the boards all chained together, glue your small board with the stars in the upper left hand corner, like a regular flag. I also added a few stars I had left over from the God Bless America sign I made and some ribbon to the chain. Then I hung it on my front door. What do you think?
I hope you enjoyed this tutorial. Stop over and see up for some other Independence Day crafts.

would look really cute to put a “bell” on the last stripe. heheh
That would be really cute! Great idea!
Great instructions. This is not hard at all! Maybe I could get the hubby to do it 🙂
I don’t think it looks hard at all either! Such a fun decoration. I hope your husband will make it for you!