
How to Layer Heat Transfer Vinyl
One of my favorite techniques with iron-on vinyl is layering. Here are two different ways to layer HTV vinyl with ease!
Layering Iron on Vinyl
Once you get comfortable with iron on vinyl, it can be fun to branch out and experiment a little bit.
Layering iron-on vinyl can be a great way to do that – and it’s really not complicated at all.
There will come a point where you want to have multiple colors of vinyl in an iron-on project. When this first happened to me, I was so worried about how to do it!
I wasn’t sure if I would have to do a bunch of slicing and then put each piece together on the material like a puzzle…which sounded way too complicated!
Fortunately, I realized that you can layer the vinyl right on top of each other without slicing – it shouldn’t hurt the vinyl at all.
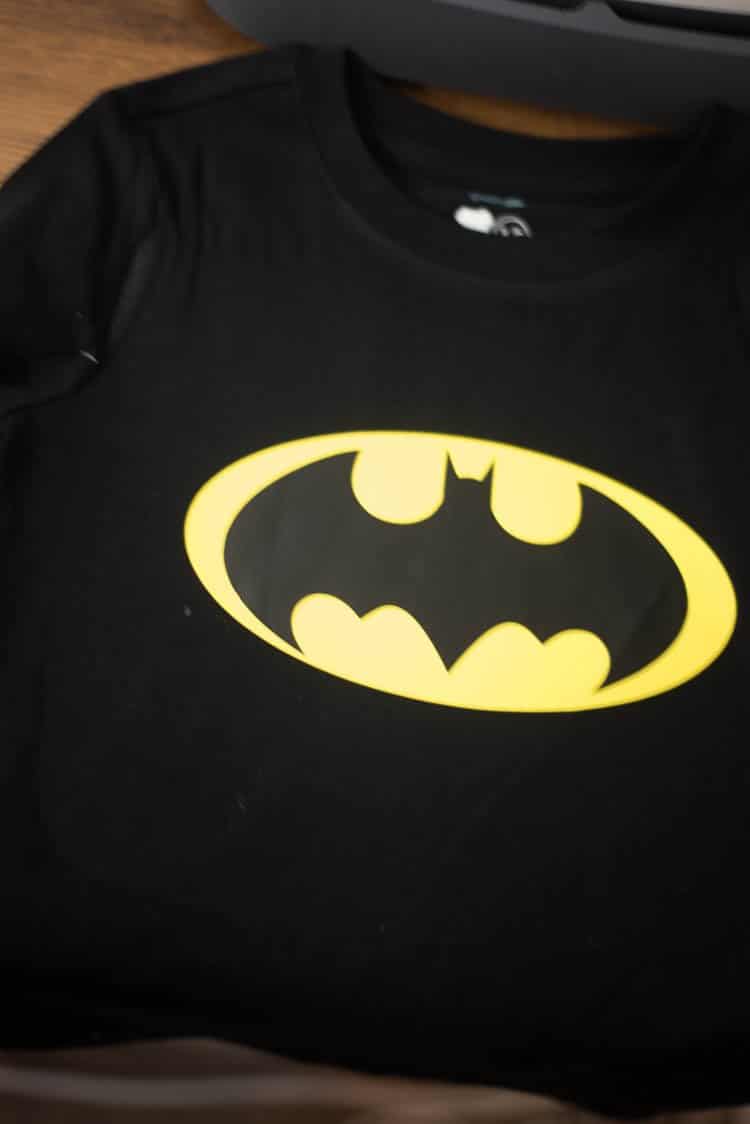
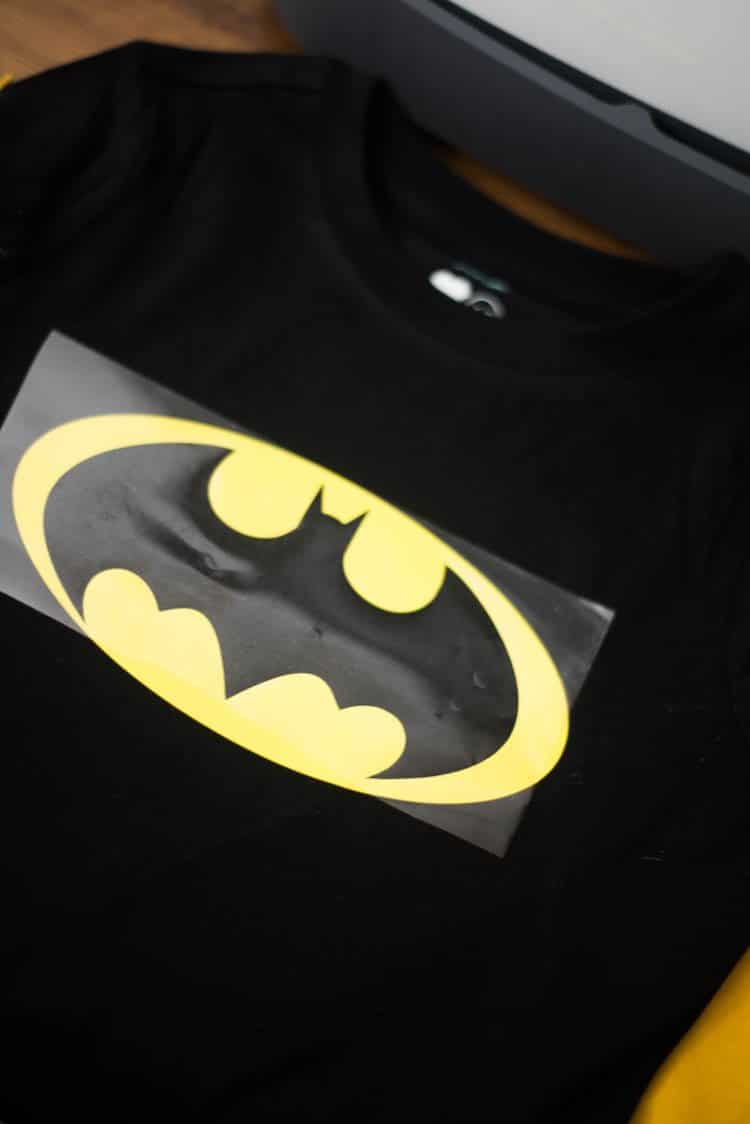
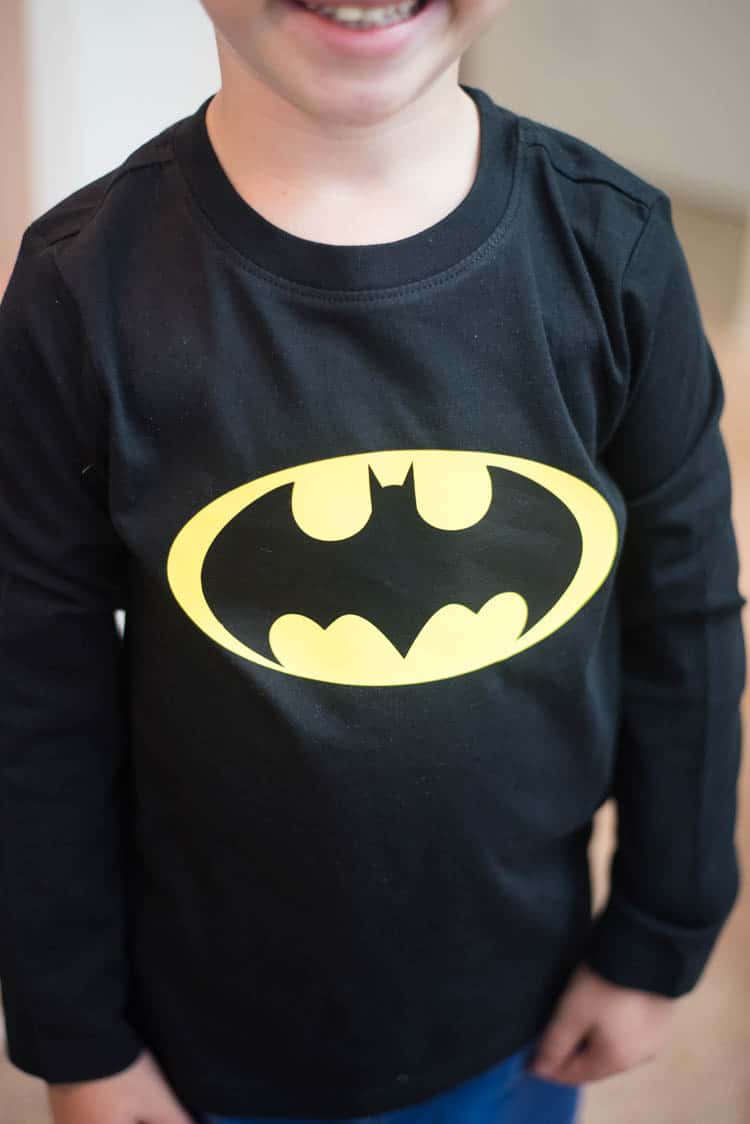
I recently did my son’s batman costume for Halloween (this whole tutorial is coming soon!), and I used this technique for the bat symbol. It went off without a hitch!
I will say that I think using a heat press makes it a lot easier than using an iron. I personally LOVE the Cricut EasyPress – we’ve been using it a ton since we got it a few weeks ago, and it just makes iron on projects so much easier. The finished product looks much better than when I used my iron.
In this post, you will learn all about how to layer iron-on vinyl – here is a table of contents so you can navigate to the section you are most interested in.
Table of contents
originally written in 2017; updated in 2020
HTV Layering Video
For those who are more visual learners, here is a video:

Layer Multicolor Heat Transfer vinyl
Materials:
- Iron-on/Heat Transfer Vinyl – click here for more information on how to use iron-on vinyl
- Iron or Heat Press (such as the EasyPress)
- Material to put vinyl on (I have been LOVING Primary.com for solids for kids. They have everything!).
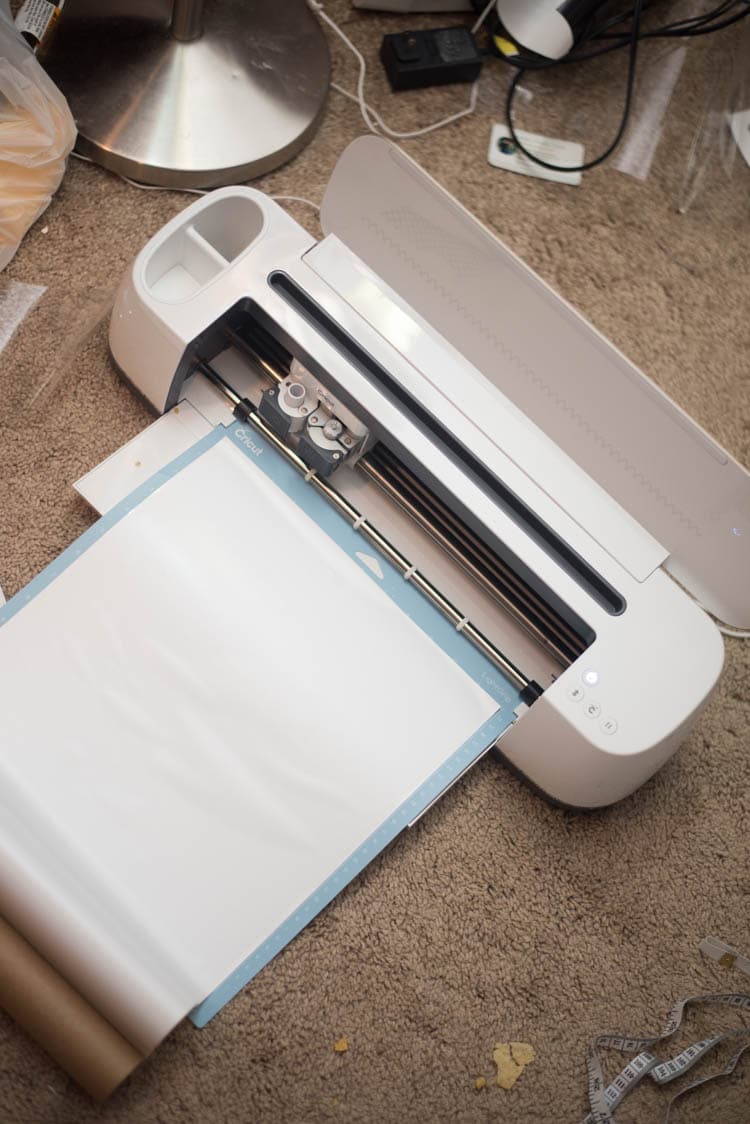
- Cricut Design Space (this is what I’m using – however, you can use this same technique with other cutting machines)
Instructions:
In Design Space, make your design! For this particular project, I was making Batman’s symbol for my son’s costume.
I uploaded my own Batman symbol (learn how to upload images to Cricut Design Space here), and then I used a free oval symbol (image #M4178D) for the background.
I change the colors to be the colors of vinyl I would be using to better visualize what I was doing.
This also makes it so when you go to cut them, they will be sorted by color to the coordinating mats.
For instance, if you have three elements that have the same color and three that have different, the three that have the same colors will be automatically sent to the same cutting mat (assuming there is enough space).
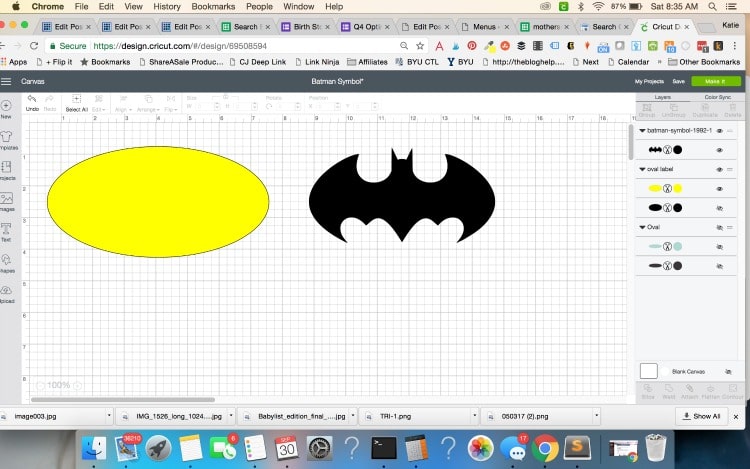
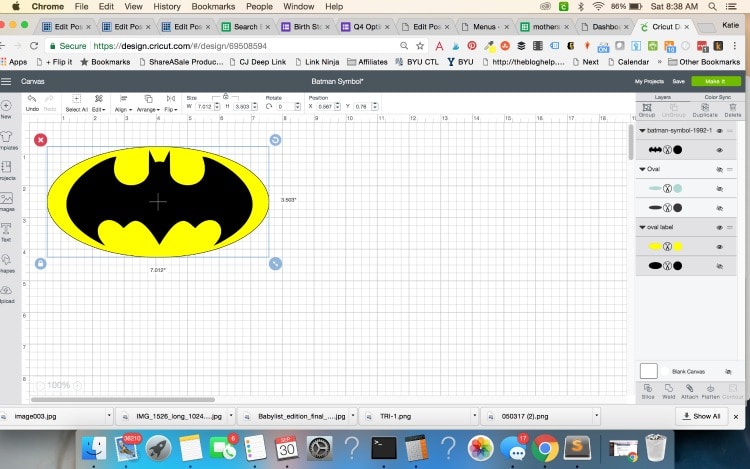
After I had both images in there, I layered them how they would look on the shirt and cape I was making.

I then pressed “Group” so I can resize them correctly, but they remain separate objects.
Then, you press make it. You can then see each item on the mat it will be cut to. I love how it changes the mat color to the color of vinyl you should be using – it certainly leaves little room for error, which can be helpful when you are cutting multiple colors.
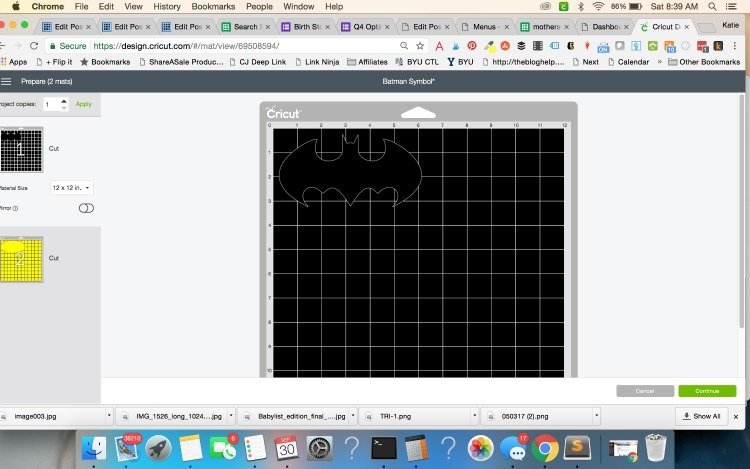
Make sure you press “mirror” under EVERY mat.
Press continue – select the type of material you will be using.
Make sure you put the iron on material shiny/colored side down.
And send the material to cut!
After the material has been cut, weed out the excess. Layer them before putting them on your material so you can make sure it all fits together!
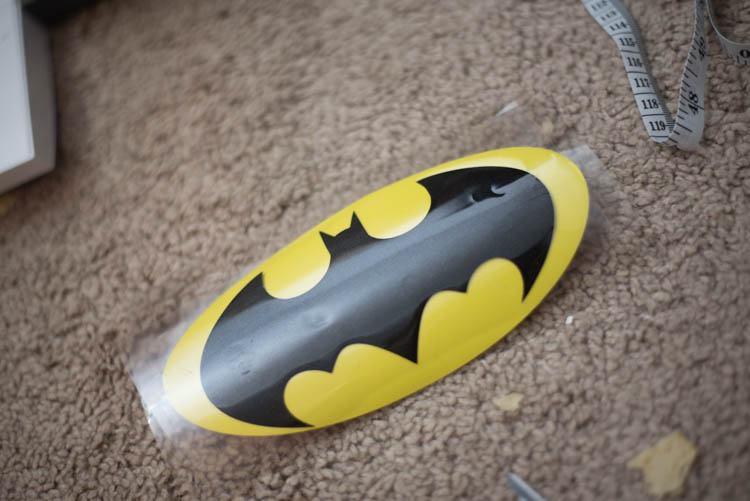
Now it’s time to layer! Put the vinyl onto the item you are adhering it to – starting with the bottom layer. For instance, with this project, I put the yellow circle down first , since the Batman symbol would be on top of that.

Using your iron or heat press, press the material into place (with a little bit less time than you normally would). Remove the iron or heat press, let the plastic backing cool until it’s warm, and then test a small corner to ensure it has stayed in place. It may not be completely set, but as you do more layers, it will go more into place.
Then, put your next piece of material on and repeat. Keep doing this process until everything is in place.
Voila! That’s how to layer heat transfer vinyl!
Knockout Method
Another way to layer heat transfer vinyl is with the knockout method.
For this method, you will be using the slice tool in Design Space and then piecing together the cutout pieces of vinyl like a puzzle.
Here’s an example. In the image below, I have a heart and the word “blessed”. I have put “blessed” on top of the heart and selected all using command+a or the select all button in the toolbar.
After that, I go down to select slice, and I slice out the letters “blessed”
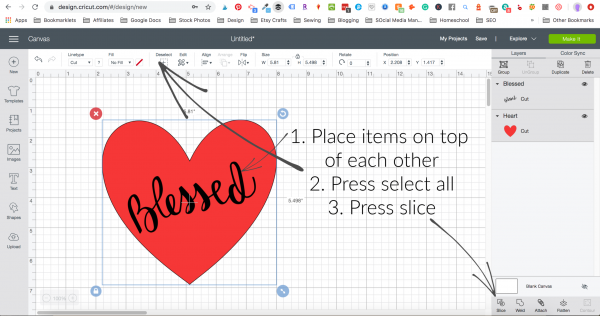
I pull the word away (twice – there will be two layers of letters) and delete the one I don’t need.

Once you’ve done this with all your elements, you will cut them as normal. When it comes time to do your iron-on project, you will simply place them on your blank and fit them together like a puzzle.
Use the same principals as I mention above when ironing on the vinyl. In the example above, if I did a glitter iron-on for the heart and black everyday iron-on for the blessed, I would do the glitter iron on first, then place the black everyday iron-on in the open spots afterward.
This technique allows you to use glitter iron-on as the “bottom” layer.
Tips
- Stick primarily to Iron-on lite for the bottom layer
- Sportflex iron-on can be used as a top or bottom layer – but when using this material, it’s typically best JUST to use SportFlex
- Unless you are using the knockout/slice method, you should use these types primarily as a top layer.
- Glitter Iron-on
- Foil Iron-on
- Holographic Iron-on
- Patterned Iron-on
- Try not to use too many variations in iron on. I would suggest a maxium of three different kinds. Again, the knockout method can make it a little easier.
- Place all of your elements on your blank first to make sure you know exactly where you want the placement and how they will fit together. This is especially important when you are piecing together iron-on with the knock out method.
No matter what you do, layering is a fun technique that helps you to create custom and beautiful designs!
Other Iron-on Posts:
Interested in learning more about iron-on vinyl? Check out some of other posts and tutorials below:
- How to use Iron-on with a stuffed animal
- How to use Multiple Types of Iron-on
- How to use Iron-on vinyl with wood
- Vinyl Iron-on FAQ
- How to Use Iron-on Vinyl
Click here for all of our Cricut projects and tutorials.


What should I do if my 2nd layer is significantly smaller than my first? My plastic layer doesn’t cover up the iron on from the first layer. Do I just reuse the big piece I peeled off the first layer on top? I recently made a blue line flag and did the blue line 2nd. I just winged it, but didn’t know what I really should do.
Thanks for this easy, tutorial, i was uber scared!
I’m so glad it was helpful!
Vinyl is a plastic and does not adhere long term to itself. It is better to have every color adhere to the tshirt itself instead of adhering to the vinyl because the adhesive is made to be stuck to a porous material and vinyl is not porous but the cotton fibers are. There is a method called subtracting that you can learn how to do this better with. My daughter wore a shirt today with layers I did before I knew about subtracting and some of the layers are missing now. Just thought you might like to know this info.
Thanks for your thoughts! I have done subtracting, and while it is better, definitely a little more time-consuming. I have had several shirts last over a year (and counting) with layering, but it’s definitely good to be aware of other options 🙂 Thank you!
Have you ever had an issue with indents on your bottom layer from the clear backing when you layer and use the heat press? If so, is there a remedy?
save vinyl. use the shirt as part of the design. I started to do that recently. saves time layering and vinyl
Great tip!
What about bubbles?
This is awesome! My best friend’s little boys are being Batman and Robin so I’ll have to pass this on to her!