DreamBox Craft Space Setup Ideas + Coupon Code and Review
Looking for the best way to organize your Cricut or Silhouette supplies? Here are some DreamBox setup ideas for Cricut and Silhouette organization.
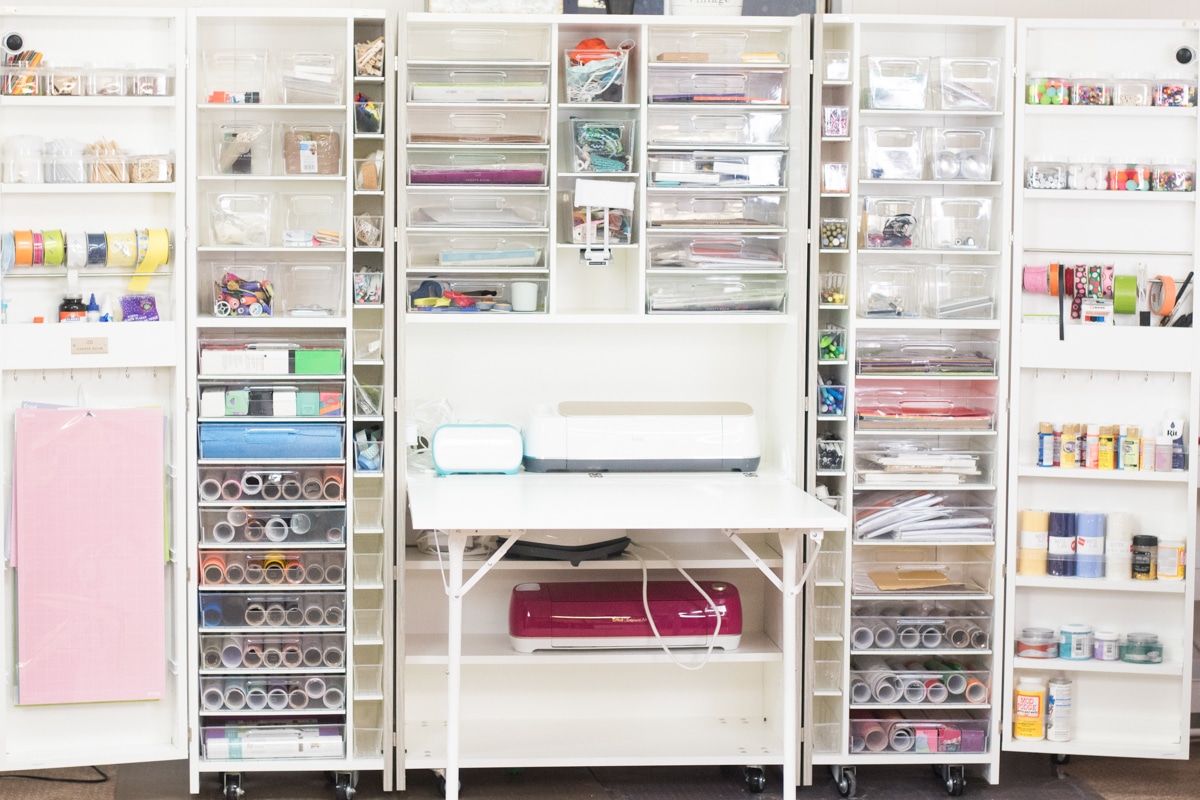
A few weeks ago, I shared my review of the DreamBox by Create Room.
I’m sure it goes without saying how much I LOVE this for my craft room – I use it on a daily basis, and it truly has transformed not only my creative process but our business as well.
However, I know it can be hard to envision how this might work for you. Clearly, it is an expensive product – and you might be asking yourself, “Could I really use this?”
The thing about the DreamBox is that are SO many ways to customize it to make it work for you. Whether you love to paint, or decorate cakes, or sew, or you homeschool…the DreamBox might be the organizational tool you were looking for.
I know it was for me!
[the_ad id=”117539″]
Create Room has encouraged people to take a blank template from their website and draw in how your DreamBox could look. You can download them here!
Today, I am going to show you how mine will look someday. Right now I have it organized, but I hope to make it look even better someday.
This is a design that would work perfectly for someone who has a Cricut or a Silhouette machine. I have thrown in a few random items that I use for general crafting, but I have really tried to design it in a way that someone who has a Cricut or Silhouette machine might appreciate.
Below is my design – you can click on it to make it bigger, or you can click here to download the PDF.
Yes, I know my handwriting and drawing skills are terrible. I might have a few too many shelves drawn in. But I hope this can give you a better idea of how it could work for you.
Remember, you can add/remove shelves, include different accessories and types of drawers, etc. The only limit is your imagination!
Don’t forget – you can get $100 off a DreamBox purchase by clicking here and using the code CLARKS100.
CLICK HERE TO SHOP THE UK SHOP – THE $100 COUPON WITH CLARKS100 IS VALID THERE AS WELL!
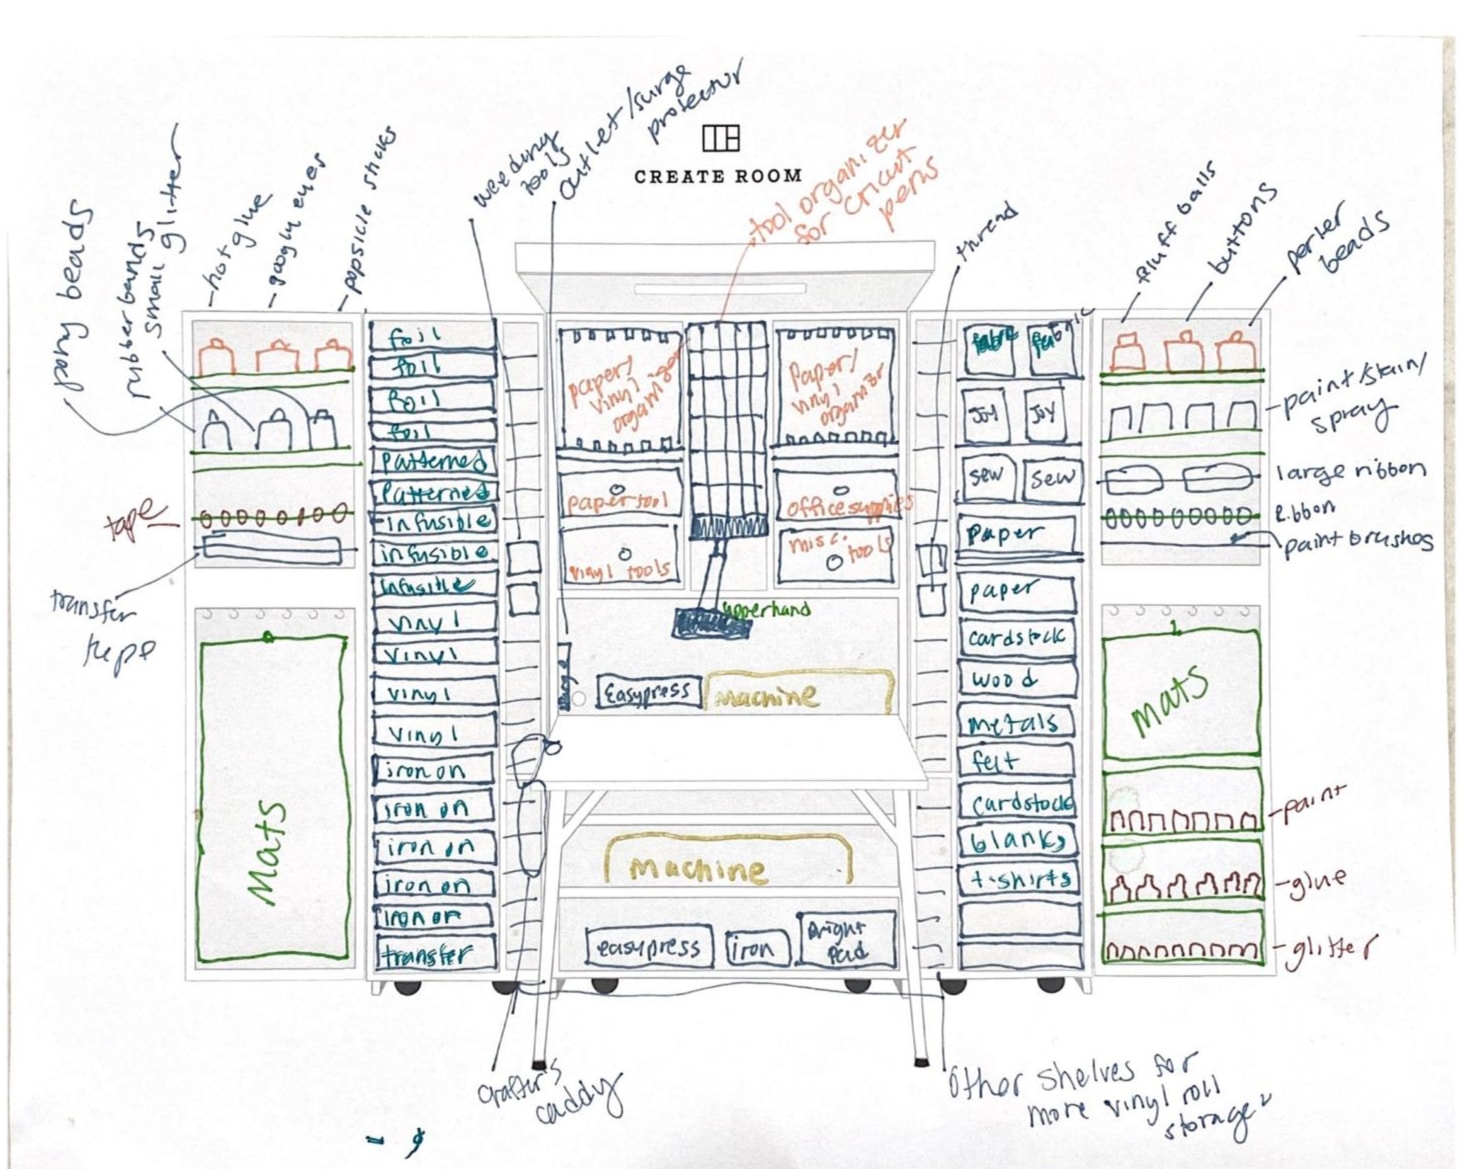
Here is a general overview:
- On the left door (the bottom half), I have removed the shelves and an installed a command hook for my 12×24″ Cricut mats. I LOVE that Forrest came up with this.
- On the right door, I thought it might be nice to put another command hook for the shorter mats. I think it would be good to keep somoe of those shelves in for paint, glue and glitter.
- The center console (so the desk area and below) are prime places to put your Cricut or Silhouette machines. I usually keep my Maker in the cubby on the same level as the table, along with a 9×9 EasyPress. Below the desk, there is plenty of space for other machines, other EasyPresses, a BrightPad, and iron, etc.
- On the desk, I definitely recommend having an outlet. I use the one that Create Room sells, which you can also get with their Power Package.
- On the side of the desk, I really want to get the Crafter’s Caddy. This comes up with a cup holder, as well as a little trash can that you attach to your desk. This would be PERFECT for putting excess from weeding.
- In the upper console, I want to rearrange it so I can put TWO paper organizers where I can put 12×12 sheets of vinyl or paper that I regularly use. I love how these look!
- I currently have the Upperhand installed right in the first cubby above the desk, and I’ve shown that in the picture above. It’s great for holding a tablet for design!
- I also want to get the Tool Cubby! I currently put my pens in the small containers to the left and right of the center console, which works just fine, but I love how this tool cubby works. It would be great for pens, weeding tools, etc.
- Underneath the two paper organizers, I would like to put some of the clear, plastic trays to hold essentials (like scissors, staplers, etc.), paper tools, Cricut tools, and miscellaneous tools.
- For the two shelves to the right and left over the center, I primarily use/plan to use 12×12 plastic trays. These fit rolls of vinyl, foil, HTV, and Infusible Ink PERFECTLY! And I have a lot of that. They are also perfect for paper, card stock, wood, blanks, sheets of vinyl, and felt!
- However, I would use some of the deeper trays that fit two per shelf for sewing materials and Cricut Joy materials.
- I love the DreamBox Jars, and I currently have those in my DreamBox. They hold hot glue sticks, popsicle sticks, pom poms, googly eyes, pony beads and more. Perfect for smaller crafting supplies!
- I LOVE the DreamBox rods, so I would not remove those. I keep ribboon and decorative tape on those, but I also think they would be perfect for holding rolls of transfer tape.
As you can see, there are SO many ways to make the DreamBox work for you. I would LOVE to see what your ideal DreamBox would be.
If you decide to buy a DreamBox, don’t forget to use the code CLARKS100 to get $100 off your total purchase!
Click here to design YOUR dream DreamBox!
(and click here for UK)

